Creating and Using Guard Policies
Contents
Background
Guard policies are used to limit what operations shall be permitted. These policies are specified in the Policy GUI or restful API and either return “PERMIT” or “DENY” on request.
There are 2 types of policies, guard policies and blacklist guard policies. The blacklist describes what is not allowed to be permitted and guard policies describe what is allowed to be permitted. The Policy PDP behaves in a PERMIT overrides fashion, that is, if any policy permits, it will override any denies.
Note
Limit Functionality: The determination to deny a request because it has exceeded the limit is based on the number of entries in the database.
Creating Guard Policies
There are two options for creating guard policies: (1) through the GUI and (2) through the restful API.
GUI Method
The GUARD policy can be created from the POLICY GUI as shown below.
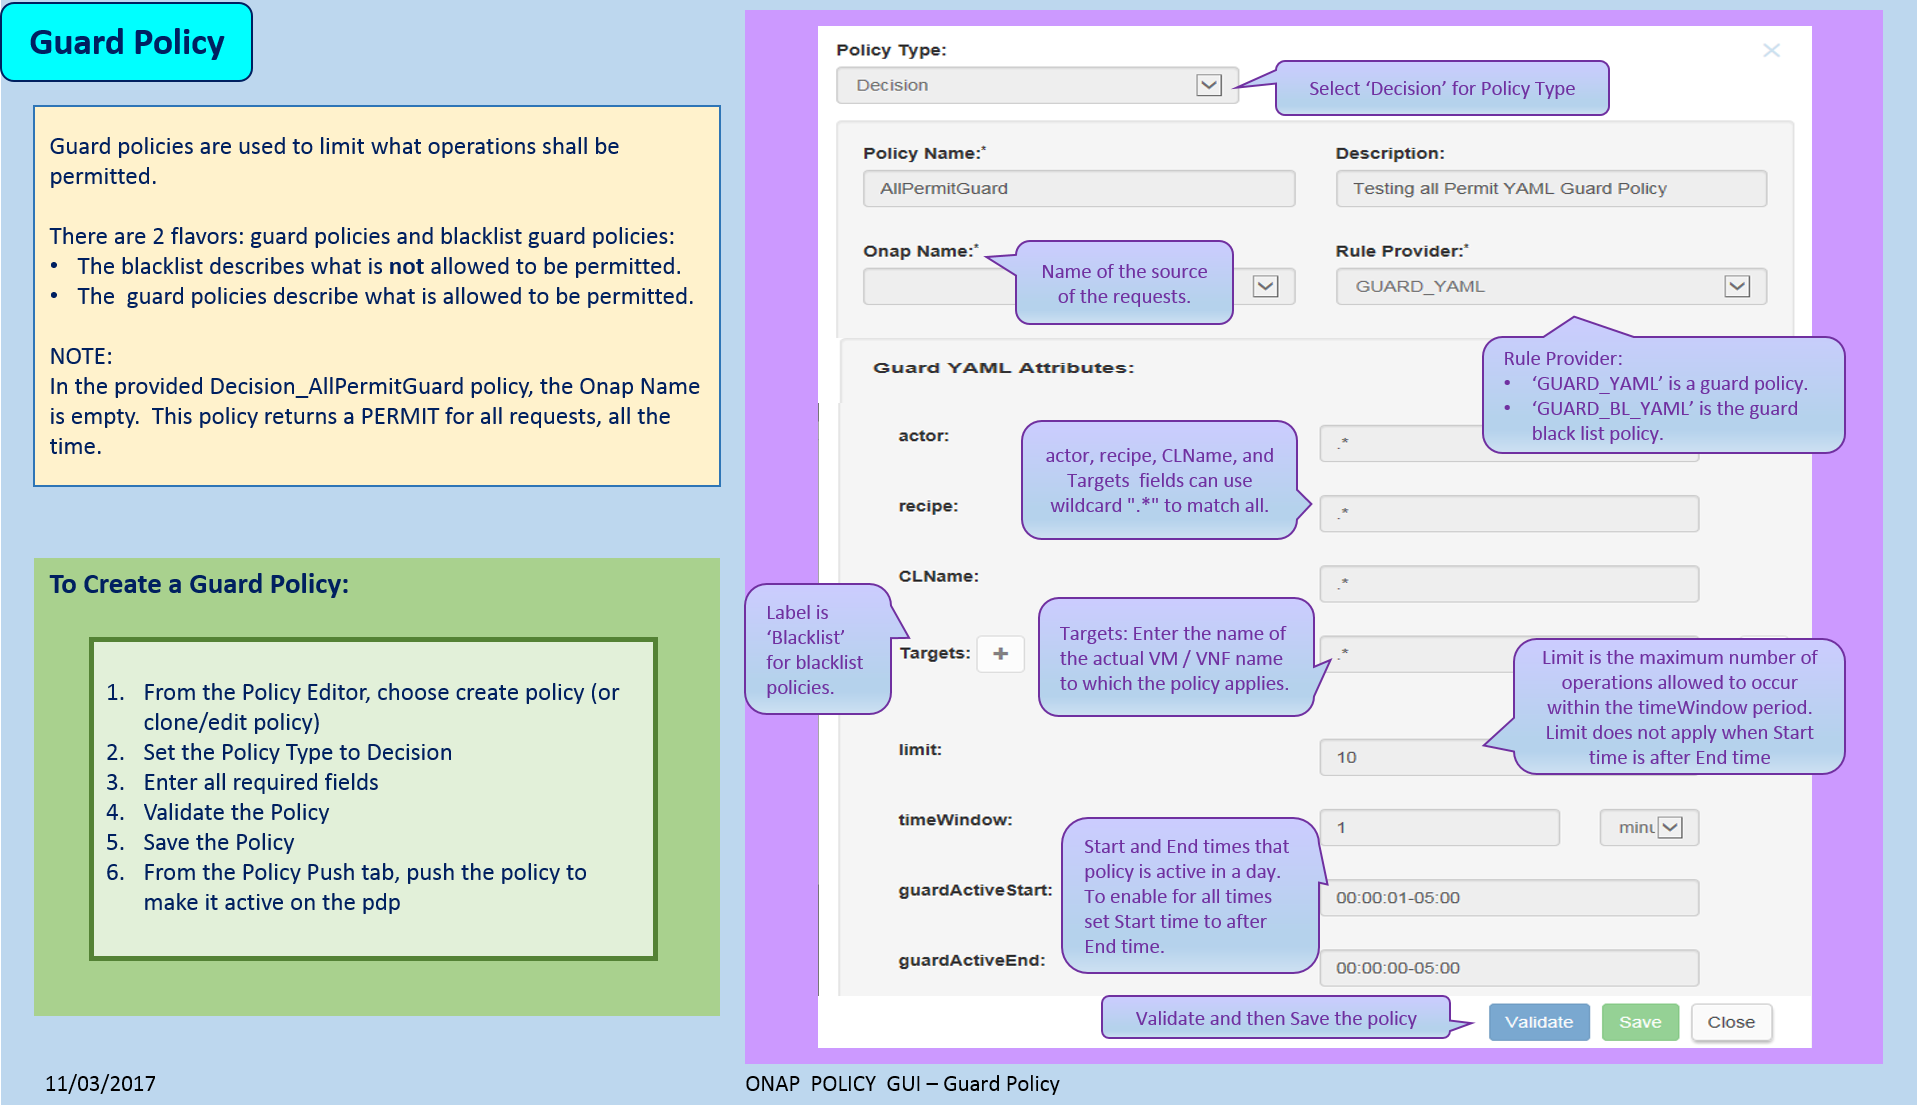
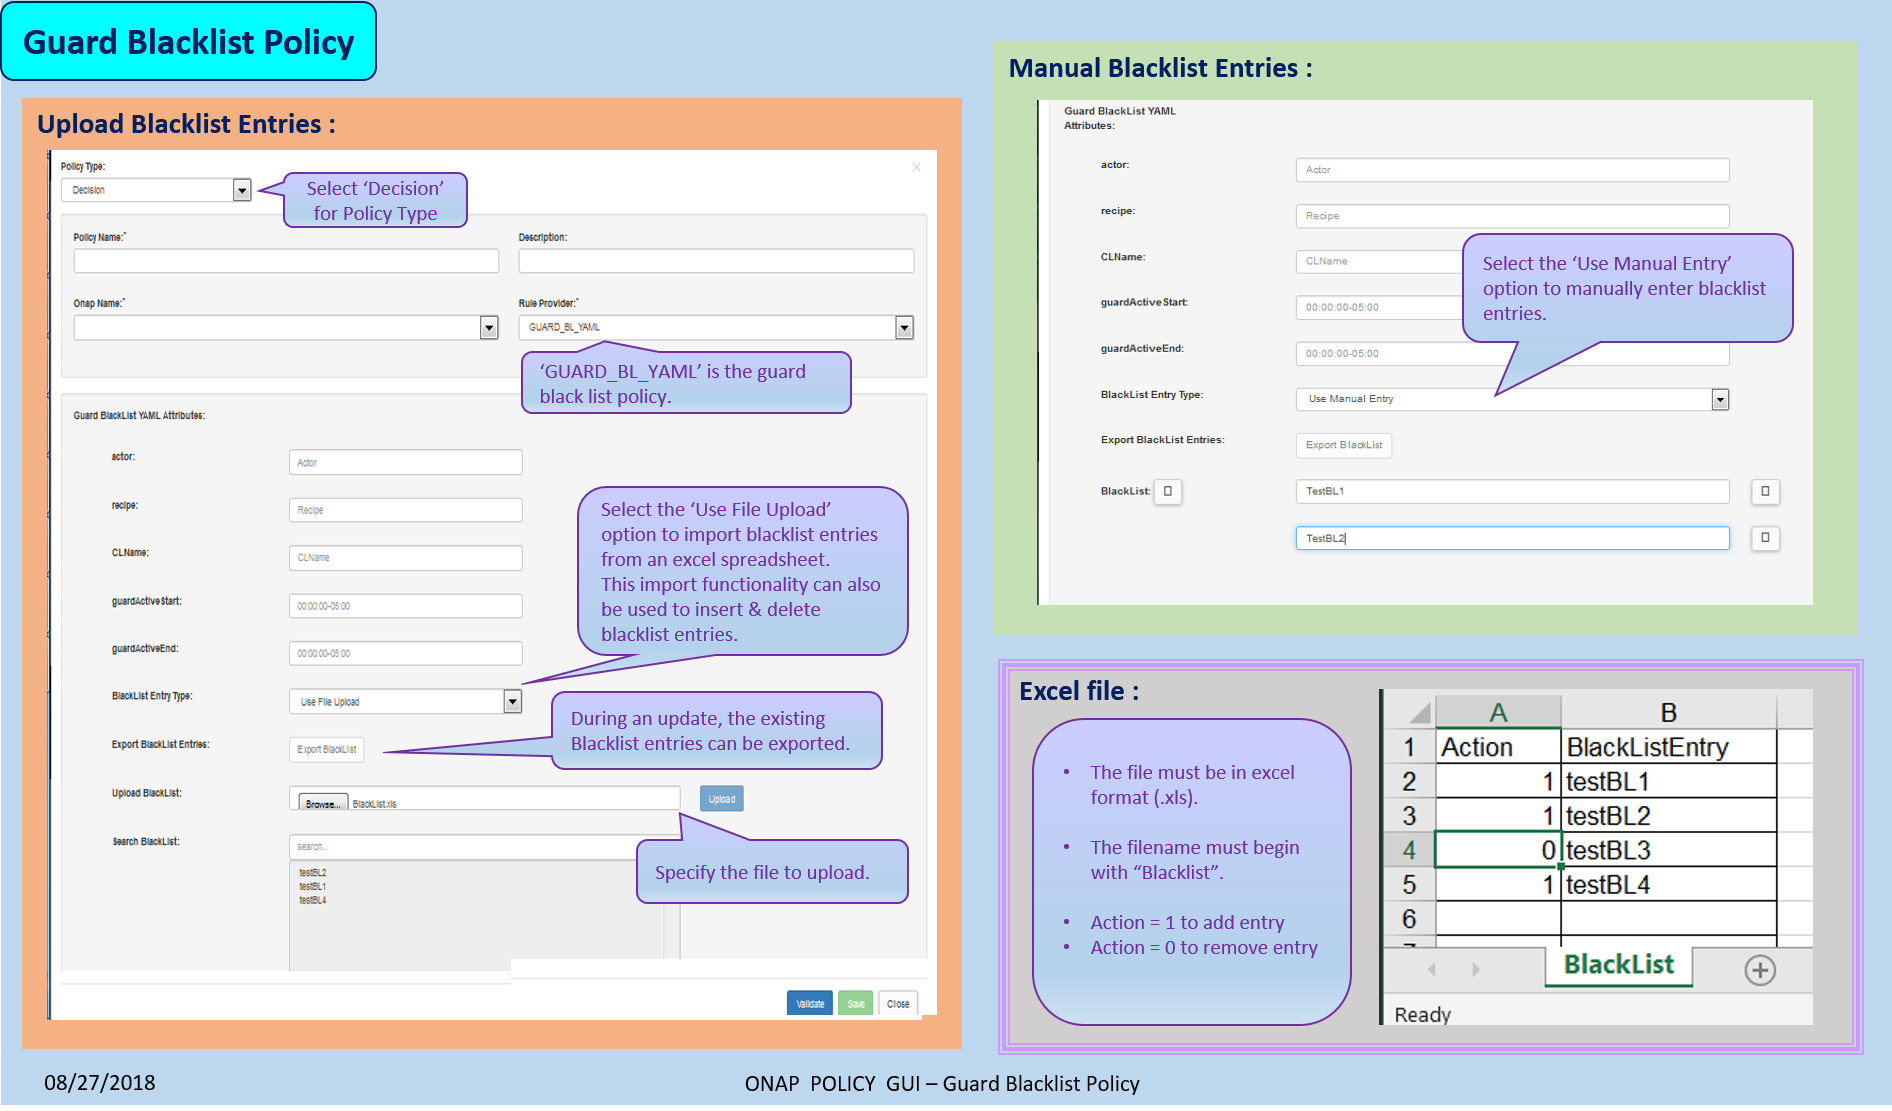
In a Blacklist policy, the blacklist entries can be entered either manually or imported from an excel sheet. This import option can also be used to delete existing blacklist entries and to add new entries.
API Method
To create the policy, use the PUT /createPolicy API. This request uses Basic Access Authentication.
The request should be in the following form for the regular guard policy:
 1 {
 2     "policyClass": "Decision",
 3     "policyName": "Test.TestingGUARDapitest",
 4     "policyDescription": "Testing new YAML Guard Policy",
 5     "onapName": "PDPD",
 6     "ruleProvider": "GUARD_YAML",
 7     "attributes": {
 8         "MATCHING": {
 9             "actor": "APPC",
10             "recipe": "restart",
11             "targets" : "test",
12             "clname" : "test",
13             "limit": "5",
14             "timeWindow": "15",
15             "timeUnits" : "minute",
16             "guardActiveStart": "05:00:00-05:00",
17             "guardActiveEnd": "23:59:59-05:00"
18         }
19     }
20 }
The request should be in the following form for the Min/Max guard policy:
 1 {
 2     "policyClass": "Decision",
 3     "policyName": "Test.TestingGUARDMinMaxtest",
 4     "policyDescription": "Testing new Min/Max Guard Policy",
 5     "onapName": "PDPD",
 6     "ruleProvider": "GUARD_MIN_MAX",
 7     "attributes": {
 8         "MATCHING": {
 9             "actor": "SO",
10             "recipe": "scaleOut",
11             "targets" : ".*",
12             "clname" : "test",
13             "min": "1",
14             "max": "5",
15             "guardActiveStart": "05:00:00-05:00",
16             "guardActiveEnd": "23:59:59-05:00"
17         }
18     }
19 }
The request should be in the following form for blacklist guard policy:
 1 {
 2     "policyClass": "Decision",
 3     "policyName": "Test.TestingBLGUARD",
 4     "policyDescription": "Testing New BL YAML Guard Policy",
 5     "onapName": "MSO",
 6     "ruleProvider": "GUARD_BL_YAML",
 7     "attributes": {
 8         "MATCHING": {
 9             "actor": "APPC",
10             "recipe": "restart",
11             "clname": "test",
12             "guardActiveStart": "05:00:00-05:00",
13             "guardActiveEnd": "23:59:59-05:00",
14             "blackList": "target1,target2,target3"
15         }
16     }
17 }
Using Guard Policies
In order to use the guard policies just make an http request. For example:
http
 POST pdp:8081/pdp/api/getDecision
 Authorization:<yourAuth> ClientAuth:<yourClientAuth>
 Environment:<environment> Content-Type:application/json < guard_request.json
The guard_request.json should be in the form of the following:
 {
   "decisionAttributes": {
         "actor": "APPC",
         "recipe": "Restart",
         "target": "test13",
         "clname" : "piptest",
         "vfCount" : "4"
     },
   "onapName": "PDPD"
 }
A response containing a “PERMIT” or “DENY” in uppercase is returned as follows:
 {
   "decision": "PERMIT",
   "details": "Decision Permit. OK!"
 }
End of Document