
ONAP on HA Kubernetes Cluster
This guide provides instructions on how to setup a Highly-Available Kubernetes Cluster. For this, we are hosting our cluster on OpenStack VMs and using the Rancher Kubernetes Engine (RKE) to deploy and manage our Kubernetes Cluster.
The result at the end of this tutorial will be:
Creation of a Key Pair to use with Open Stack and RKE
Creation of OpenStack VMs to host Kubernetes Control Plane
Creation of OpenStack VMs to host Kubernetes Workers
Installation and configuration of RKE to setup an HA Kubernetes
Installation and configuration of kubectl
Installation and configuration of Helm
Creation of an NFS Server to be used by ONAP as shared persistance
There are many ways one can execute the above steps. Including automation through the use of HEAT to setup the OpenStack VMs. To better illustrate the steps involved, we have captured the manual creation of such an environment using the ONAP Wind River Open Lab.
Create Key Pair
A Key Pair is required to access the created OpenStack VMs and will be used by RKE to configure the VMs for Kubernetes.
Use an existing key pair, import one or create a new one to assign.
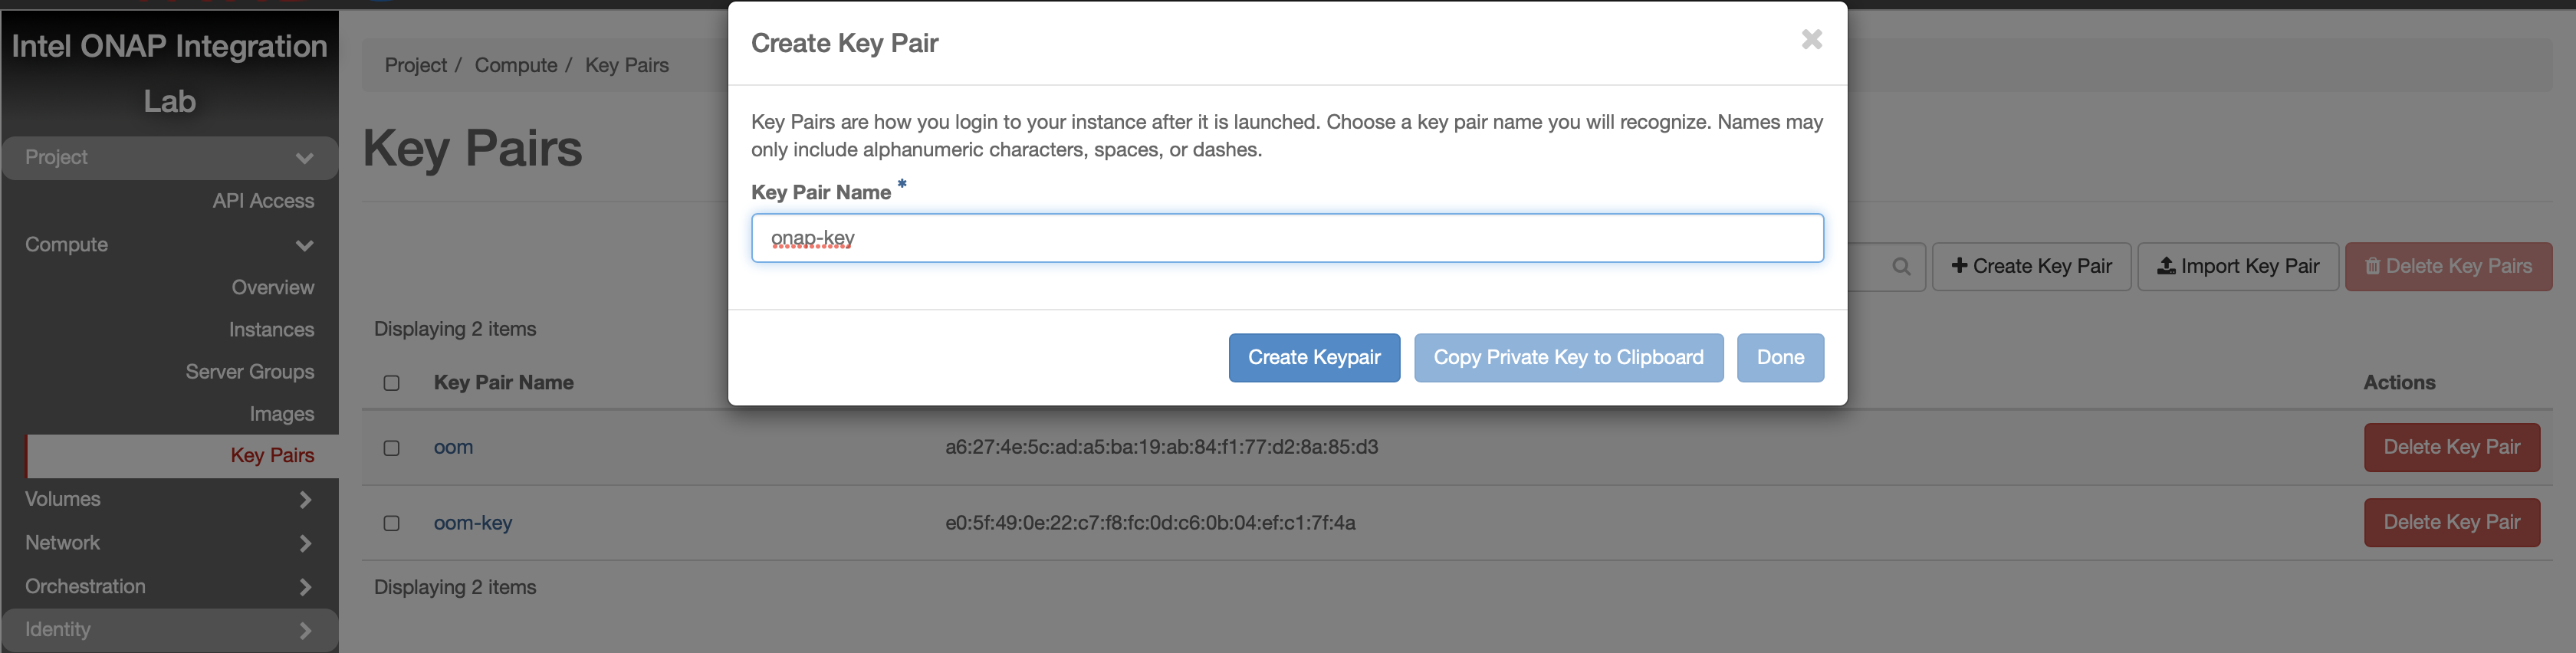
Note
If you’re creating a new Key Pair, ensure to create a local copy of the Private Key through the use of “Copy Private Key to Clipboard”.
For the purpose of this guide, we will assume a new local key called “onap-key” has been downloaded and is copied into ~/.ssh/, from which it can be referenced.
Example:
> mv onap-key ~/.ssh

> chmod 600 ~/.ssh/onap-key
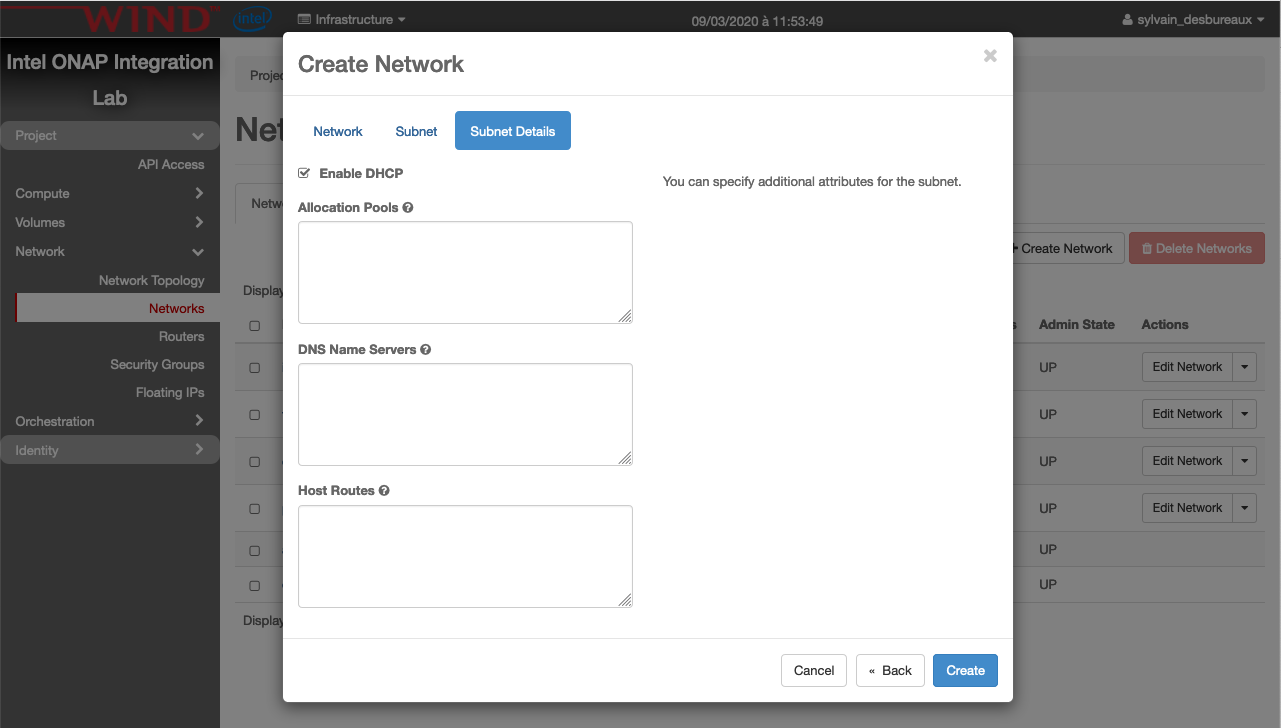
Create Network
An internal network is required in order to deploy our VMs that will host Kubernetes.
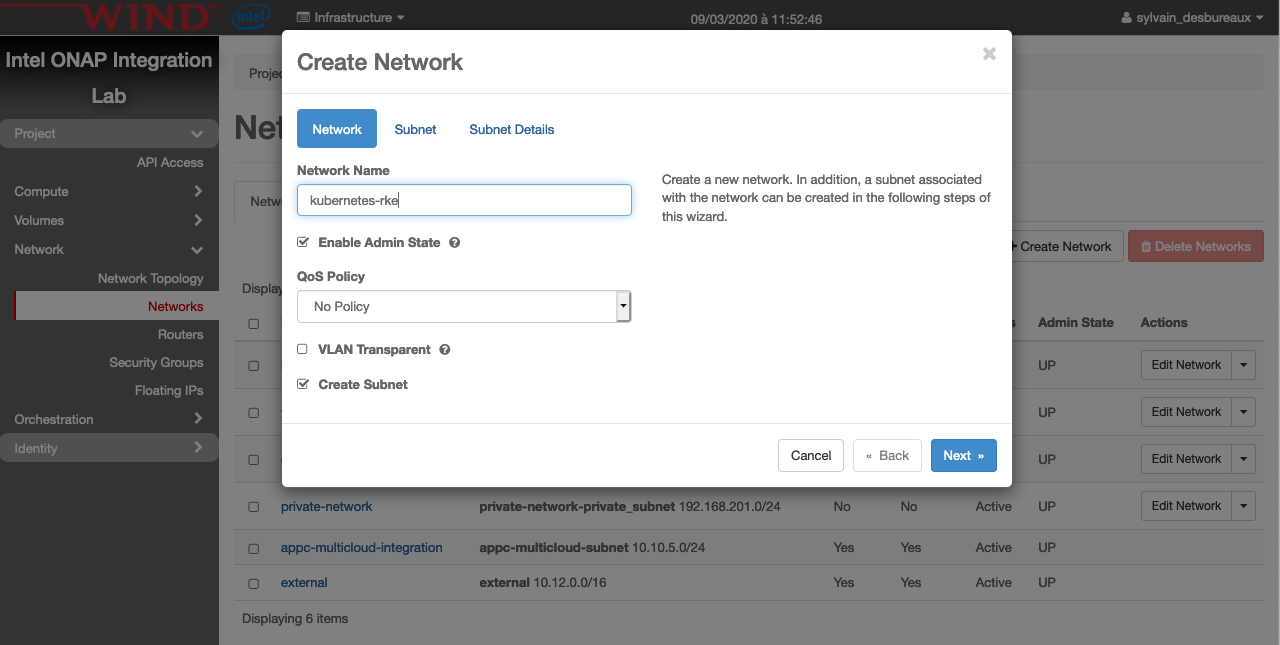
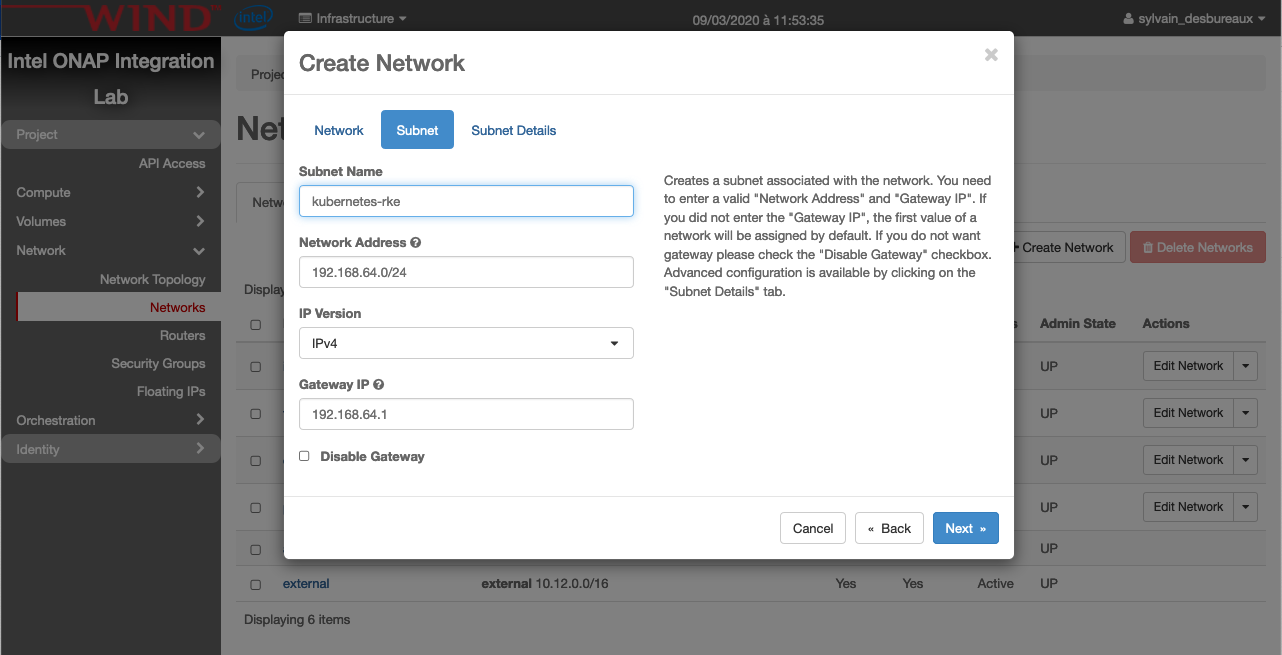
Note
It’s better to have one network per deployment and obviously the name of this network should be unique.
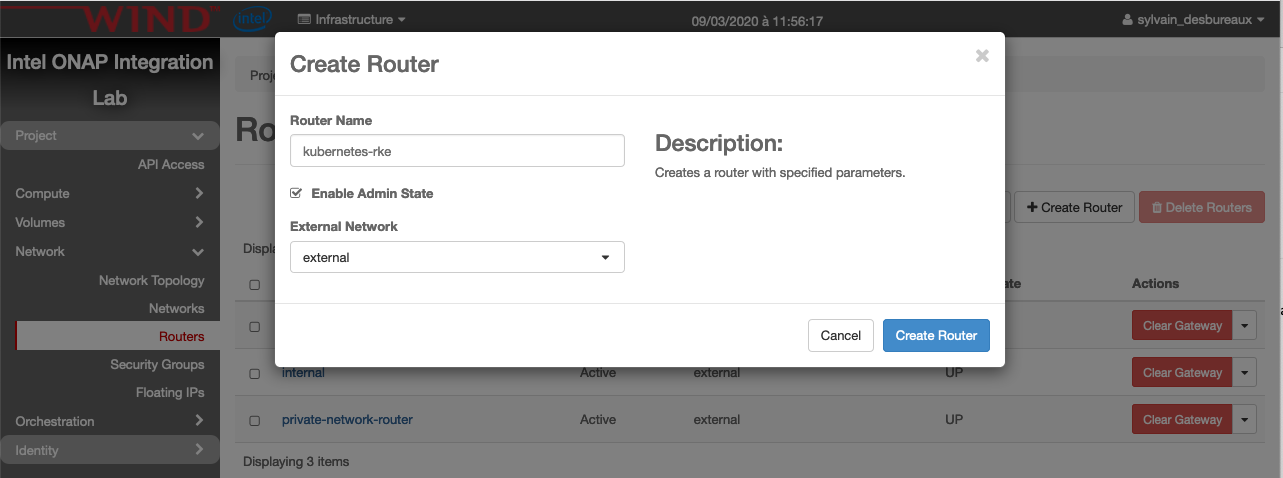
Now we need to create a router to attach this network to outside:
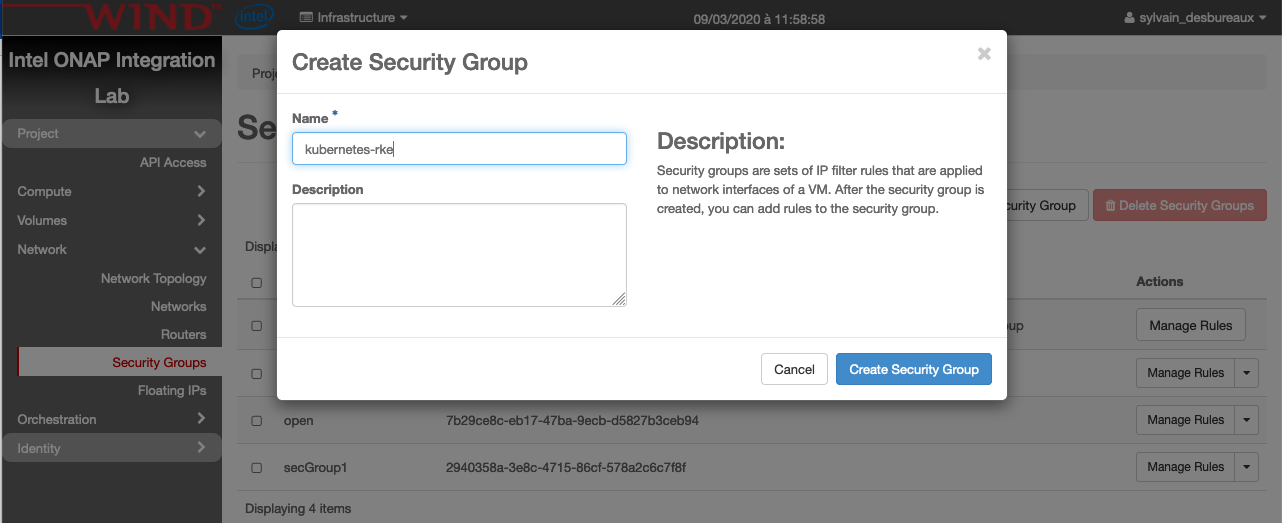
Create Security Group
A specific security group is also required
then click on manage rules of the newly created security group. And finally click on Add Rule and create the following one:
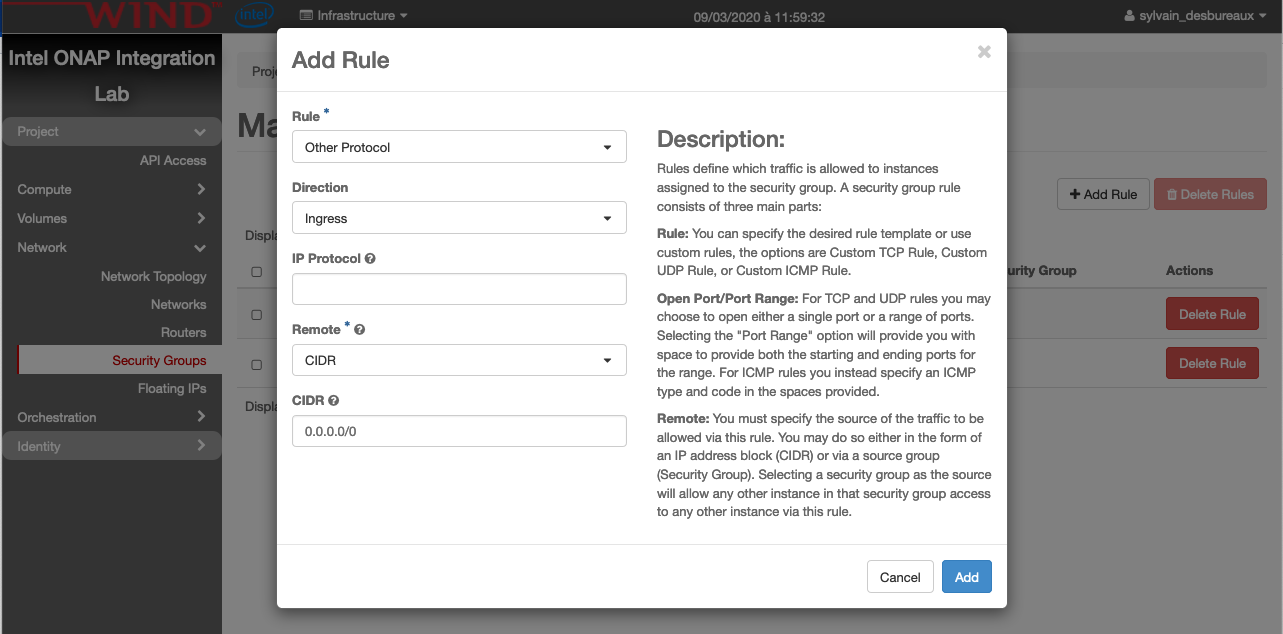
Note
the security is clearly not good here and the right SG will be proposed in a future version
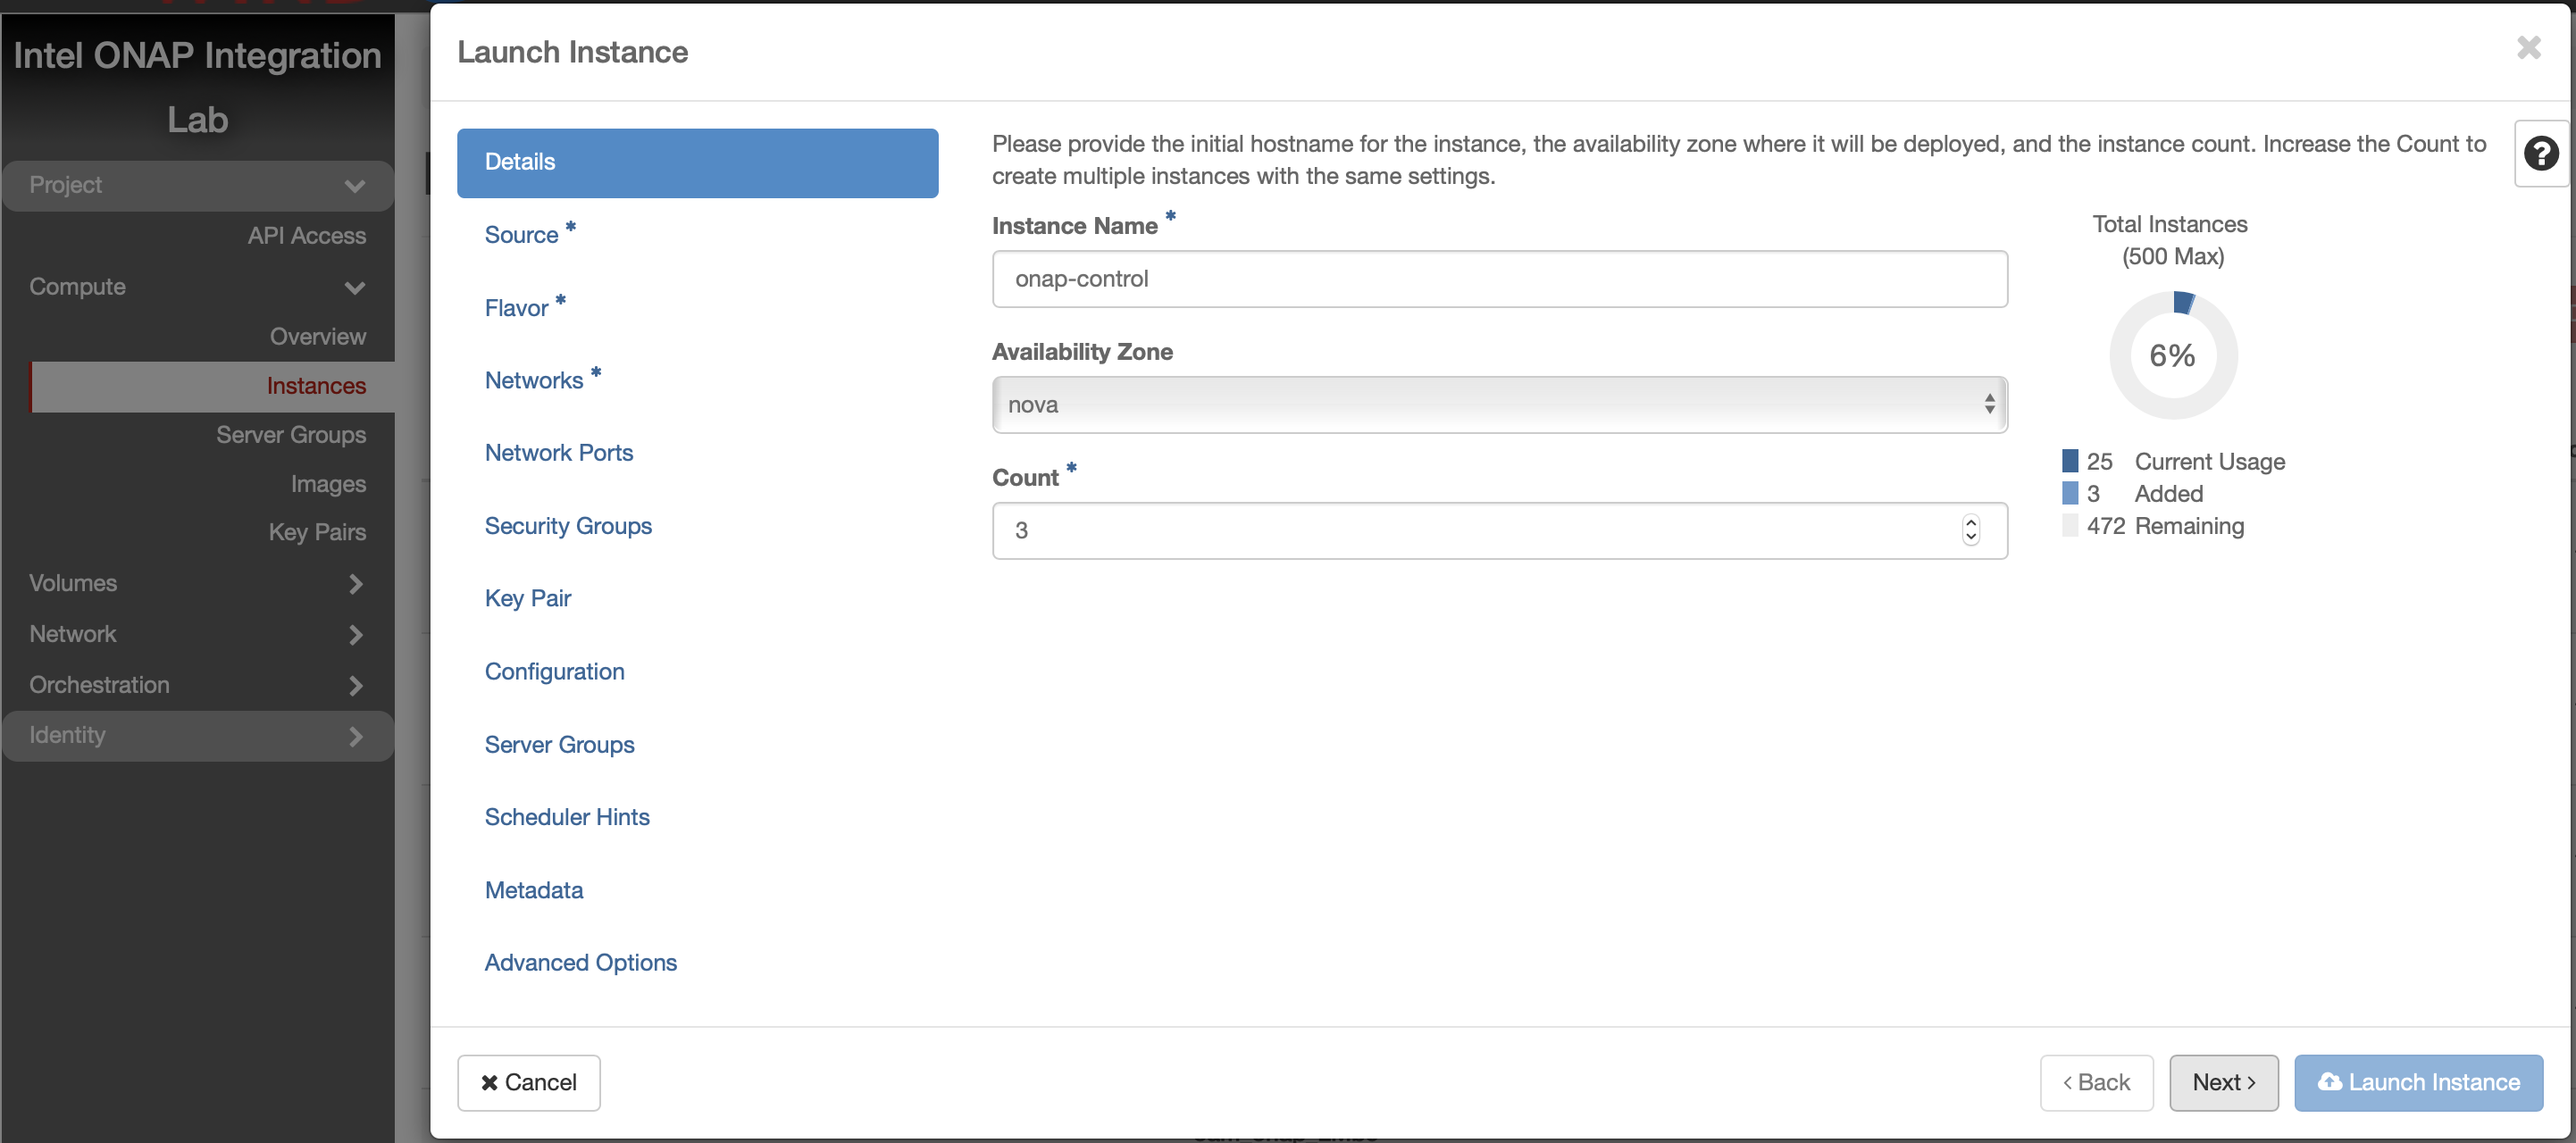
Create Kubernetes Control Plane VMs
The following instructions describe how to create 3 OpenStack VMs to host the Highly-Available Kubernetes Control Plane. ONAP workloads will not be scheduled on these Control Plane nodes.
Launch new VM instances

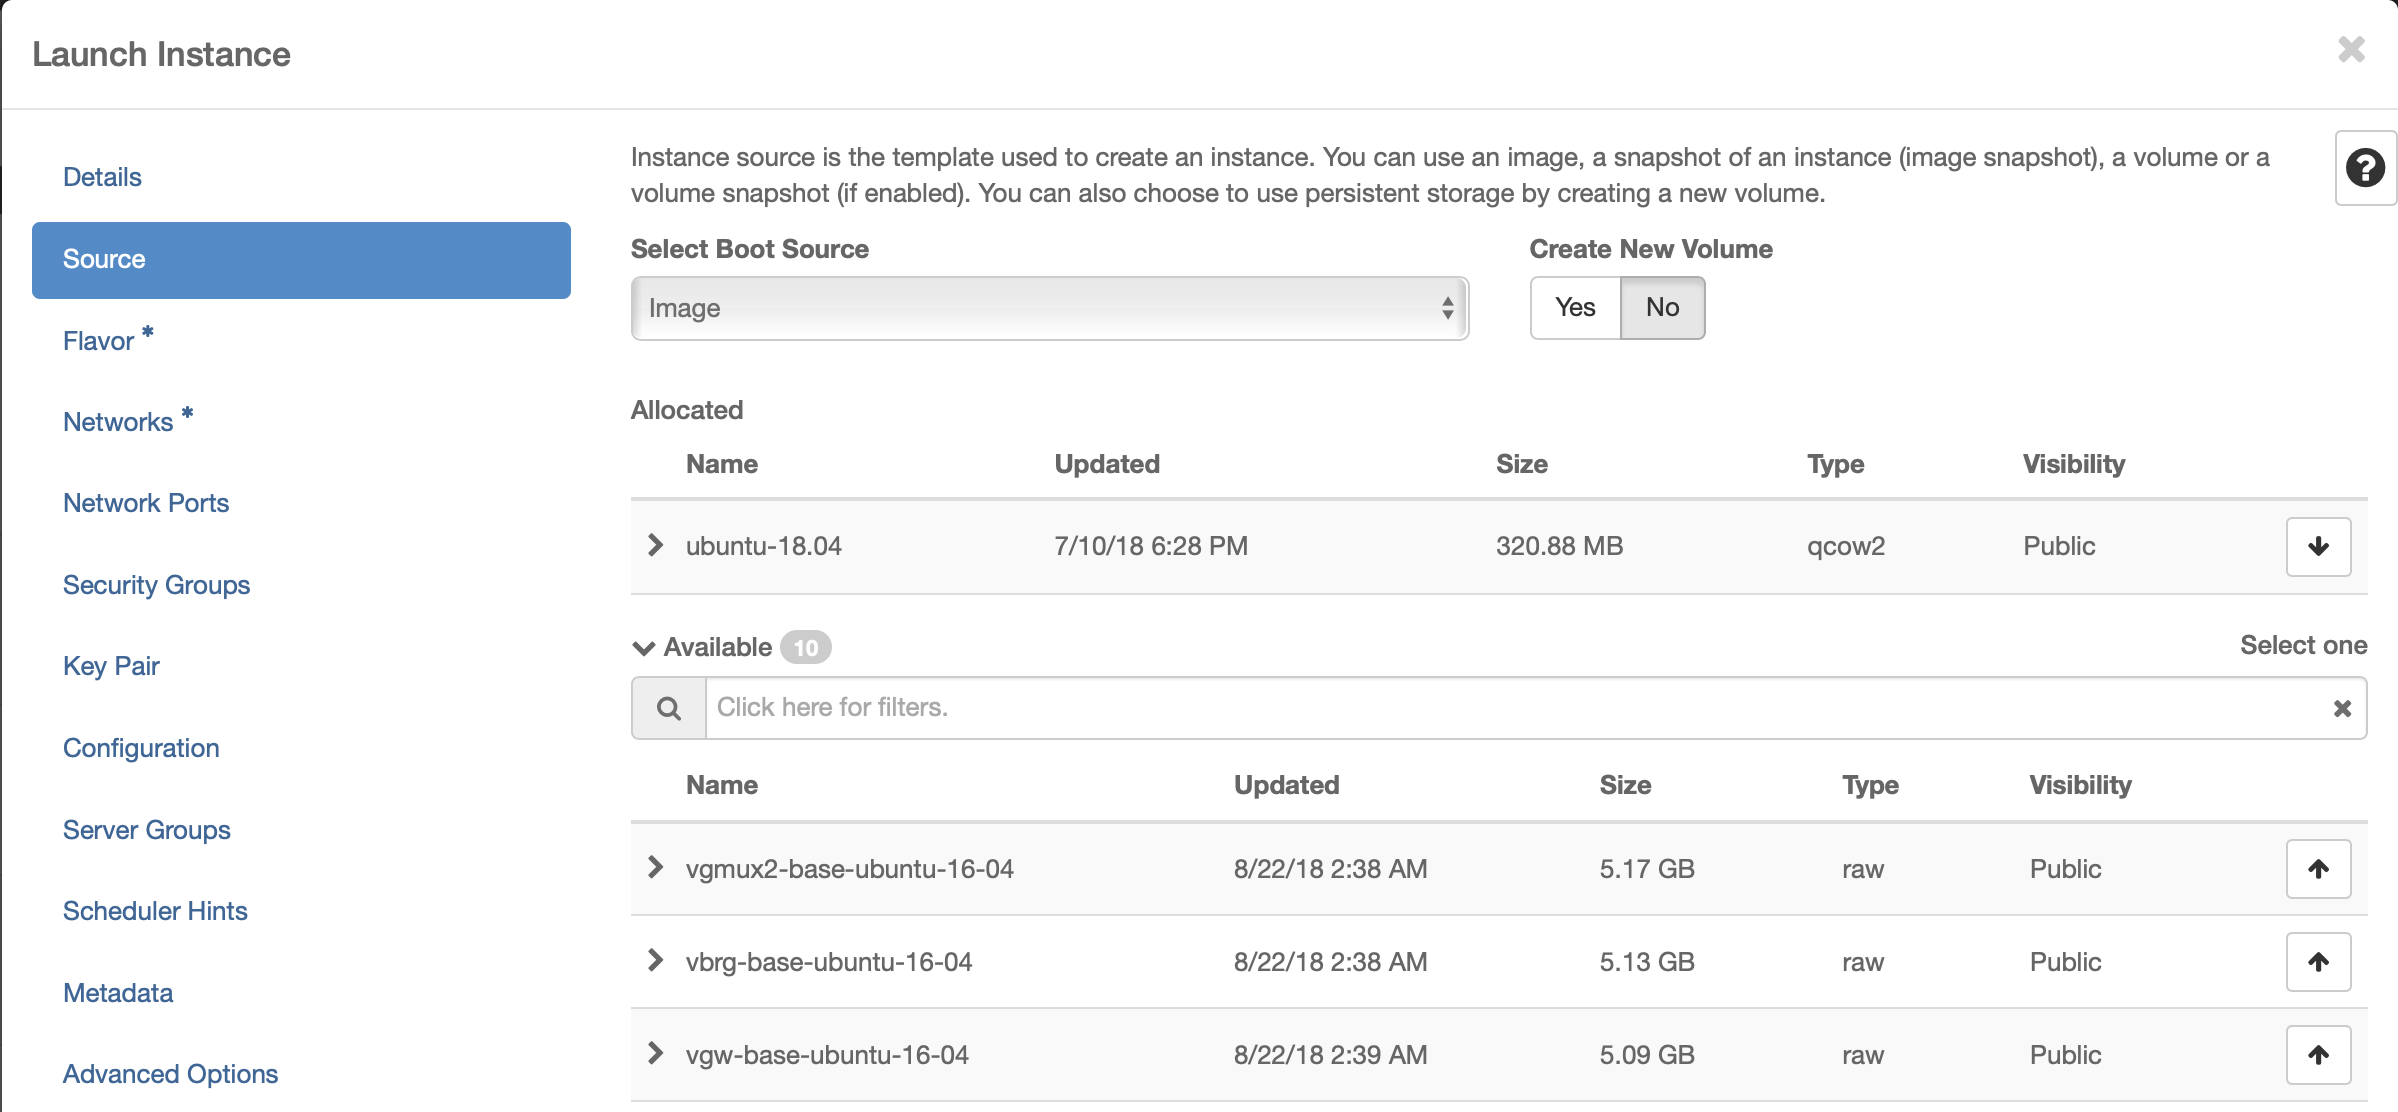
Select Ubuntu 18.04 as base image
Select “No” for “Create New Volume”

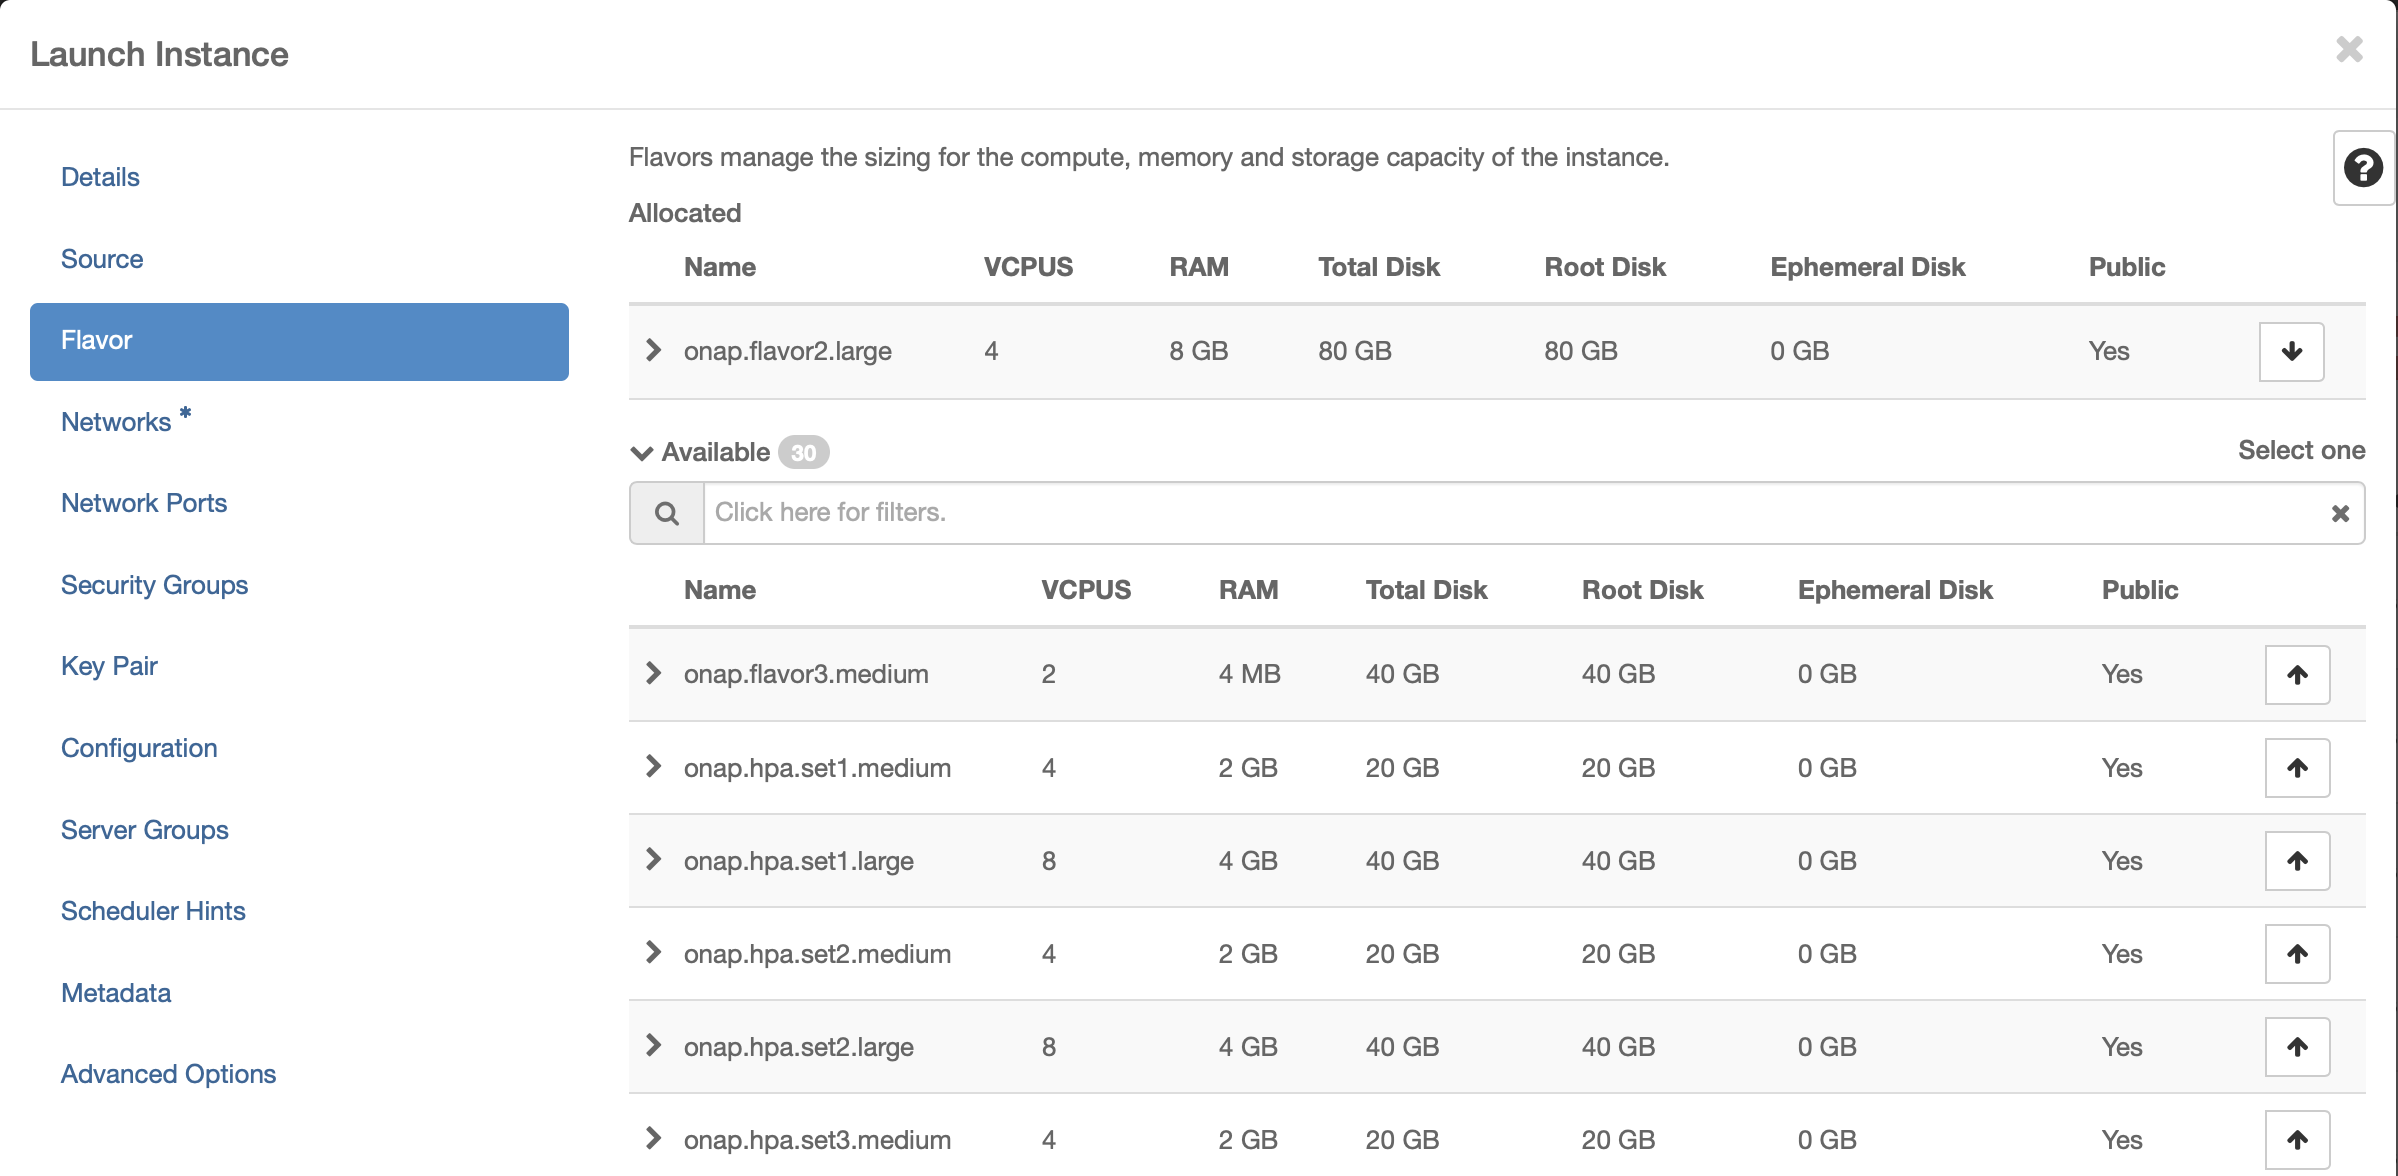
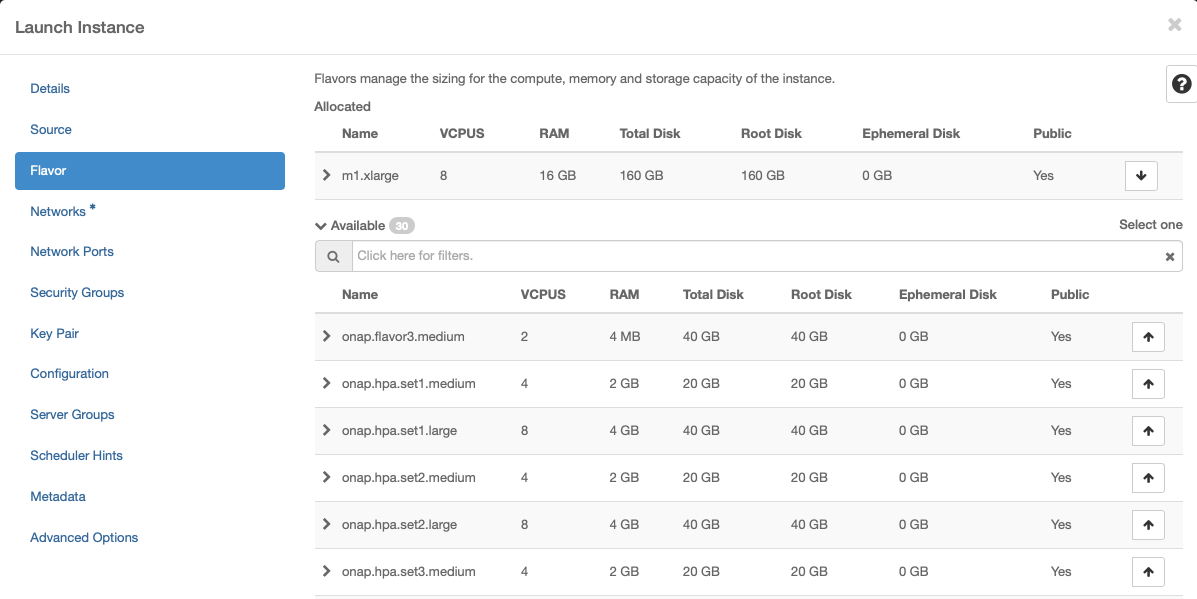
Select Flavor
The recommended flavor is at least 4 vCPU and 8GB ram.
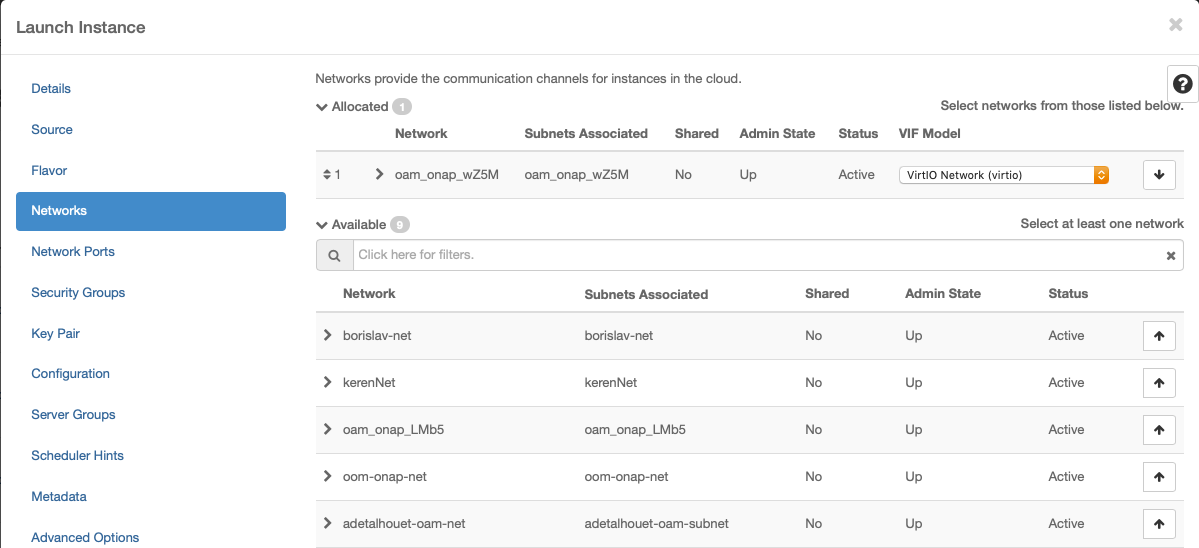
Networking
Use the created network:

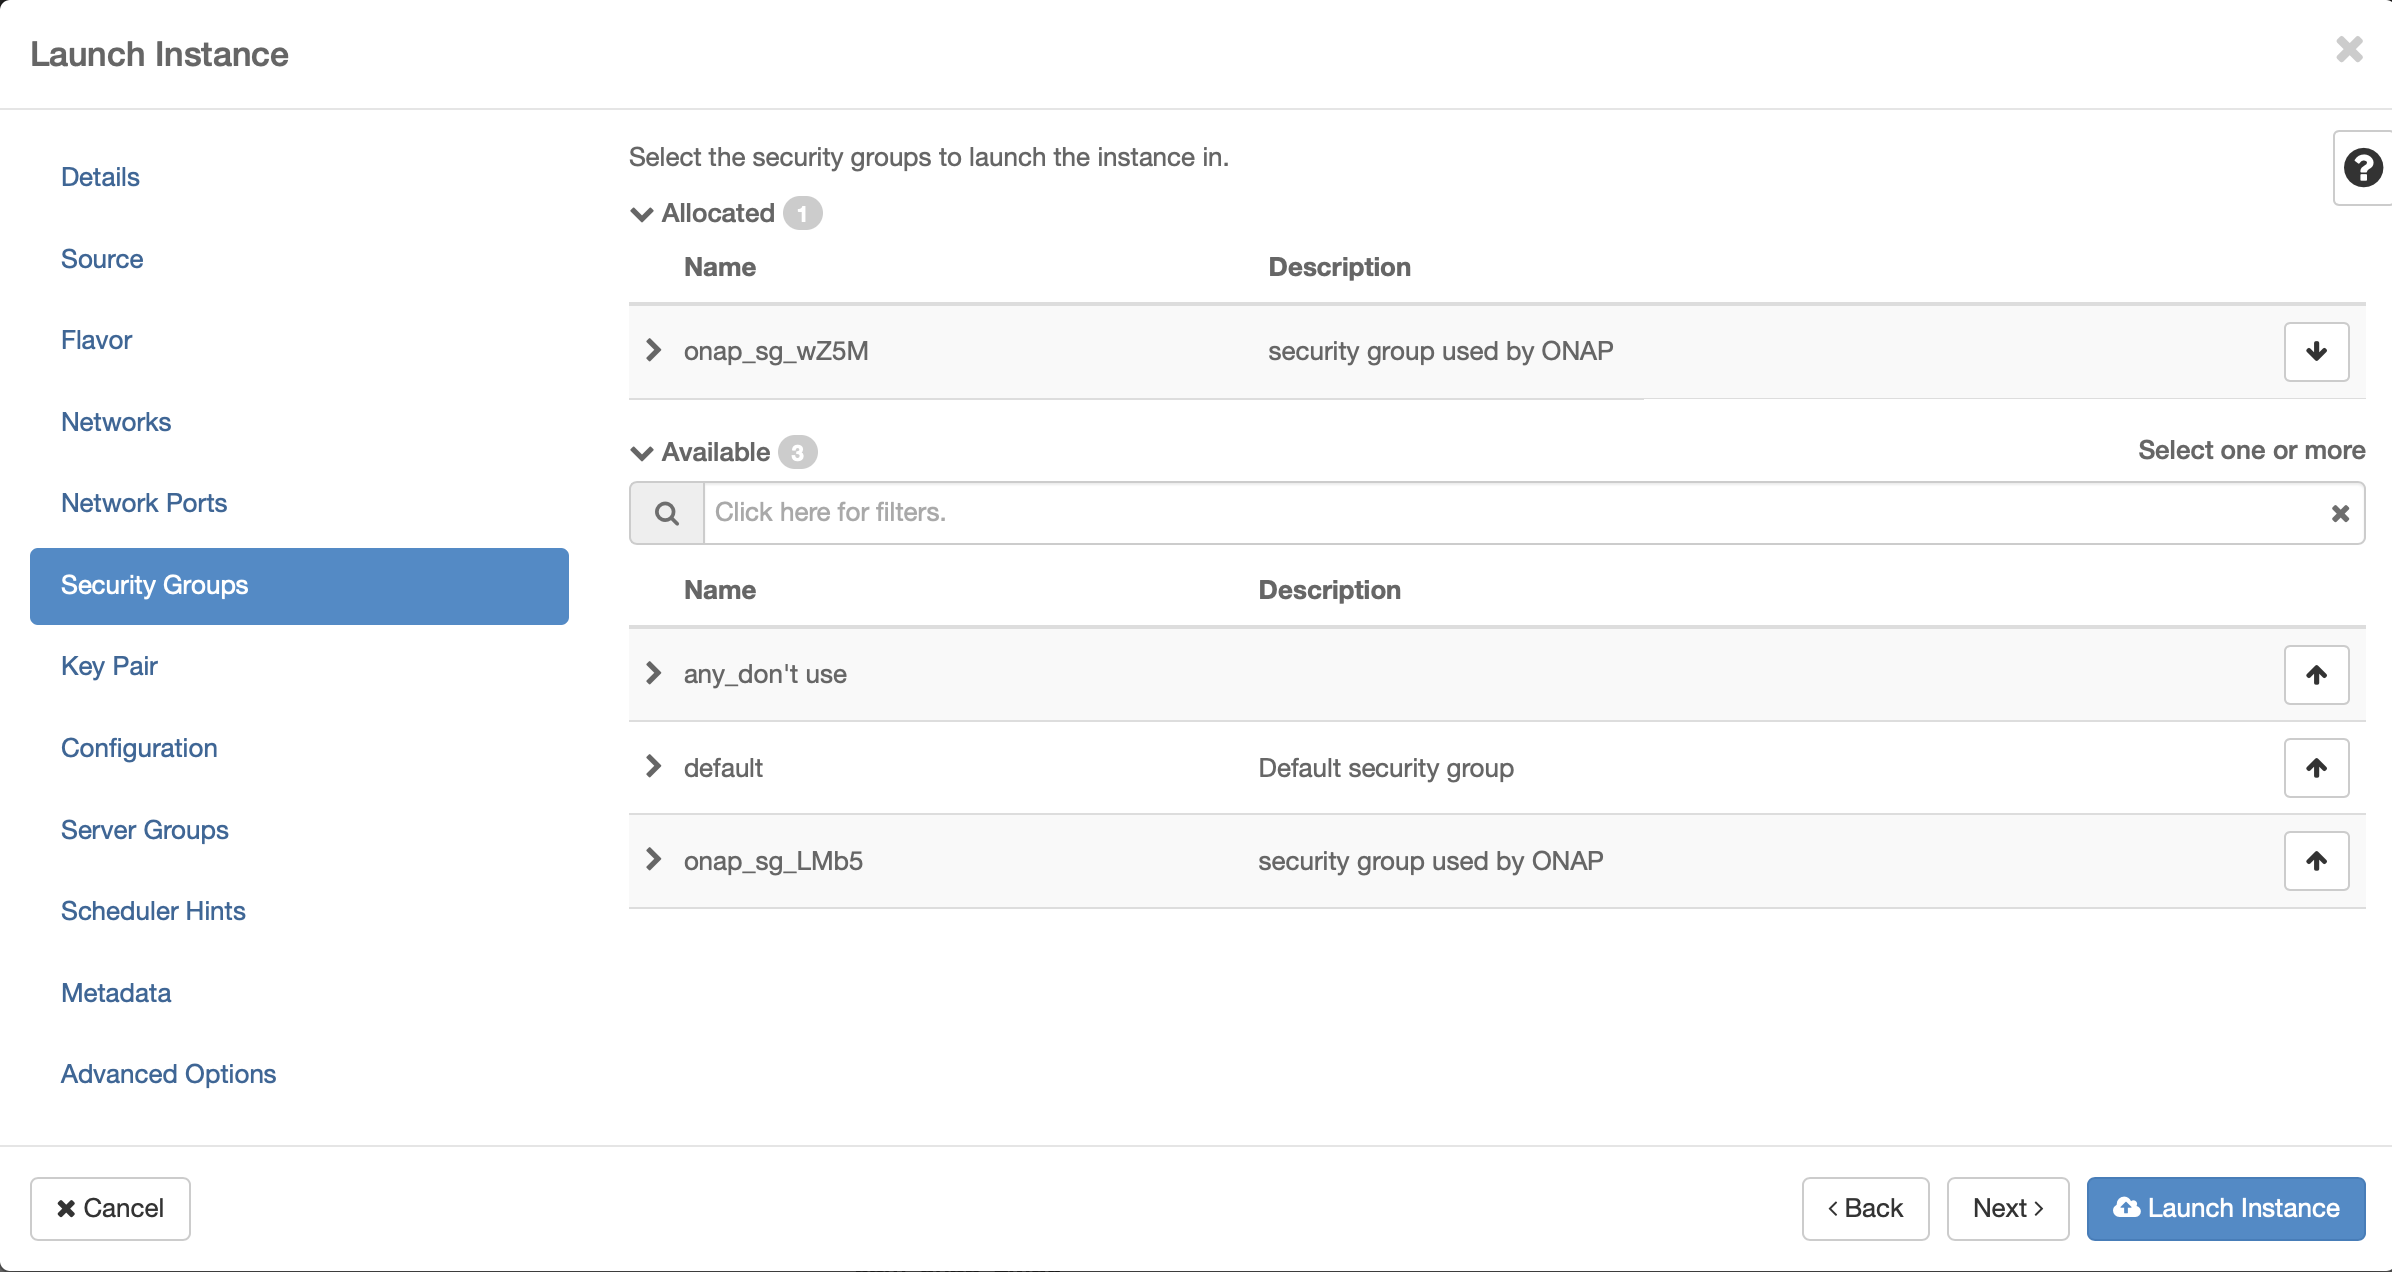
Security Groups
Use the created security group:

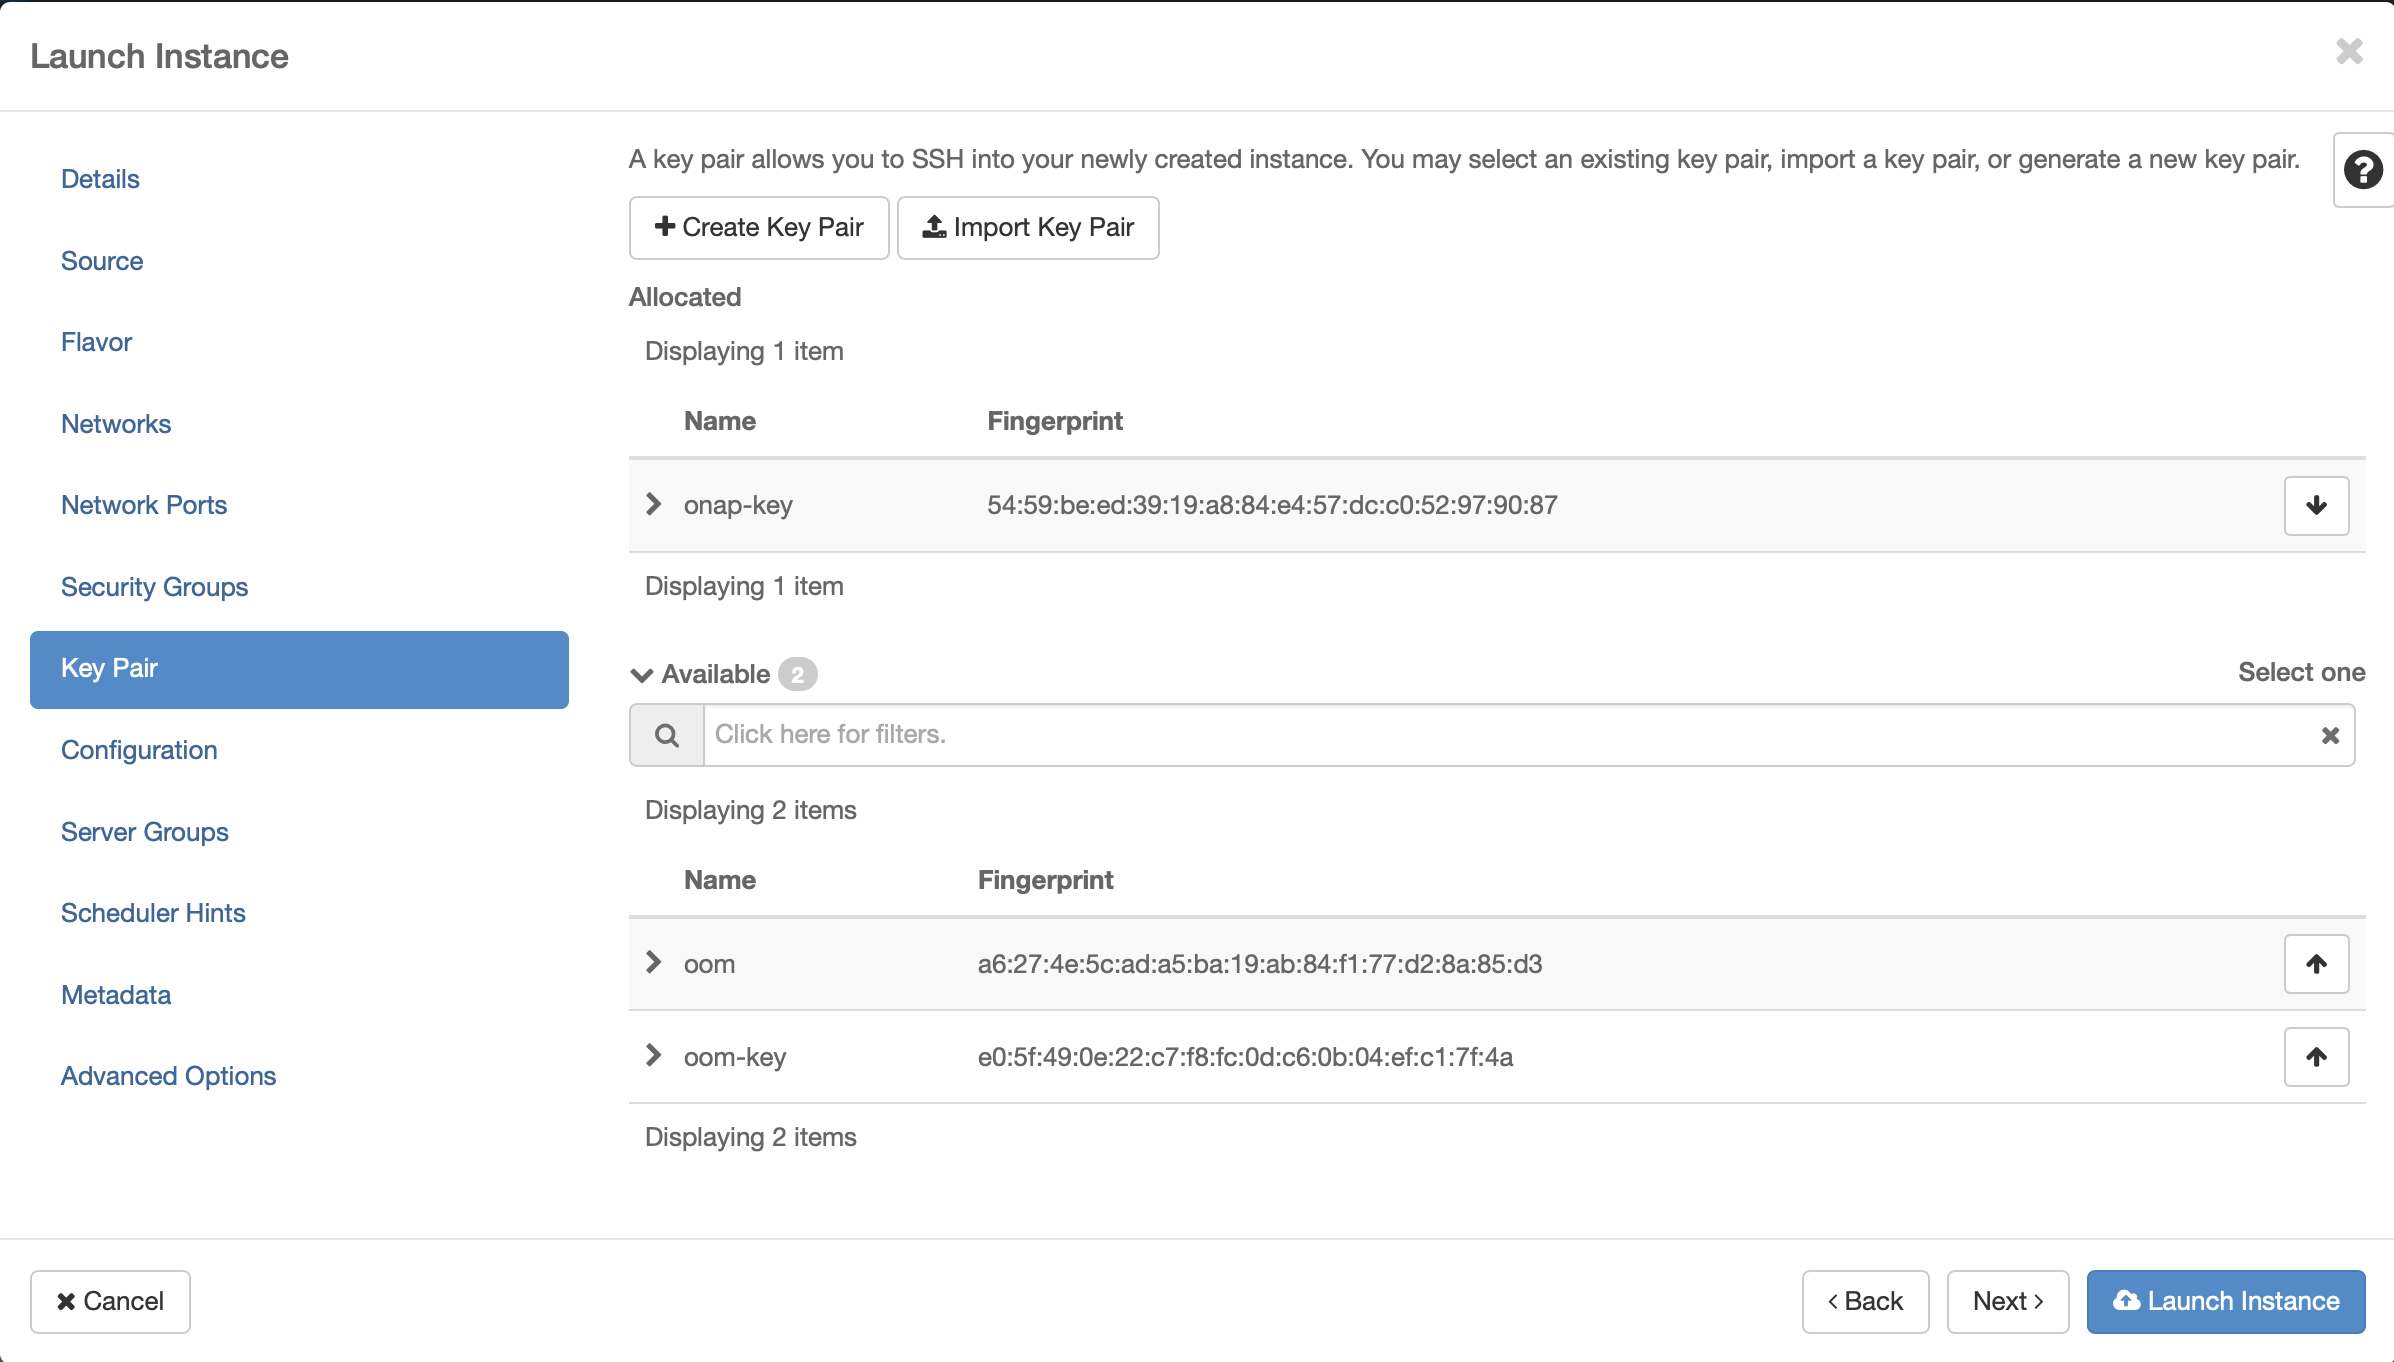
Key Pair
Assign the key pair that was created/selected previously (e.g. onap_key).
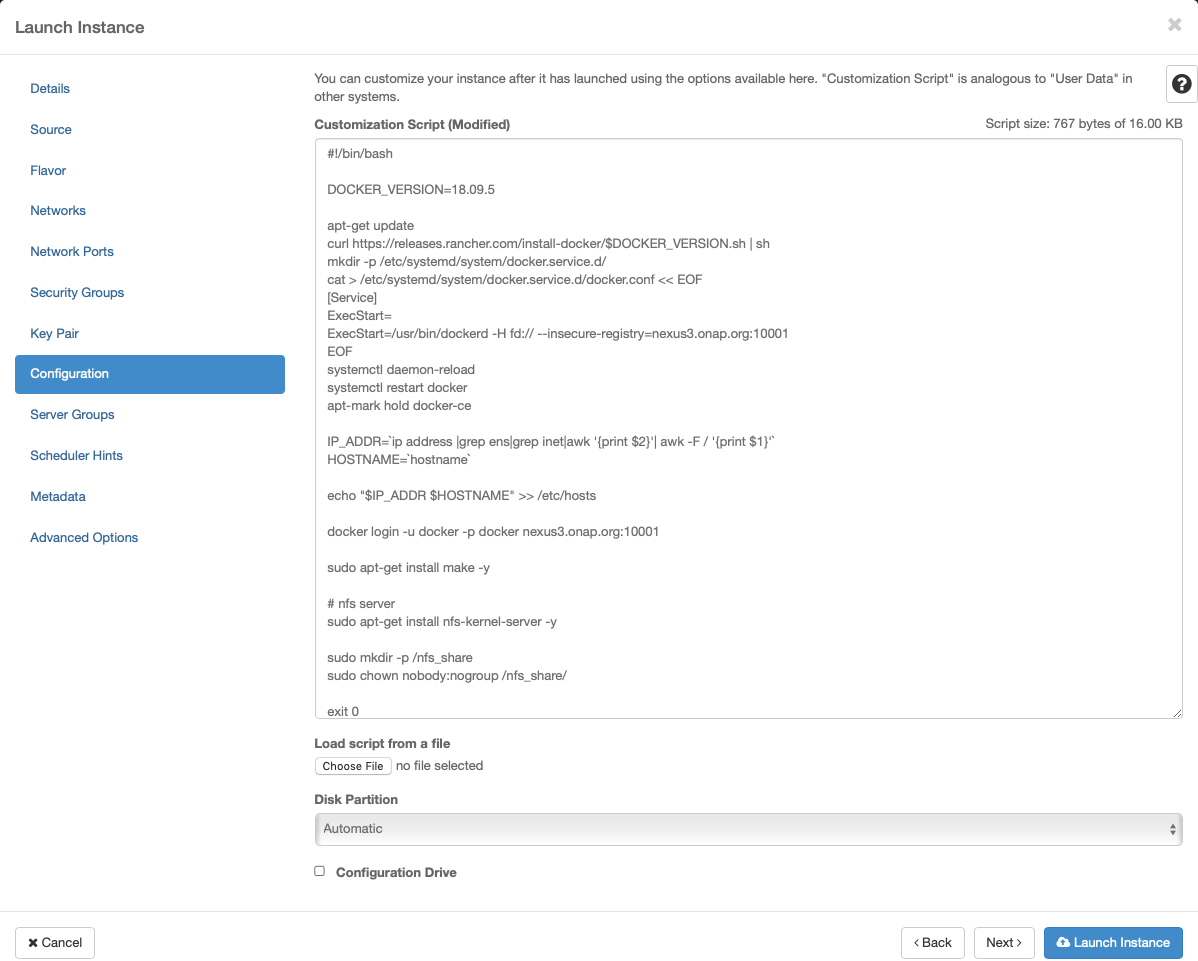
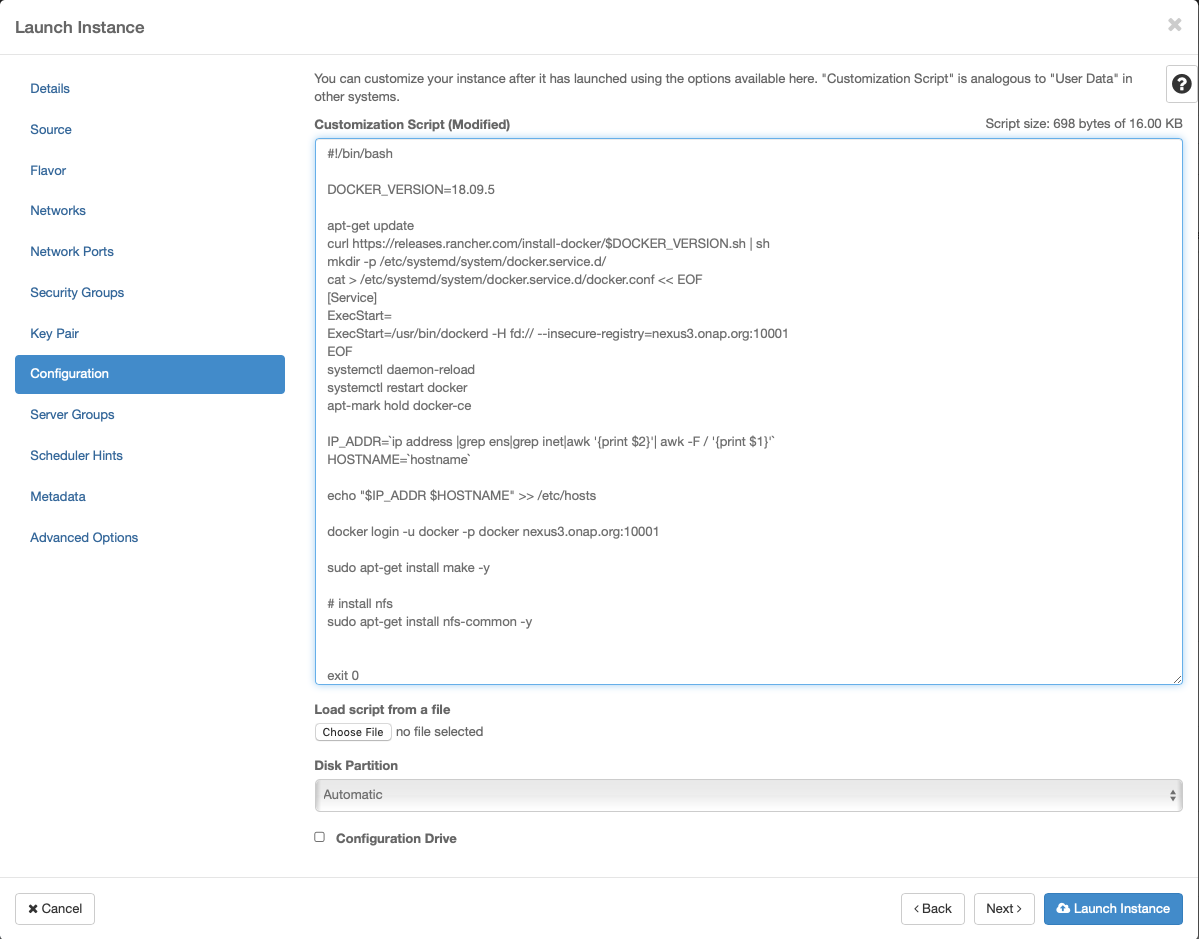
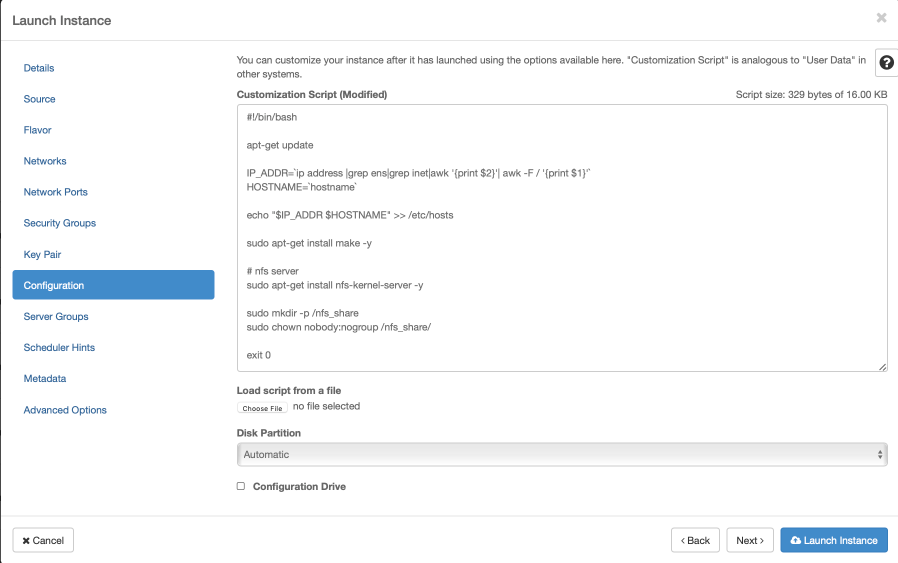
Apply customization script for Control Plane VMs
Click openstack-k8s-controlnode.sh
to download the script.
#!/bin/sh

DOCKER_VERSION=18.09.5

apt-get update

curl https://releases.rancher.com/install-docker/$DOCKER_VERSION.sh | sh
mkdir -p /etc/systemd/system/docker.service.d/
cat > /etc/systemd/system/docker.service.d/docker.conf << EOF
[Service]
ExecStart=
ExecStart=/usr/bin/dockerd -H fd:// --insecure-registry=nexus3.onap.org:10001
EOF

sudo usermod -aG docker ubuntu

systemctl daemon-reload
systemctl restart docker
apt-mark hold docker-ce

IP_ADDR=$(ip address |grep ens|grep inet|awk '{print $2}'| awk -F / '{print $1}')
HOST_NAME=$(hostname)

echo "$IP_ADDR $HOST_NAME" >> /etc/hosts

docker login -u docker -p docker nexus3.onap.org:10001

sudo apt-get install make -y

#nfs server
sudo apt-get install nfs-kernel-server -y
sudo mkdir -p /dockerdata-nfs
sudo chown nobody:nogroup /dockerdata-nfs/


exit 0
This customization script will:
update ubuntu
install docker
Launch Instance
Create Kubernetes Worker VMs
The following instructions describe how to create OpenStack VMs to host the Highly-Available Kubernetes Workers. ONAP workloads will only be scheduled on these nodes.
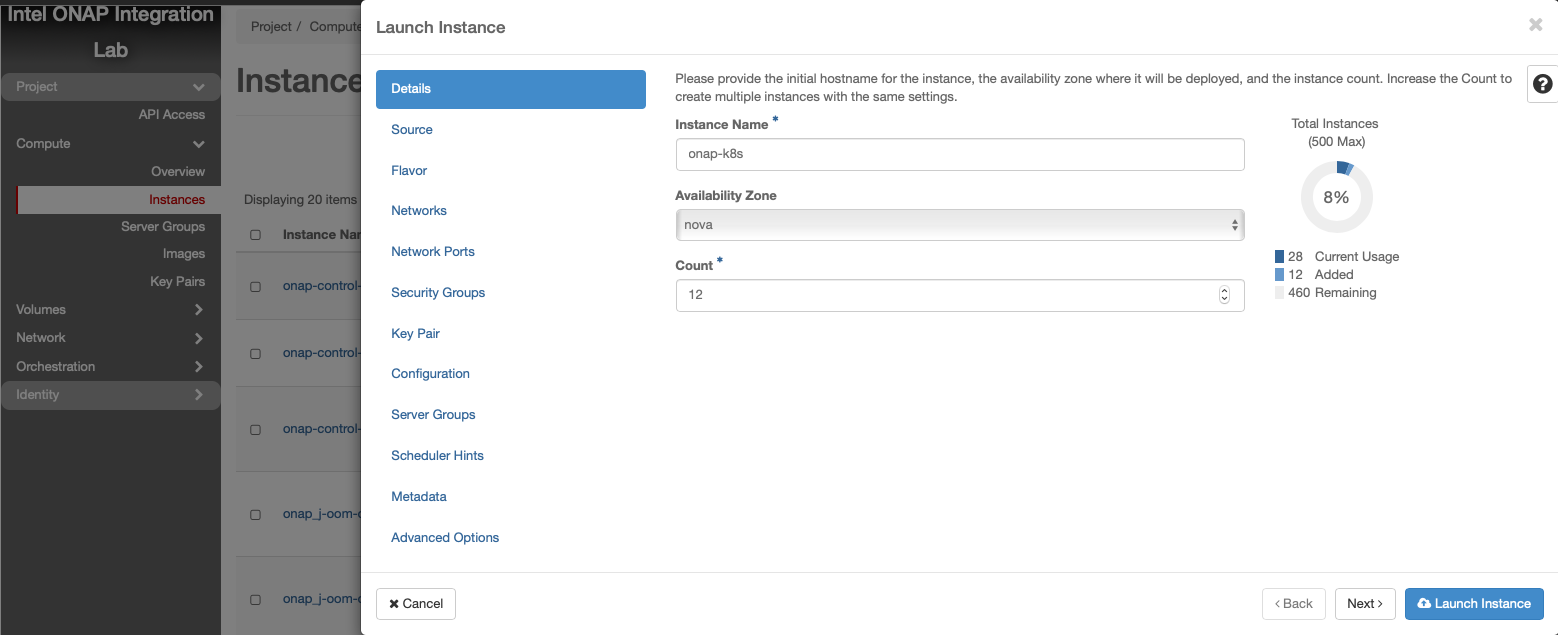
Launch new VM instances
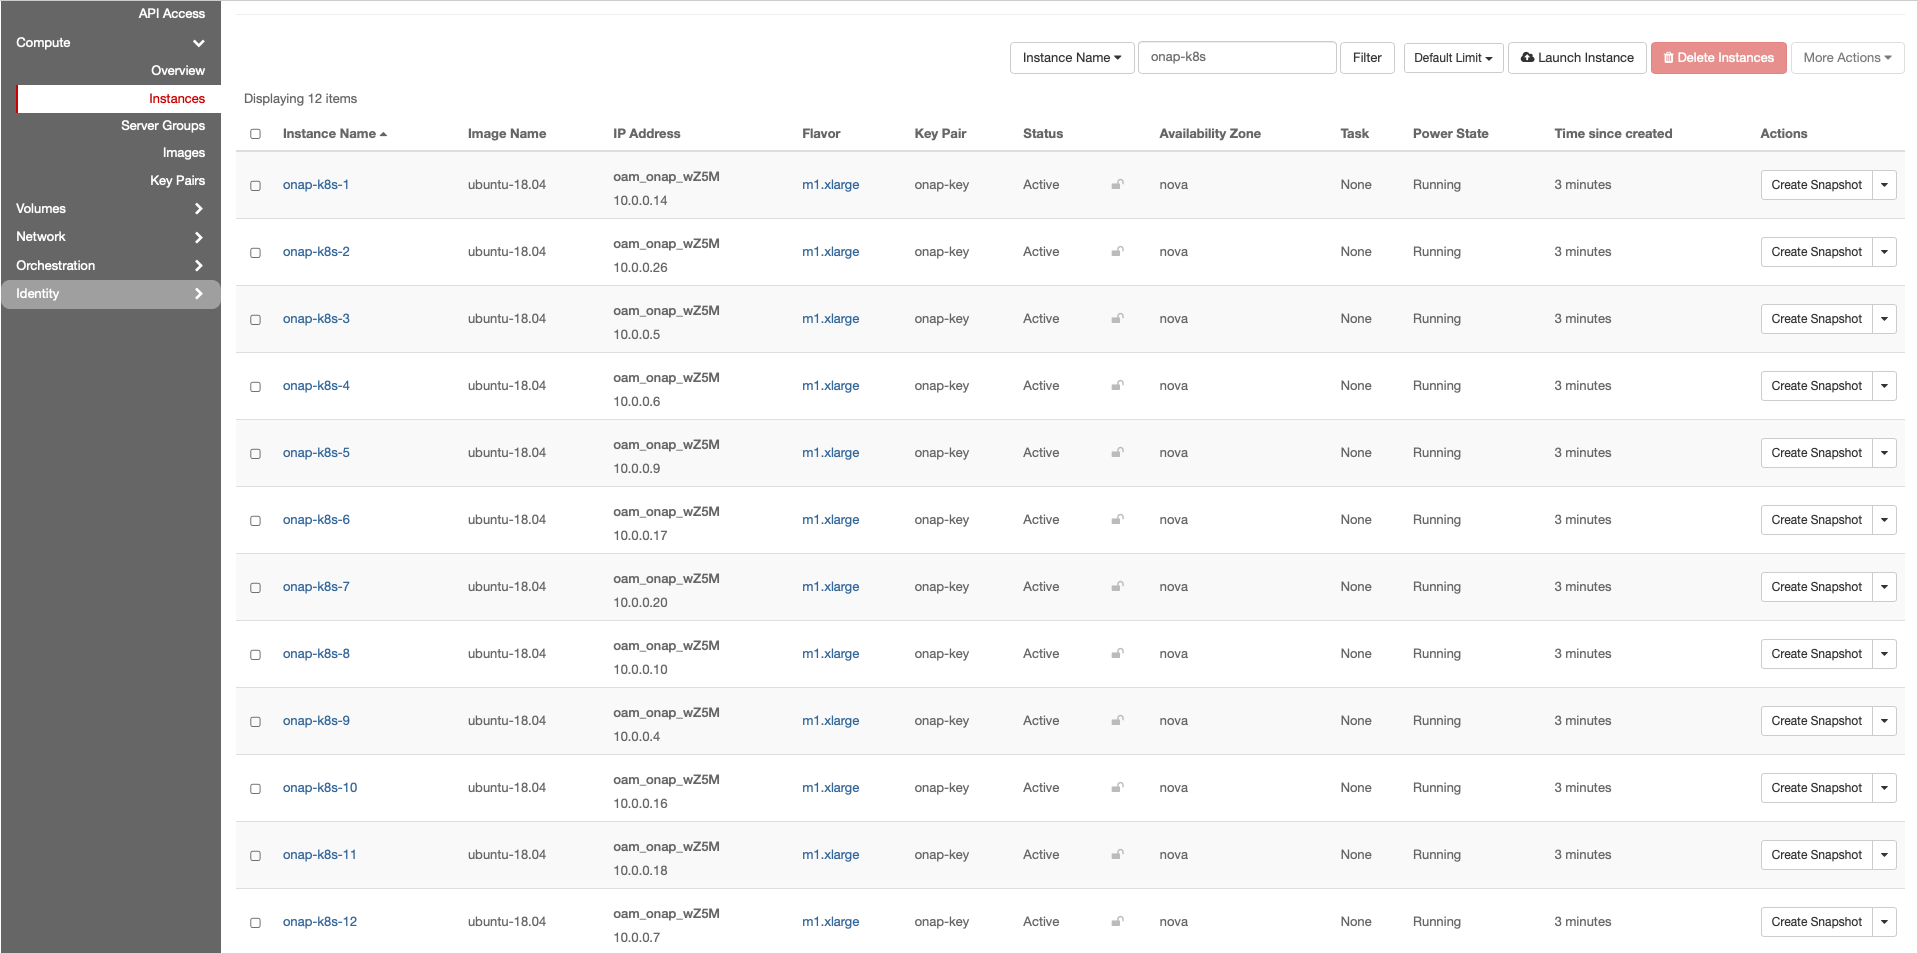
The number and size of Worker VMs is dependent on the size of the ONAP deployment. By default, all ONAP applications are deployed. It’s possible to customize the deployment and enable a subset of the ONAP applications. For the purpose of this guide, however, we will deploy 12 Kubernetes Workers that have been sized to handle the entire ONAP application workload.
Select Ubuntu 18.04 as base image
Select “No” on “Create New Volume”

Select Flavor
The size of Kubernetes hosts depend on the size of the ONAP deployment being installed.
If a small subset of ONAP applications are being deployed (i.e. for testing purposes), then 16GB or 32GB may be sufficient.
Networking

Security Group
Key Pair
Assign the key pair that was created/selected previously (e.g. onap_key).
Apply customization script for Kubernetes VM(s)
Click openstack-k8s-workernode.sh to
download the script.
#!/bin/sh

DOCKER_VERSION=18.09.5

apt-get update

curl https://releases.rancher.com/install-docker/$DOCKER_VERSION.sh | sh
mkdir -p /etc/systemd/system/docker.service.d/
cat > /etc/systemd/system/docker.service.d/docker.conf << EOF
[Service]
ExecStart=
ExecStart=/usr/bin/dockerd -H fd:// --insecure-registry=nexus3.onap.org:10001
EOF

sudo usermod -aG docker ubuntu

systemctl daemon-reload
systemctl restart docker
apt-mark hold docker-ce

IP_ADDR=$(ip address |grep ens|grep inet|awk '{print $2}'| awk -F / '{print $1}')
HOST_NAME=$(hostname)

echo "$IP_ADDR $HOST_NAME" >> /etc/hosts

docker login -u docker -p docker nexus3.onap.org:10001

sudo apt-get install make -y

# install nfs
sudo apt-get install nfs-common -y


exit 0
This customization script will:
update ubuntu
install docker
install nfs common
Launch Instance
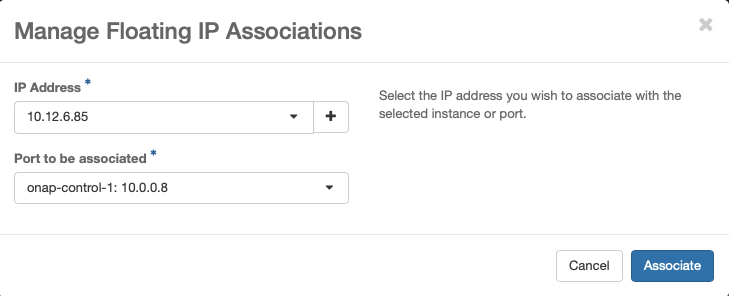
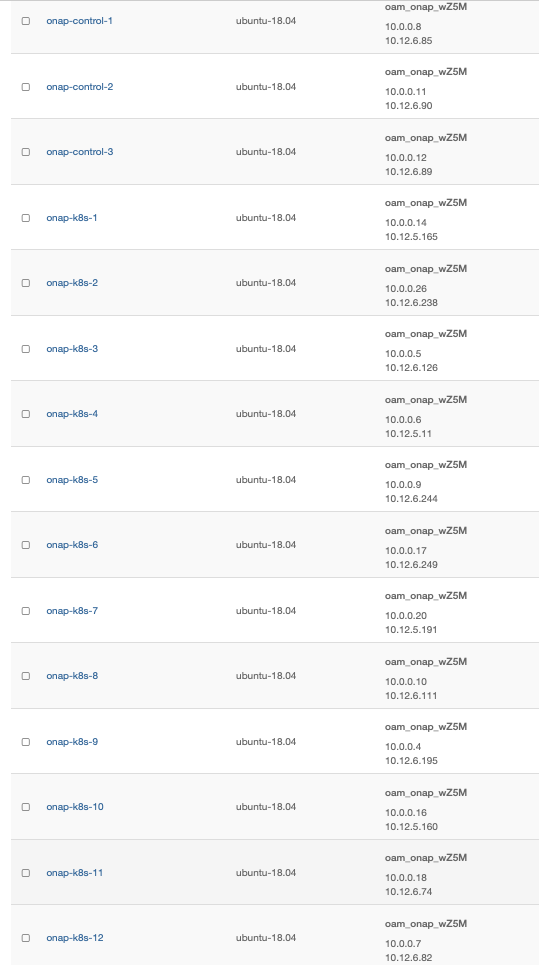
Assign Floating IP addresses
Assign Floating IPs to all Control Plane and Worker VMs. These addresses provide external access to the VMs and will be used by RKE to configure kubernetes on to the VMs.
Repeat the following for each VM previously created:
Resulting floating IP assignments in this example.
Configure Rancher Kubernetes Engine (RKE)
Install RKE
Download and install RKE on a VM, desktop or laptop. Binaries can be found here for Linux and Mac: https://github.com/rancher/rke/releases/tag/v1.0.6
Note
There are several ways to install RKE. Further parts of this documentation assumes that you have rke command available. If you don’t know how to install RKE you may follow the below steps:
chmod +x ./rke_linux-amd64
sudo mv ./rke_linux-amd64 /user/local/bin/rke
RKE requires a cluster.yml as input. An example file is show below that describes a Kubernetes cluster that will be mapped onto the OpenStack VMs created earlier in this guide.
Click cluster.yml to download the
configuration file.
# An example of an HA Kubernetes cluster for ONAP
nodes:
- address: 10.12.6.85
  port: "22"
  internal_address: 10.0.0.8
  role:
  - controlplane
  - etcd
  hostname_override: "onap-control-1"
  user: ubuntu
  ssh_key_path: "~/.ssh/onap-key"
- address: 10.12.6.90
  port: "22"
  internal_address: 10.0.0.11
  role:
  - controlplane
  - etcd
  hostname_override: "onap-control-2"
  user: ubuntu
  ssh_key_path: "~/.ssh/onap-key"
- address: 10.12.6.89
  port: "22"
  internal_address: 10.0.0.12
  role:
  - controlplane
  - etcd
  hostname_override: "onap-control-3"
  user: ubuntu
  ssh_key_path: "~/.ssh/onap-key"
- address: 10.12.5.165
  port: "22"
  internal_address: 10.0.0.14
  role:
  - worker
  hostname_override: "onap-k8s-1"
  user: ubuntu
  ssh_key_path: "~/.ssh/onap-key"
- address: 10.12.6.238
  port: "22"
  internal_address: 10.0.0.26
  role:
  - worker
  hostname_override: "onap-k8s-2"
  user: ubuntu
  ssh_key_path: "~/.ssh/onap-key"
- address: 10.12.6.126
  port: "22"
  internal_address: 10.0.0.5
  role:
  - worker
  hostname_override: "onap-k8s-3"
  user: ubuntu
  ssh_key_path: "~/.ssh/onap-key"
- address: 10.12.5.11
  port: "22"
  internal_address: 10.0.0.6
  role:
  - worker
  hostname_override: "onap-k8s-4"
  user: ubuntu
  ssh_key_path: "~/.ssh/onap-key"
- address: 10.12.6.244
  port: "22"
  internal_address: 10.0.0.9
  role:
  - worker
  hostname_override: "onap-k8s-5"
  user: ubuntu
  ssh_key_path: "~/.ssh/onap-key"
- address: 10.12.6.249
  port: "22"
  internal_address: 10.0.0.17
  role:
  - worker
  hostname_override: "onap-k8s-6"
  user: ubuntu
  ssh_key_path: "~/.ssh/onap-key"
- address: 10.12.5.191
  port: "22"
  internal_address: 10.0.0.20
  role:
  - worker
  hostname_override: "onap-k8s-7"
  user: ubuntu
  ssh_key_path: "~/.ssh/onap-key"
- address: 10.12.6.111
  port: "22"
  internal_address: 10.0.0.10
  role:
  - worker
  hostname_override: "onap-k8s-8"
  user: ubuntu
  ssh_key_path: "~/.ssh/onap-key"
- address: 10.12.6.195
  port: "22"
  internal_address: 10.0.0.4
  role:
  - worker
  hostname_override: "onap-k8s-9"
  user: ubuntu
  ssh_key_path: "~/.ssh/onap-key"
- address: 10.12.5.160
  port: "22"
  internal_address: 10.0.0.16
  role:
  - worker
  hostname_override: "onap-k8s-10"
  user: ubuntu
  ssh_key_path: "~/.ssh/onap-key"
- address: 10.12.6.74
  port: "22"
  internal_address: 10.0.0.18
  role:
  - worker
  hostname_override: "onap-k8s-11"
  user: ubuntu
  ssh_key_path: "~/.ssh/onap-key"
- address: 10.12.6.82
  port: "22"
  internal_address: 10.0.0.7
  role:
  - worker
  hostname_override: "onap-k8s-12"
  user: ubuntu
  ssh_key_path: "~/.ssh/onap-key"
services:
  kube-api:
    service_cluster_ip_range: 10.43.0.0/16
    pod_security_policy: false
    always_pull_images: false
  kube-controller:
    cluster_cidr: 10.42.0.0/16
    service_cluster_ip_range: 10.43.0.0/16
  kubelet:
    cluster_domain: cluster.local
    cluster_dns_server: 10.43.0.10
    fail_swap_on: false
network:
  plugin: canal
authentication:
  strategy: x509
ssh_key_path: "~/.ssh/onap-key"
ssh_agent_auth: false
authorization:
  mode: rbac
ignore_docker_version: false
kubernetes_version: "v1.15.11-rancher1-2"
private_registries:
- url: nexus3.onap.org:10001
  user: docker
  password: docker
  is_default: true
cluster_name: "onap"
restore:
  restore: false
  snapshot_name: ""
Prepare cluster.yml
Before this configuration file can be used the external address and the internal_address must be mapped for each control and worker node in this file.
Run RKE
From within the same directory as the cluster.yml file, simply execute:
> rke up
The output will look something like:
INFO[0000] Initiating Kubernetes cluster
INFO[0000] [certificates] Generating admin certificates and kubeconfig
INFO[0000] Successfully Deployed state file at [./cluster.rkestate]
INFO[0000] Building Kubernetes cluster
INFO[0000] [dialer] Setup tunnel for host [10.12.6.82]
INFO[0000] [dialer] Setup tunnel for host [10.12.6.249]
INFO[0000] [dialer] Setup tunnel for host [10.12.6.74]
INFO[0000] [dialer] Setup tunnel for host [10.12.6.85]
INFO[0000] [dialer] Setup tunnel for host [10.12.6.238]
INFO[0000] [dialer] Setup tunnel for host [10.12.6.89]
INFO[0000] [dialer] Setup tunnel for host [10.12.5.11]
INFO[0000] [dialer] Setup tunnel for host [10.12.6.90]
INFO[0000] [dialer] Setup tunnel for host [10.12.6.244]
INFO[0000] [dialer] Setup tunnel for host [10.12.5.165]
INFO[0000] [dialer] Setup tunnel for host [10.12.6.126]
INFO[0000] [dialer] Setup tunnel for host [10.12.6.111]
INFO[0000] [dialer] Setup tunnel for host [10.12.5.160]
INFO[0000] [dialer] Setup tunnel for host [10.12.5.191]
INFO[0000] [dialer] Setup tunnel for host [10.12.6.195]
INFO[0002] [network] Deploying port listener containers
INFO[0002] [network] Pulling image [nexus3.onap.org:10001/rancher/rke-tools:v0.1.27] on host [10.12.6.85]
INFO[0002] [network] Pulling image [nexus3.onap.org:10001/rancher/rke-tools:v0.1.27] on host [10.12.6.89]
INFO[0002] [network] Pulling image [nexus3.onap.org:10001/rancher/rke-tools:v0.1.27] on host [10.12.6.90]
INFO[0011] [network] Successfully pulled image [nexus3.onap.org:10001/rancher/rke-tools:v0.1.27] on host [10.12.6.89]
. . . .
INFO[0309] [addons] Setting up Metrics Server
INFO[0309] [addons] Saving ConfigMap for addon rke-metrics-addon to Kubernetes
INFO[0309] [addons] Successfully saved ConfigMap for addon rke-metrics-addon to Kubernetes
INFO[0309] [addons] Executing deploy job rke-metrics-addon
INFO[0315] [addons] Metrics Server deployed successfully
INFO[0315] [ingress] Setting up nginx ingress controller
INFO[0315] [addons] Saving ConfigMap for addon rke-ingress-controller to Kubernetes
INFO[0316] [addons] Successfully saved ConfigMap for addon rke-ingress-controller to Kubernetes
INFO[0316] [addons] Executing deploy job rke-ingress-controller
INFO[0322] [ingress] ingress controller nginx deployed successfully
INFO[0322] [addons] Setting up user addons
INFO[0322] [addons] no user addons defined
INFO[0322] Finished building Kubernetes cluster successfully
Install Kubectl
Download and install kubectl. Binaries can be found here for Linux and Mac:
https://storage.googleapis.com/kubernetes-release/release/v1.15.11/bin/linux/amd64/kubectl https://storage.googleapis.com/kubernetes-release/release/v1.15.11/bin/darwin/amd64/kubectl
You only need to install kubectl where you’ll launch Kubernetes command. This can be any machines of the Kubernetes cluster or a machine that has IP access to the APIs. Usually, we use the first controller as it has also access to internal Kubernetes services, which can be convenient.
Validate deployment
> mkdir -p ~/.kube

> cp kube_config_cluster.yml ~/.kube/config.onap

> export KUBECONFIG=~/.kube/config.onap

> kubectl config use-context onap

> kubectl get nodes -o=wide
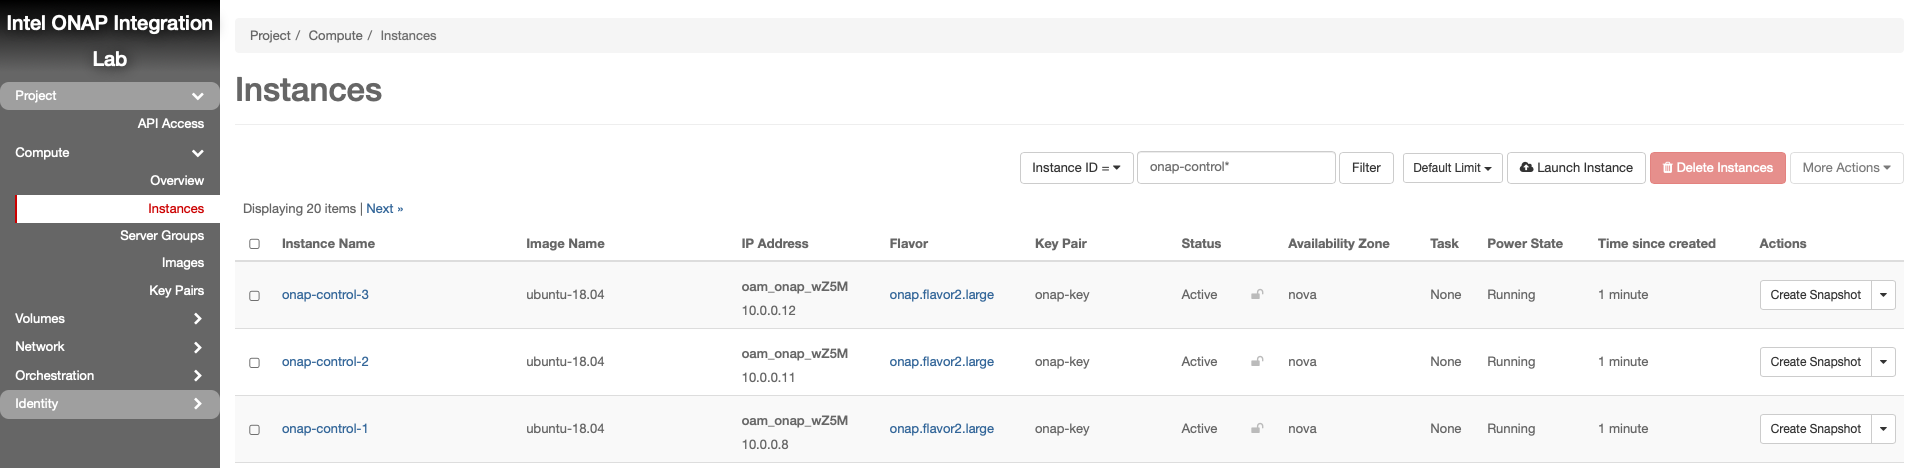
NAME             STATUS   ROLES               AGE     VERSION   INTERNAL-IP   EXTERNAL-IP   OS-IMAGE           KERNEL-VERSION      CONTAINER-RUNTIME
onap-control-1   Ready    controlplane,etcd   3h53m   v1.15.2   10.0.0.8      <none>        Ubuntu 18.04 LTS   4.15.0-22-generic   docker://18.9.5
onap-control-2   Ready    controlplane,etcd   3h53m   v1.15.2   10.0.0.11     <none>        Ubuntu 18.04 LTS   4.15.0-22-generic   docker://18.9.5
onap-control-3   Ready    controlplane,etcd   3h53m   v1.15.2   10.0.0.12     <none>        Ubuntu 18.04 LTS   4.15.0-22-generic   docker://18.9.5
onap-k8s-1       Ready    worker              3h53m   v1.15.2   10.0.0.14     <none>        Ubuntu 18.04 LTS   4.15.0-22-generic   docker://18.9.5
onap-k8s-10      Ready    worker              3h53m   v1.15.2   10.0.0.16     <none>        Ubuntu 18.04 LTS   4.15.0-22-generic   docker://18.9.5
onap-k8s-11      Ready    worker              3h53m   v1.15.2   10.0.0.18     <none>        Ubuntu 18.04 LTS   4.15.0-22-generic   docker://18.9.5
onap-k8s-12      Ready    worker              3h53m   v1.15.2   10.0.0.7      <none>        Ubuntu 18.04 LTS   4.15.0-22-generic   docker://18.9.5
onap-k8s-2       Ready    worker              3h53m   v1.15.2   10.0.0.26     <none>        Ubuntu 18.04 LTS   4.15.0-22-generic   docker://18.9.5
onap-k8s-3       Ready    worker              3h53m   v1.15.2   10.0.0.5      <none>        Ubuntu 18.04 LTS   4.15.0-22-generic   docker://18.9.5
onap-k8s-4       Ready    worker              3h53m   v1.15.2   10.0.0.6      <none>        Ubuntu 18.04 LTS   4.15.0-22-generic   docker://18.9.5
onap-k8s-5       Ready    worker              3h53m   v1.15.2   10.0.0.9      <none>        Ubuntu 18.04 LTS   4.15.0-22-generic   docker://18.9.5
onap-k8s-6       Ready    worker              3h53m   v1.15.2   10.0.0.17     <none>        Ubuntu 18.04 LTS   4.15.0-22-generic   docker://18.9.5
onap-k8s-7       Ready    worker              3h53m   v1.15.2   10.0.0.20     <none>        Ubuntu 18.04 LTS   4.15.0-22-generic   docker://18.9.5
onap-k8s-8       Ready    worker              3h53m   v1.15.2   10.0.0.10     <none>        Ubuntu 18.04 LTS   4.15.0-22-generic   docker://18.9.5
onap-k8s-9       Ready    worker              3h53m   v1.15.2   10.0.0.4      <none>        Ubuntu 18.04 LTS   4.15.0-22-generic   docker://18.9.5
Install Helm
Example Helm client install on Linux:
> wget https://get.helm.sh/helm-v2.16.6-linux-amd64.tar.gz

> tar -zxvf helm-v2.16.6-linux-amd64.tar.gz

> sudo mv linux-amd64/helm /usr/local/bin/helm
Initialize Kubernetes Cluster for use by Helm
> kubectl -n kube-system create serviceaccount tiller

> kubectl create clusterrolebinding tiller --clusterrole=cluster-admin --serviceaccount=kube-system:tiller

> helm init --service-account tiller

> kubectl -n kube-system  rollout status deploy/tiller-deploy
Setting up an NFS share for Multinode Kubernetes Clusters
Deploying applications to a Kubernetes cluster requires Kubernetes nodes to share a common, distributed filesystem. In this tutorial, we will setup an NFS Master, and configure all Worker nodes a Kubernetes cluster to play the role of NFS slaves.
It is recommended that a separate VM, outside of the kubernetes cluster, be used. This is to ensure that the NFS Master does not compete for resources with Kubernetes Control Plane or Worker Nodes.
Launch new NFS Server VM instance
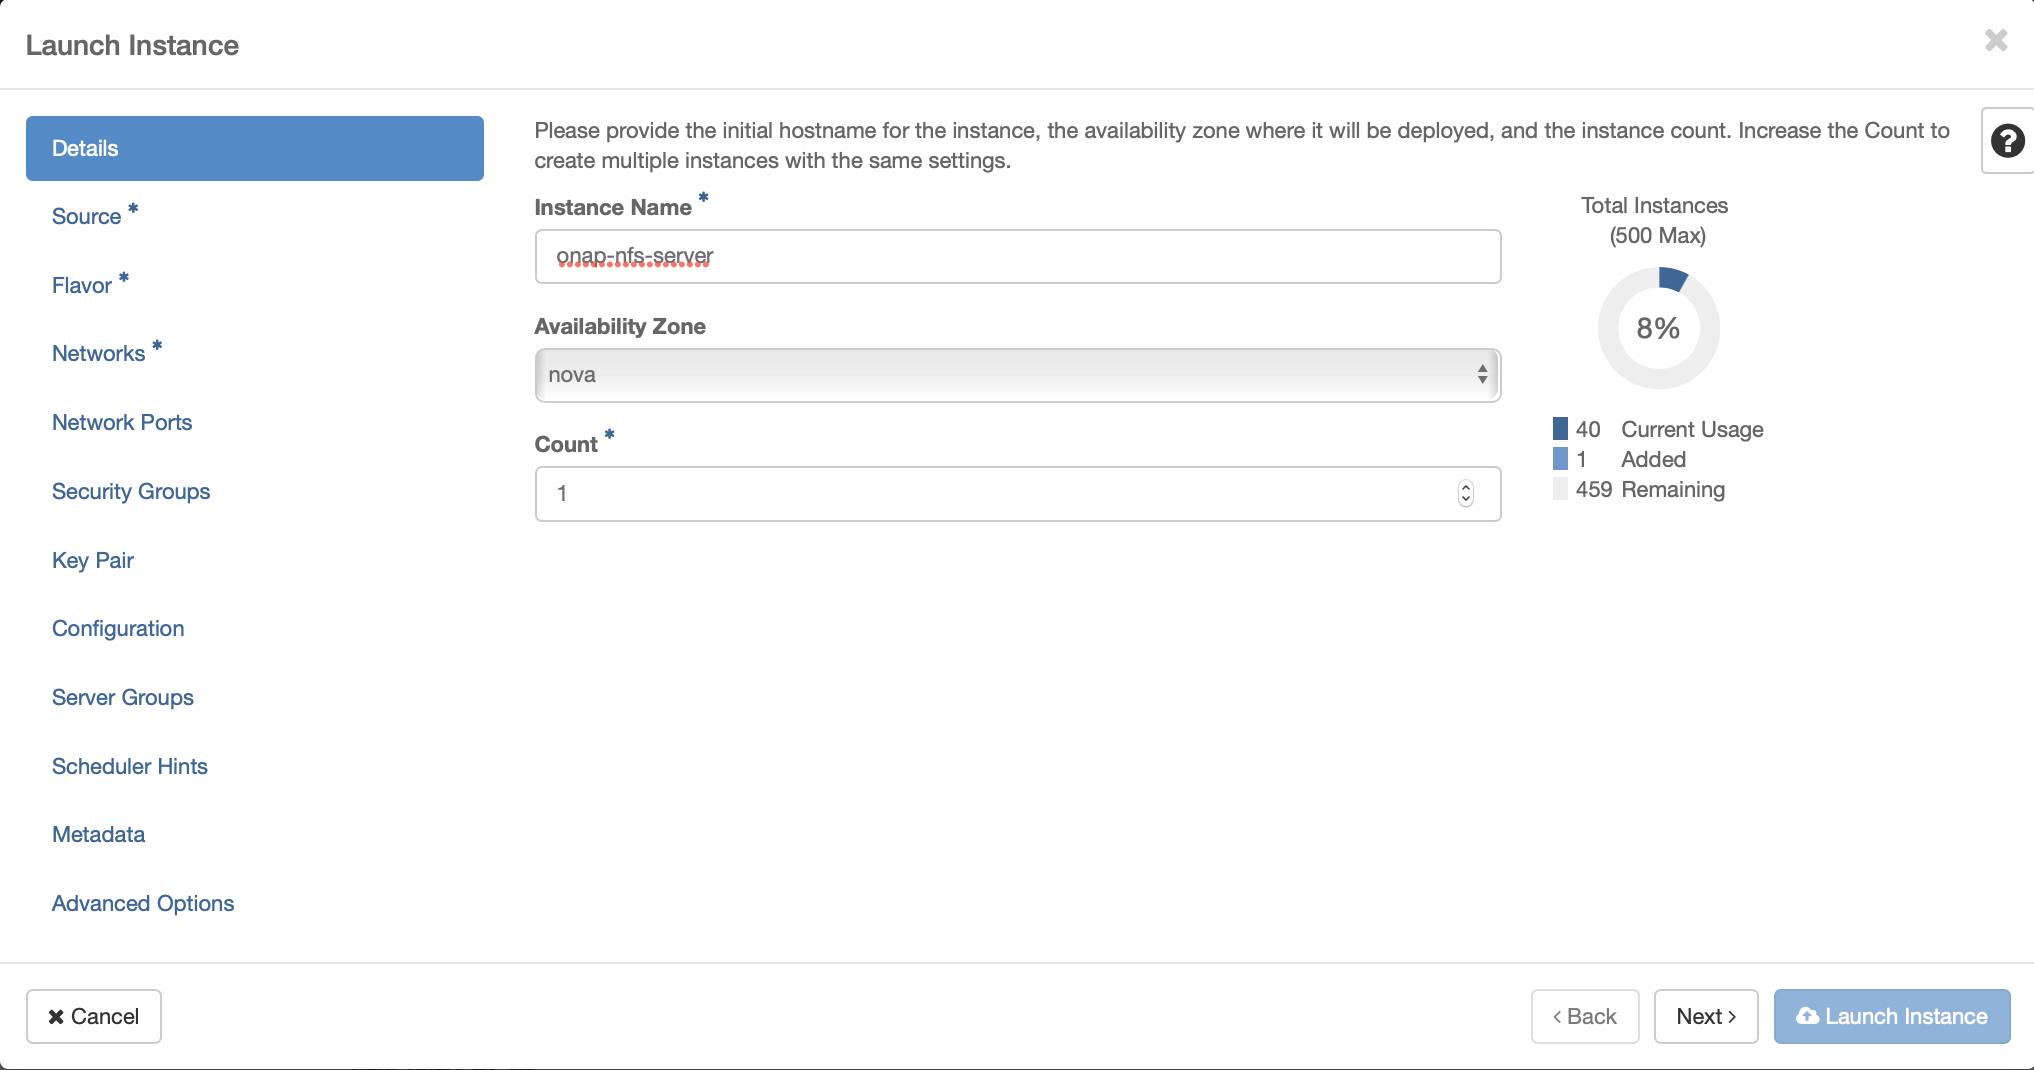
Select Ubuntu 18.04 as base image
Select “No” on “Create New Volume”
Select Flavor
Networking

Security Group
Key Pair
Assign the key pair that was created/selected previously (e.g. onap_key).

Apply customization script for NFS Server VM
Click openstack-nfs-server.sh to download
the script.
#!/bin/sh

apt-get update

IP_ADDR=$(ip address |grep ens|grep inet|awk '{print $2}'| awk -F / '{print $1}')
HOST_NAME=$(hostname)

echo "$IP_ADDR $HOST_NAME" >> /etc/hosts

sudo apt-get install make -y

# nfs server
sudo apt-get install nfs-kernel-server -y

sudo mkdir -p /nfs_share
sudo chown nobody:nogroup /nfs_share/

exit 0
This customization script will:
update ubuntu
install nfs server
Launch Instance

Assign Floating IP addresses
Resulting floating IP assignments in this example.

To properly set up an NFS share on Master and Slave nodes, the user can run the scripts below.
Click master_nfs_node.sh to download the
script.
#!/bin/sh

usage () {
  echo "Usage:"
  echo "   ./$(basename $0) node1_ip node2_ip ... nodeN_ip"
  exit 1
}

if [ "$#" -lt 1 ]; then
  echo "Missing NFS slave nodes"
  usage
fi

#Install NFS kernel
sudo apt-get update
sudo apt-get install -y nfs-kernel-server

#Create /dockerdata-nfs and set permissions
sudo mkdir -p /dockerdata-nfs
sudo chmod 777 -R /dockerdata-nfs
sudo chown nobody:nogroup /dockerdata-nfs/

#Update the /etc/exports
NFS_EXP=""
for i in $@; do
  NFS_EXP="${NFS_EXP}$i(rw,sync,no_root_squash,no_subtree_check) "
done
echo "/dockerdata-nfs "$NFS_EXP | sudo tee -a /etc/exports

#Restart the NFS service
sudo exportfs -a
sudo systemctl restart nfs-kernel-server
Click slave_nfs_node.sh to download the script.
#!/bin/sh

usage () {
  echo "Usage:"
  echo "   ./$(basename $0) nfs_master_ip"
  exit 1
}

if [ "$#" -ne 1 ]; then
  echo "Missing NFS mater node"
  usage
fi

MASTER_IP=$1

#Install NFS common
sudo apt-get update
sudo apt-get install -y nfs-common

#Create NFS directory
sudo mkdir -p /dockerdata-nfs

#Mount the remote NFS directory to the local one
sudo mount $MASTER_IP:/dockerdata-nfs /dockerdata-nfs/
echo "$MASTER_IP:/dockerdata-nfs /dockerdata-nfs nfs auto,nofail,noatime,nolock,intr,tcp,actimeo=1800 0 0" | sudo tee -a /etc/fstab
The master_nfs_node.sh script runs in the NFS Master node and needs the list of NFS Slave nodes as input, e.g.:
> sudo ./master_nfs_node.sh node1_ip node2_ip ... nodeN_ip
The slave_nfs_node.sh script runs in each NFS Slave node and needs the IP of the NFS Master node as input, e.g.:
> sudo ./slave_nfs_node.sh master_node_ip
ONAP Deployment via OOM
Now that Kubernetes and Helm are installed and configured you can prepare to deploy ONAP. Follow the instructions in the README.md or look at the official documentation to get started:
OOM Quick Start Guide - deploy ONAP on an existing cloud
OOM User Guide helm3 (experimental) - a guide for operators of an ONAP instance