Resource Onboarding
- Goal: Add models and other artifacts required to create, configure,
instantiate, and manage a VF/PNF and, optionally, a VFC.
Tool: SDC
SDC user role: Designer
- Steps
- After updating the artifacts in a VSP, also update:
the VF/PNF created from the VSP
any services that include the VF/PNF

Create a License Model [Optional]
VSPs optionally require a license and entitlements to enable the service provider to track the usage.
Note
For interim saving while creating the license model and its components, click 
Prerequisites: To obtain license information, contact the service provider’s Supply Chain Management (SCM) group.
From the SDC HOME page, navigate to the ONBOARD Tab.
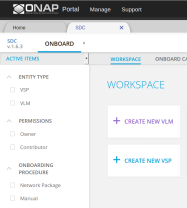
In the Workspace select CREATE NEW VLM.
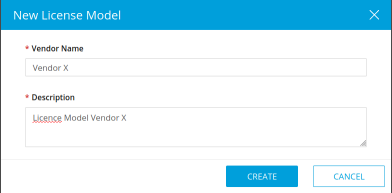
Complete all fields.
Click Create.
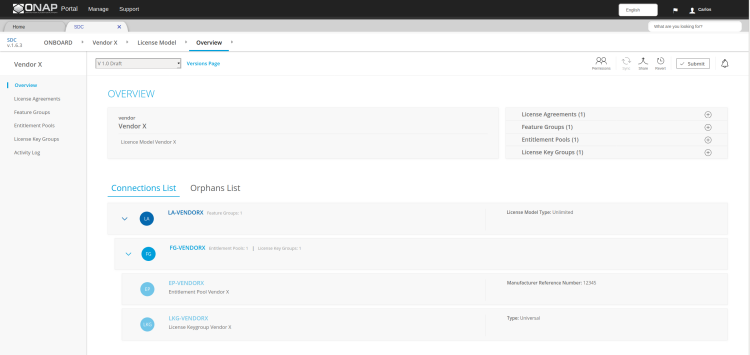
After creation of the VLM, you should be presented with the “Overview” tab of the VLM.
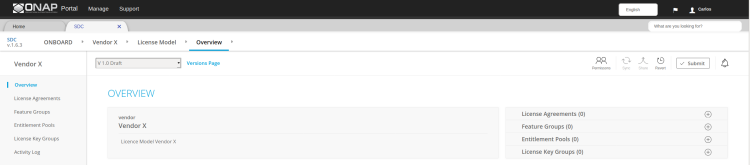
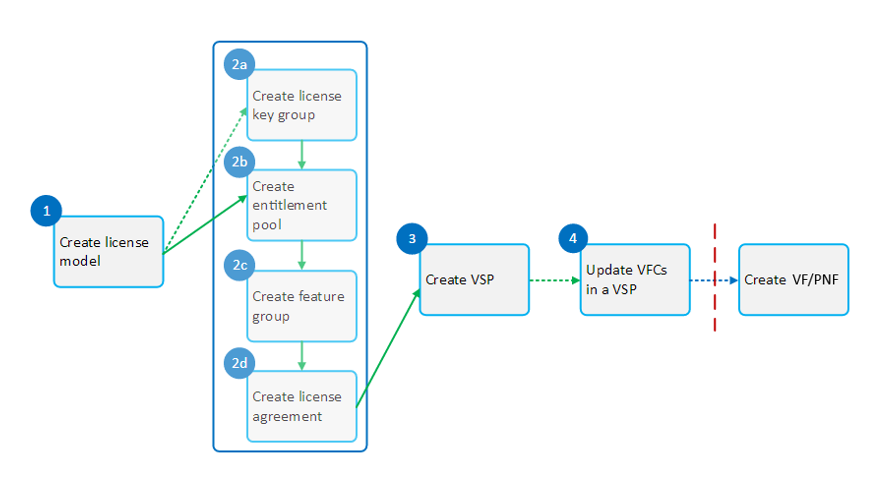
Select the following options in order:
Create 0 or more license key groups (see Create a License Key Group [Optional]).
Create 1 or more entitlement pools (see Create an Entitlement Pool).
Create 1 or more feature groups (see Create a Feature Group).
Create 1 or more license agreements (see Create a License Agreement).
Note: Perform all steps above before submitting the license model to the SDC catalog.
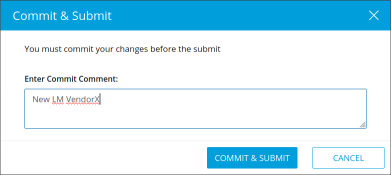
Click Submit to add the license model to the catalog.After filling a comment, press Commit&Submit.
After creating a license, complete Create a Vendor Software Product to add the VSP required for the associated VF/PNF.
Create a License Key Group [Optional]
If required by the resource model, create one or more license key groups; otherwise the license key group is optional.
Prerequisites: Create a License Model [Optional]
Select the License Model in the Onboard section of the SDC.
In the Overview click the + inside the License Key Groups OR Navigate to License Key Groups and click on “+ ADD LICENSE KEY GROUP”

Complete all fields (mandatory fields are marked by a red asterisk).
Click Save.
Create an Entitlement Pool
Prerequisites: If required by the resource model, create one or more license key groups (see Create a License Key Group [Optional]).
Select the License Model in the Onboard section of the SDC.
In the Overview click the + sign inside the Entitlement Pools OR Navigate to Entitlement Pools and click on “+ ADD ENTITLEMENT POOL”
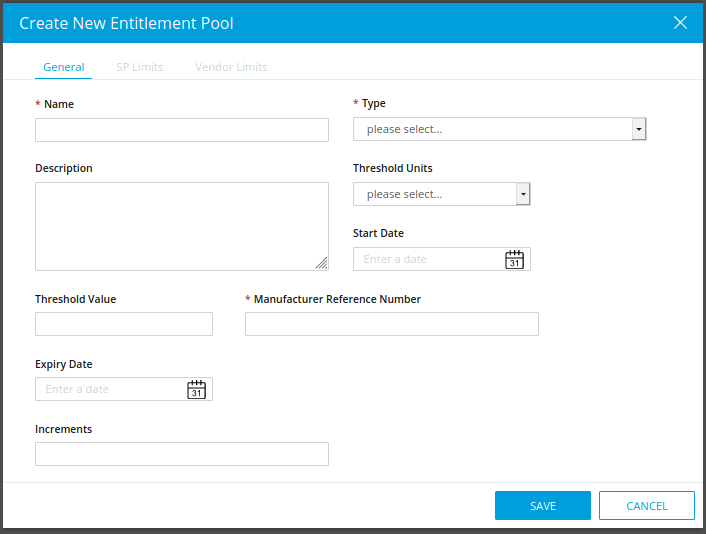
Complete required fields (mandatory fields are marked by a red asterisk).
Click Save.
Create a Feature Group
Prerequisites: Create one or more:
license key groups if required by the resource model (see Create a License Key Group [optional])
entitlement pools (see Create an Entitlement Pool)
Select the License Model in the Onboard section of the SDC.
In the Overview click the + sign inside the Feature Groups OR Navigate to Feature Groups and click on “+ ADD FEATURE GROUP”
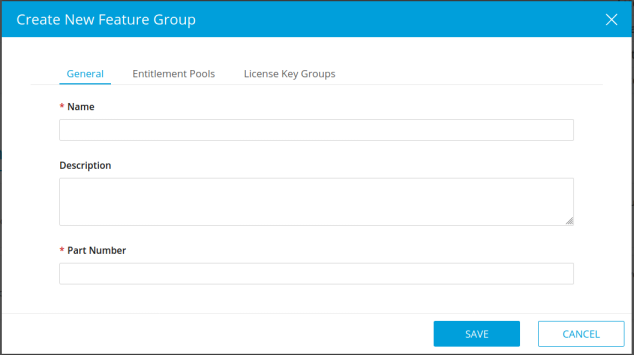
On the General tab, complete all fields.
- Navigate to the Entitlement Pools. Tab
In the Available Entitlement Pools, select one or more entitlement pools and click on the “>” sign.
Selected pools should now be seen under the Selected Entitlements Pools.
- Navigate to the License Key Groups. Tab
In the Available License Key Groups, select one or more license key groups and click on the “>” sign.
Selected pools should now be seen under the Selected License Key Groups.
Click Save.
Create a License Agreement
- Prerequisites: Create one or more feature groups
(see Create a Feature Group).
Select the License Model in the Onboard section of the SDC.
In the Overview click the + sign inside the License Agreements OR Navigate to License Agreements and click on “+ Add FEATURE GROUP”

On the General tab, complete required fields.
Click Feature Groups.
- If not selected, click Available Feature Groups.
Select one or more groups in the Available Feature Groups, select one or more feature groups and click on the “>” sign.
Selected feature groups should now be seen under the Selected Feature Groups.
Click Save.
Return to step 6 of Create a License Model [Optional] to complete the license model.
Create a Vendor Software Product
Create one or more Vendor Software Products (VSPs) as the building blocks for VFs/PNFs.
Note
For interim saving while creating a VSP, click
Prerequisites:
VNF HEAT package or VNF/PNF CSAR/Zip package is available.
See Onboarding Package Types for a description of the onboarding package types.
If the package is a secure package then pre-install the corresponding Root Certificate in SDC.
Note
Example packages can be found in the SDC project: SDC Packages
From the SDC HOME page, click ONBOARD.
In the Workspace select CREATE NEW VSP.
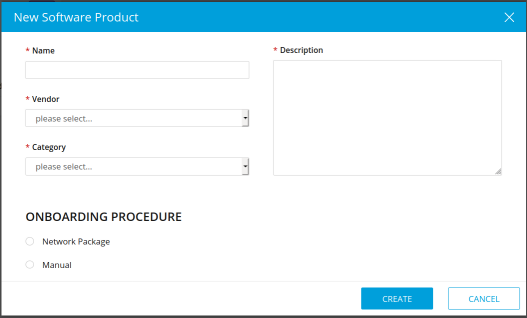
Complete all fields.
- Click Create.
The Overview page is shown
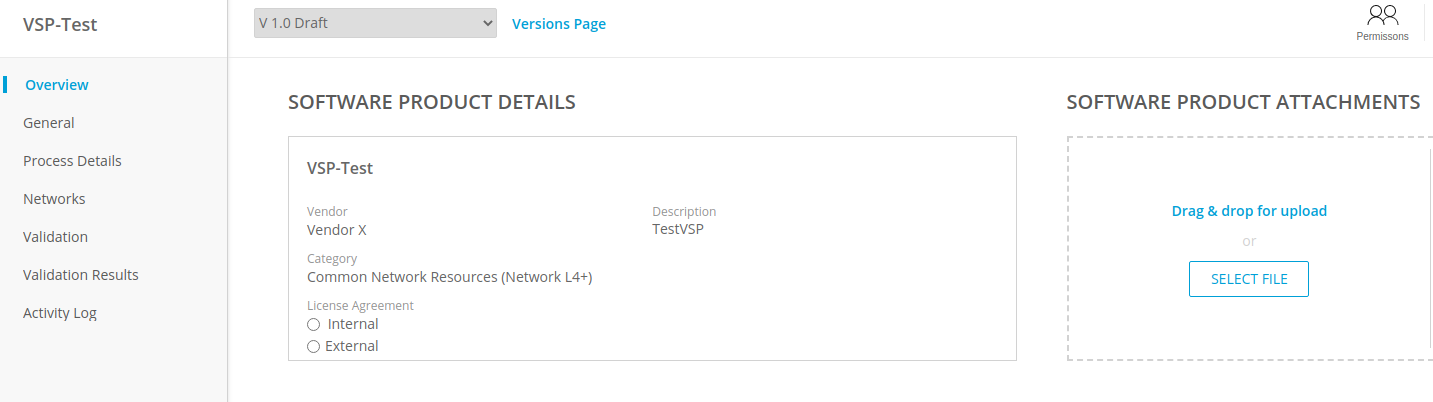
Click Internal in the software product details section.
Note
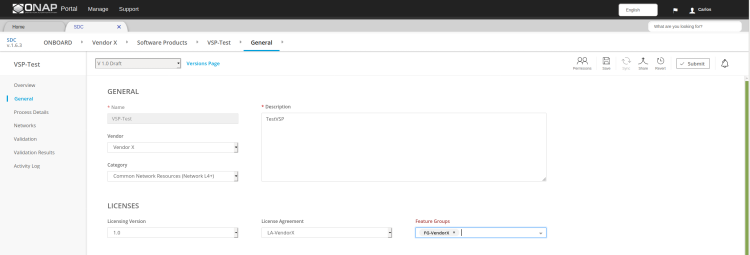
Under License Agreement, there is a choice between internal or external license. If internal is selected then after redirect to general tab, select licenses details. If external is selected then in general tab licenses details are disabled.
For the defined Vendor, select a licensing version, a license agreement, and one or more feature groups.
[Optional] Complete other fields, such as Availability (high-availability zones) and Storage Data Replication (requirement for storage replication), as required.
In the Overview section, select Software Product Attachments (right pane), click Select file.
In case of a VNF HEAT file: Locate the Heat .zip package and click Open.
In case of a VNF or PNF CSAR file: Locate the VNF or PNF csar/.zip package and click Open.
The file is loaded and the attachments page opens
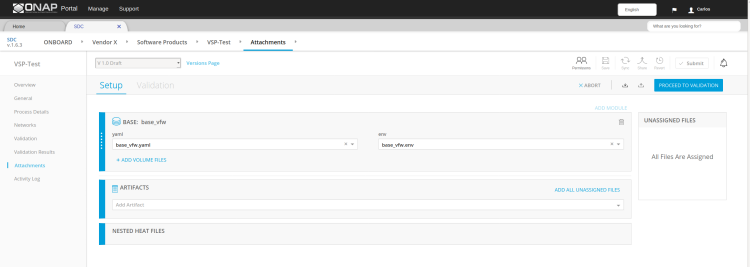
Press the Button Proceed to Validation. After successful validation, SDC displays the files and a success message. If validation fails, SDC displays the errors in the files.
In case the SDC Helm Validator is enabled in SDC configuration file and the onboarding package is a CNF which contains any helm charts listed in MANIFEST.json and marked as type=HELM, there will be an attempt to make a request to the Helm Validator for each chart, to check its validity. More information on Helm Validator can be found here
This validation feature is enabled by default, and checks, if the chart can be deployed by running helm template command. Helm v3 libraries are used for validation.
Example Heat errors:
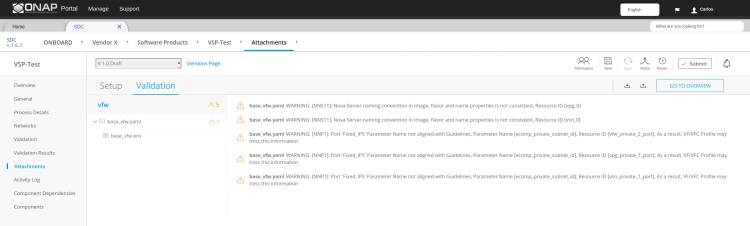
Example helm chart validation warnings:
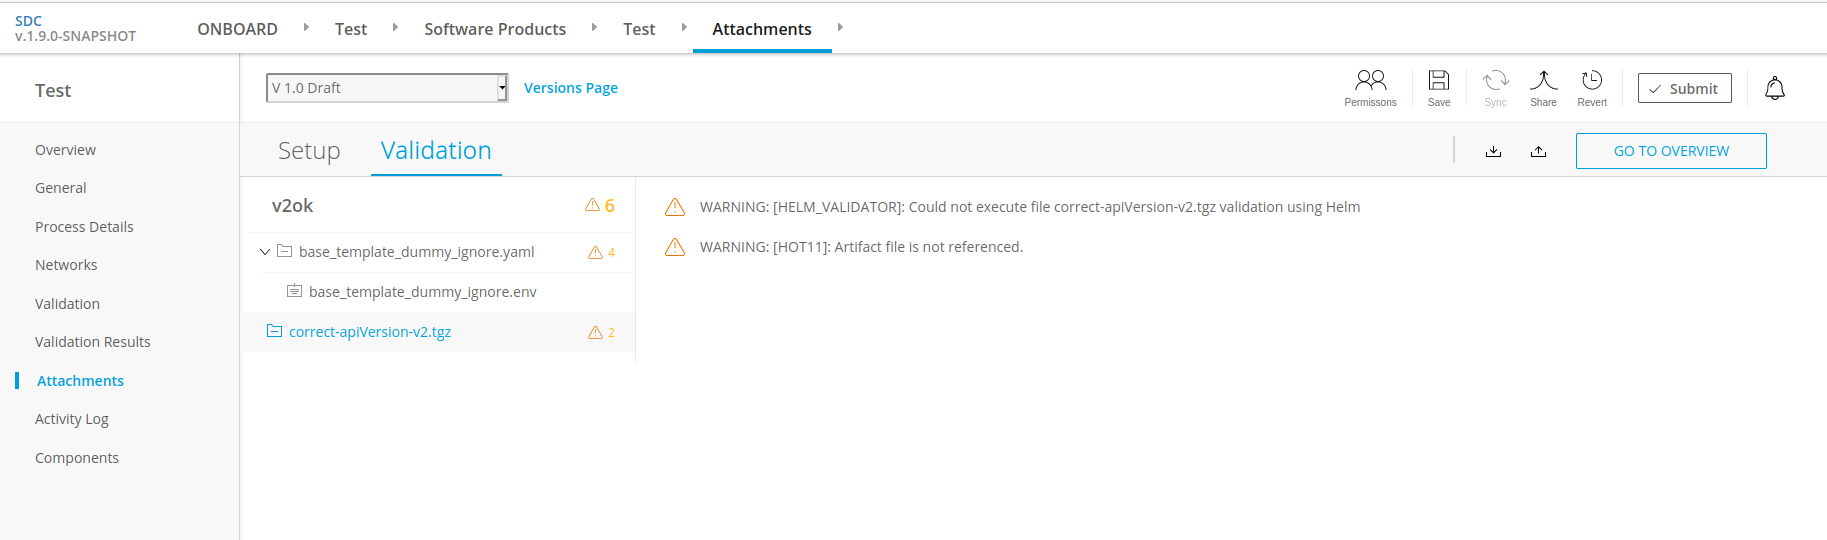
Example helm chart validation errors (which caused the Submit button to be disabled)

Click Submit to add the VSP to the catalog.
After filling a comment, press Commit&Submit.
A success message is displayed. If the VSP attachments contain errors, an error message is displayed instead. Fix the issue(s) and re-submit.
To configure VFCs associated with the VSP, see Update VFCs in a VSP [optional], below.
Update VFCs in a VSP [optional]
If required, configure Virtual Function Components (VFCs) associated with a VSP, such as the Hypervisor, VM recovery details, and cloning. VFCs are listed on the Components tab.
Note
All fields are optional. Answers to questionnaires are stored as metadata only on the SDC platform.
- Prerequisites: Add one or more VSPs
From the SDC HOME page, click ONBOARD and search for a VSP.
Selecting the VSP opens the Versions page.
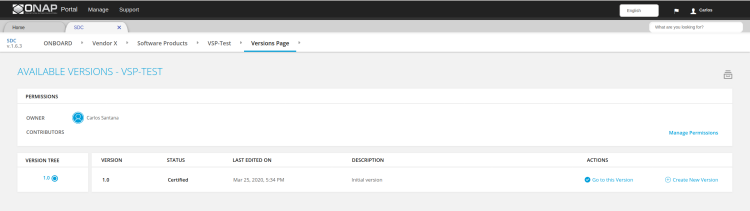
Press the + at Create New Version on the version to update
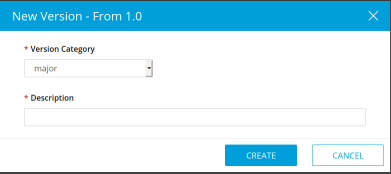
Fill the fields and press Create
In Components , click a VFC (VSP component).
The component links display in the left pane.
Click General to view and edit general parameters such as hypervisor, image format, VM recovery details, and DNS configuration.
Click Compute to view and edit VM parameters such as the number of VMs required for a VFC instance and persistent storage/volume size.
Click High Availability & Load Balancing to answer questions related to VM availability and load balancing.
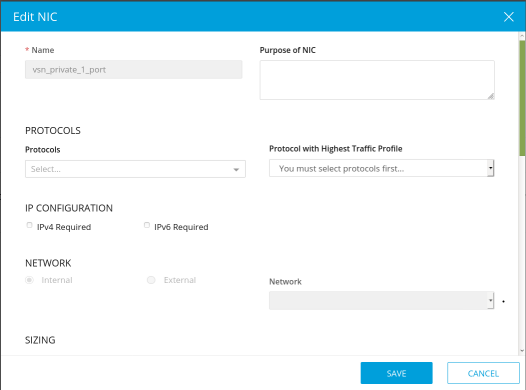
Click Networks to view or edit parameters related to network capacity and interfaces.
Note
Click an interface to view or edit it. A dialog box displays similar to the figure below.
Click Storage to configure storage information, such as backup type, storage size, and logging.
Click Process Details, click Add Component Process Details, and complete the Create New Process Details dialog box.
Use Process Details to identify the processes and configuration associated with VFCs.
Click Monitoring to upload MIB or JSON files for SNMP traps and polling.
To update the VSP, click Submit
After filling a comment, press Commit&Submit and the new version is certified.
Update a VSP [optional]
Upload a new onboarding package to a VSP. Afterward, update the VF/PNF and service.
- Prerequisites: Add one or more VSPs
From the SDC HOME page, click ONBOARD and search for a VSP.
Selecting the VSP opens the Versions page.
Press the + at Create New Version on the version to update
Fill the fields and press Create
In Software Product Attachments (right pane), click Select file.
In case of a VNF HEAT file: Locate the Heat .zip package and click Open.
In case of a VNF or PNF CSAR file: Locate the VNF or PNF csar/.zip package and click Open.
SDC warns that uploading a new package erases existing data.
Click Continue to upload the new package.
The file is loaded and the attachments page opens
Press the Button Proceed to Validation. After successful validation, SDC displays the files and a success message. If validation fails, SDC displays the errors in the files.
In case the SDC Helm Validator is enabled in SDC configuration file and the onboarding package is a CNF which contains any helm charts listed in MANIFEST.json and marked as type=HELM, there will be an attempt to make a request to the Helm Validator for each chart, to check its validity. More information on Helm Validator can be found here.
This validation feature is enabled by default, and checks, if the chart can be deployed by running helm template command. Helm v3 libraries are used for validation.
Example Heat errors:
Example helm chart validation warnings:
Example helm chart validation errors (which caused the Submit button to be disabled)
- Click Submit to add the new VSP version to the catalog.
After filling a comment, press Commit&Submit and the new version is certified.
After updating the VSP:
Upload the VSP to the Vf/PNF (see steps 3 to 5 in VF/PNF Creation and Testing).
- Update the VF/PNF version in services that include the VF/PNF (see step 4
in Service Design).
Pre-Install Root Certificate in SDC [only needed for secure package]
SDC supports the onboarding of packages that are secured according to security option 2 in ETSI NFV-SOL 004v2.6.1.
During onboarding, SDC will validate the authenticity and integrity of a secure package. To enable this validation, the root certificate corresponding to the certificate included in the package needs to be available to SDC. This is currently done by uploading the root certificate to the following default directory location:
/dockerdata-nfs/{{ .Release.Name }}/sdc/onbaording/cert
Note
The directory listed above is mapped to the following directory in the onboarding pod (sdc-onboarding-be)
/var/lib/jetty/cert
so it is also possible to copy the root certificate directly to this directory in the pod.
The location where the root certificate is uploaded is configurable. The relevant parameters are described in the cert block in the following values file:
<path_to_oom_kubernetes>/sdc/charts/sdc-onboarding-be/values.yaml