Deployment Steps
Pre-requisite
Make sure dcae postgres is properly deployed and functional. An external database, such as Elasticsearch and MongoDB is deployed. Install mongodb through the following command.
#docker run -itd –restart=always –name dl-mongo -p 27017:27017 mongo
- For DES service deployment, presto service is deployed. Here is a sample how presto deploy in the environment.
- Build a presto image:
The package of presto version we are using is v0.0.2:presto-v0.0.2.tar.gz
#docker build -t presto:v0.0.2 . #docker tag presto:v0.0.2 registry.baidubce.com/onap/presto:v0.0.2 #docker push registry.baidubce.com/onap/presto:v0.0.2
Note: Replace the repository path with your own repository.
Install presto service:
#kubectl -n onap run dl-presto –image=registry.baidubce.com/onap/presto:v0.0.2 –env=”MongoDB_IP=192.168.235.11” –env=”MongoDB_PORT=27017” #kubectl -n onap expose deployment dl-presto –port=9000 –target-port=9000 –type=NodePort
Note: MonoDB_IP and Mongo_PORT you can replace this two values with your own configuration.
After datalake getting deployed, the admin UI can be used to configure the sink database address and credentials.
Log-in to the DCAE Bootstrap POD
- First, we should find the bootstrap pod name through the following command and make sure that DCAE coudify manager is properly deployed.

- Login to the DCAE bootstrap pod through the following command.
#kubectl exec -it <DCAE bootstrap pod> /bin/bash -n onap
Validate Blueprint
- Before the blueprints uploading to Cloudify manager, the blueprints shoule be validated first through the following command.
#cfy blueprint validate /bluerints/k8s-datalake-feeder.yaml
#cfy blueprint validate /blueprints/k8s-datalake-admin-ui.yaml
#cfy blueprint validate /blueprints/k8s-datalake-des.yaml
Upload the Blueprint to Cloudify Manager.
- After validating, we can start to proceed blueprints uploading.
#cfy blueprint upload -b dl-feeder /bluerints/k8s-datalake-feeder.yaml
#cfy blueprint upload -b dl-admin-ui /blueprints/k8s-datalake-admin-ui.yaml
#cfy blueprint upload -b des /blueprints/k8s-datalake-des.yaml
Verify Uploaded Blueprints
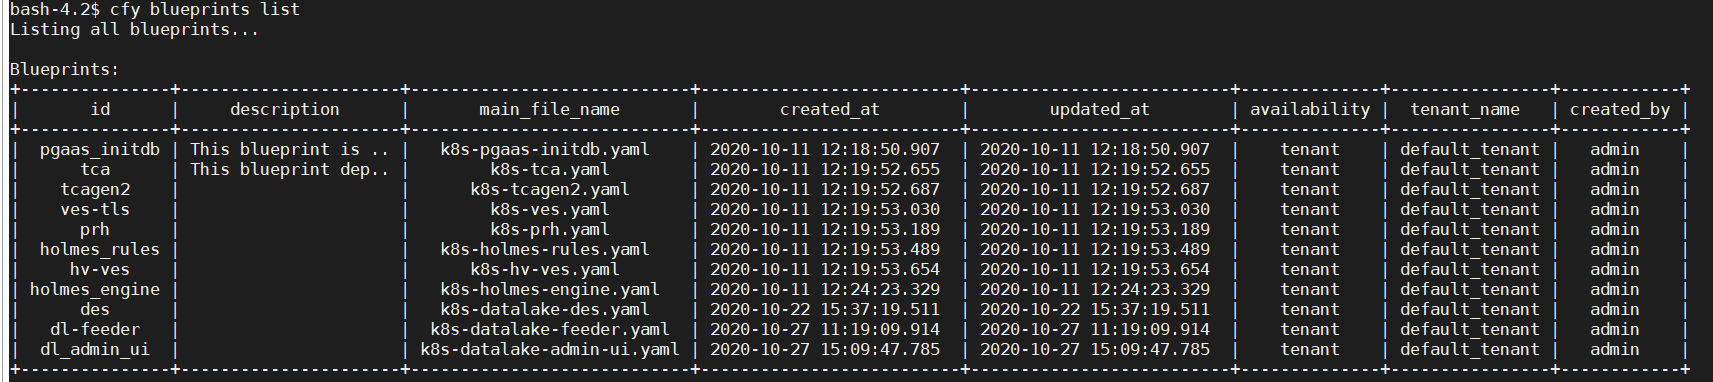
- Using “cfy blueprint list” to verify your work.
#cfy blueprint list- You can see the following returned message to show the blueprints have been correctly uploaded.
Verify Plugin Versions
- If the version of the plugin used is different, update the blueprint import to match.
#cfy plugins list
Create Deployment
- Here we are going to create deployments for both feeder and admin UI.
#cfy deployments create -b dl-feeder feeder-deploy
#cfy deployments create -b dl-admin-ui admin-ui-deploy
#cfy deployments create -b des des
Launch Service
- Next, we are going to launch the datalake.
#cfy executions start -d feeder-deploy install
#cfy executions start -d admin-ui-deploy install
#cfy executions start -d des install
Verify the Deployment Result
The following command can be used to list the datalake logs.
#kubectl logs <datalake-pod> -n onap
- The output should looks like.

- The des output should looks like.

If you find any Java exception from log, make sure that the external database and datalake configuration are properly configured. Admin UI can be used to configure the external database configuration.
Uninstall
- Uninstall running component and delete deployment
#cfy uninstall feeder-deploy
#cfy uninstall admin-ui-deploy
#cfy uninstall des
Delete Blueprint
#cfy blueprints delete dl-feeder
#cfy blueprints delett dl-admin-ui
#cfy blueprints delete des