DCAE MOD User Guide
Types of Users and Usage Instructions:
Sr.No |
User |
Usage Instructions |
|---|---|---|
Developers who are looking to onboard their mS |
- Access the Nifi Web UI url provided to you - Follow steps 2.c to 2.f - You should be able to see your microservices in the Nifi Web UI by clicking and dragging ‘Processor’ on the canvas, and searching for the name of the micros ervice/component/processor. |
|
Designers who are building the flows through UI and triggering distribution |
- Access the Nifi Web UI url provided to you - Follow steps 3 to the end of the document |
|
Infrastructure/ Admins who want to stand up DCAE Mod and validate it |
- Follow start to the end |
1. Deployment of DCAE MOD components via Helm charts
The DCAE MOD components are deployed using the standard ONAP OOM deployment process. When deploying ONAP using the helm deploy command, DCAE MOD components are deployed when the dcaemod.enabled flag is set to true, either via a –set option on the command line or by an entry in an overrides file. In this respect, DCAE MOD is no different from any other ONAP subsystem.
The default DCAE MOD deployment relies on an nginx ingress controller being available in the Kubernetes cluster where DCAE MOD is being deployed. The Rancher RKE installation process sets up a suitable ingress controller. In order to enable the use of the ingress controller, it is necessary to override the OOM default global settings for ingress configuration. Specifically, the installation needs to set the following configuration in an override file:
ingress:
  enabled: true
  virtualhost:
    baseurl: "simpledemo.onap.org"
When DCAE MOD is deployed with an ingress controller, several endpoints are exposed outside the cluster at the ingress controller’s external IP address and port. (In the case of a Rancher RKE installation, there is an ingress controller on every worker node, listening at the the standard HTTP port (80).) These exposed endpoints are needed by users using machines outside the Kubernetes cluster.
Endpoint |
** Routes to (cluster internal address)** |
Description |
|---|---|---|
/nifi |
Design tool Web UI |
|
/nifi-api |
Design tool API |
|
/nifi-jars |
Flow registry listing of JAR files built from component specs |
|
/onboarding |
Onboarding API |
|
/distributor |
Distributor API |
There are two additional internal endpoints that users need to know, in order to configure a registry client and a distribution target in the design tool’s controller settings.
Configuration Item |
Endpoint URL |
|---|---|
Registry client |
|
Distribution target |
With Guilin release, OOM/ingress template has been updated to enable virtual host by default. All MOD API’s and UI access via ingress should use dcaemod.simpledemo.onap.org.
In order to access Design UI from local, add an entry for dcaemod.simpledemo.onap.org in /etc/hosts with the correct IP (any K8S node IP can be specified).
Using DCAE MOD without an Ingress Controller
Not currently supported
2. Configuring DCAE mod
a. Configure Nifi Registry url
Next check Nifi settings by selecting the Hamburger button in the Nifi UI. It should lead you to the Nifi Settings screen

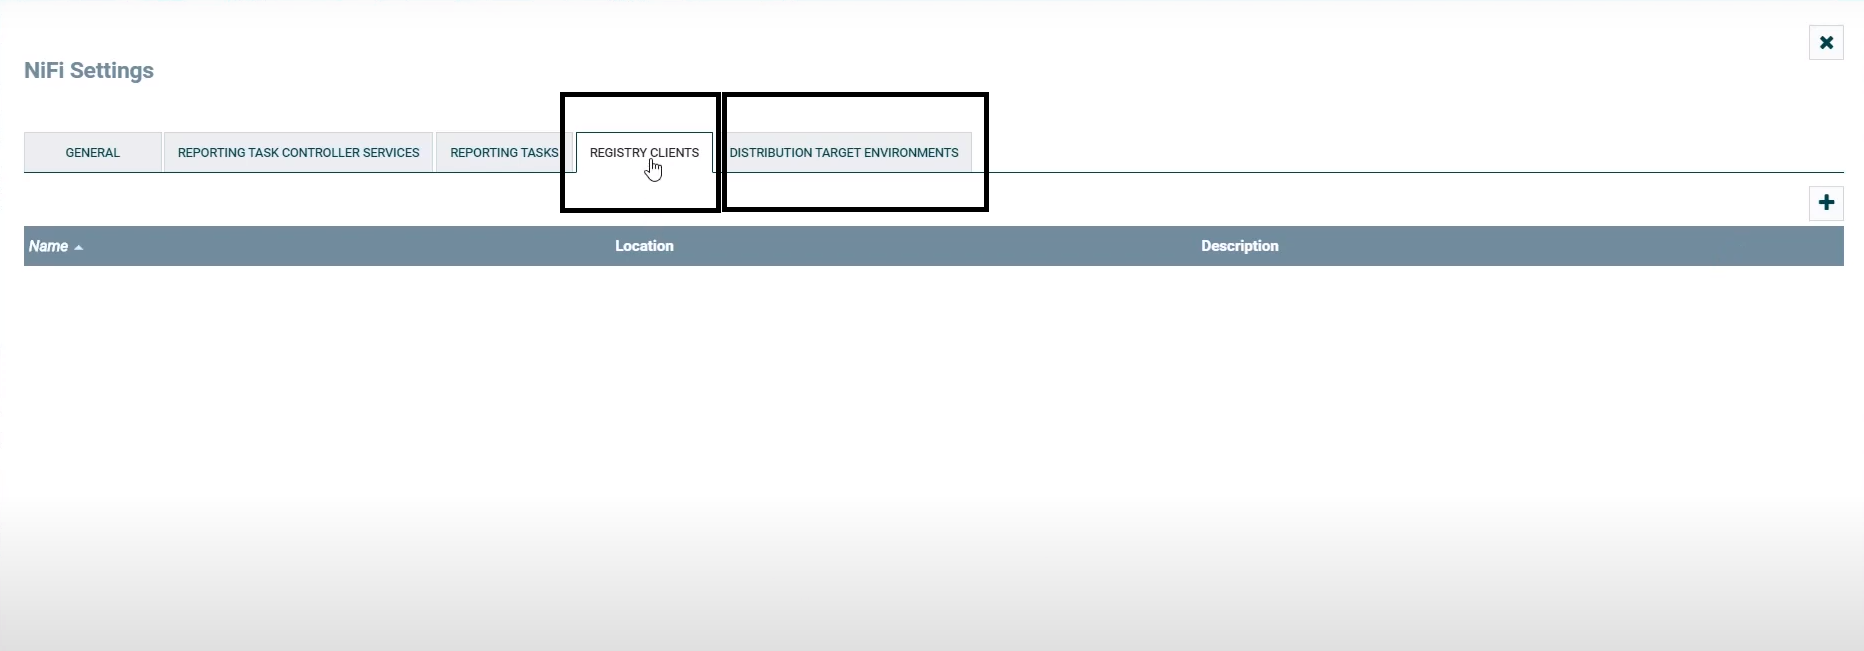
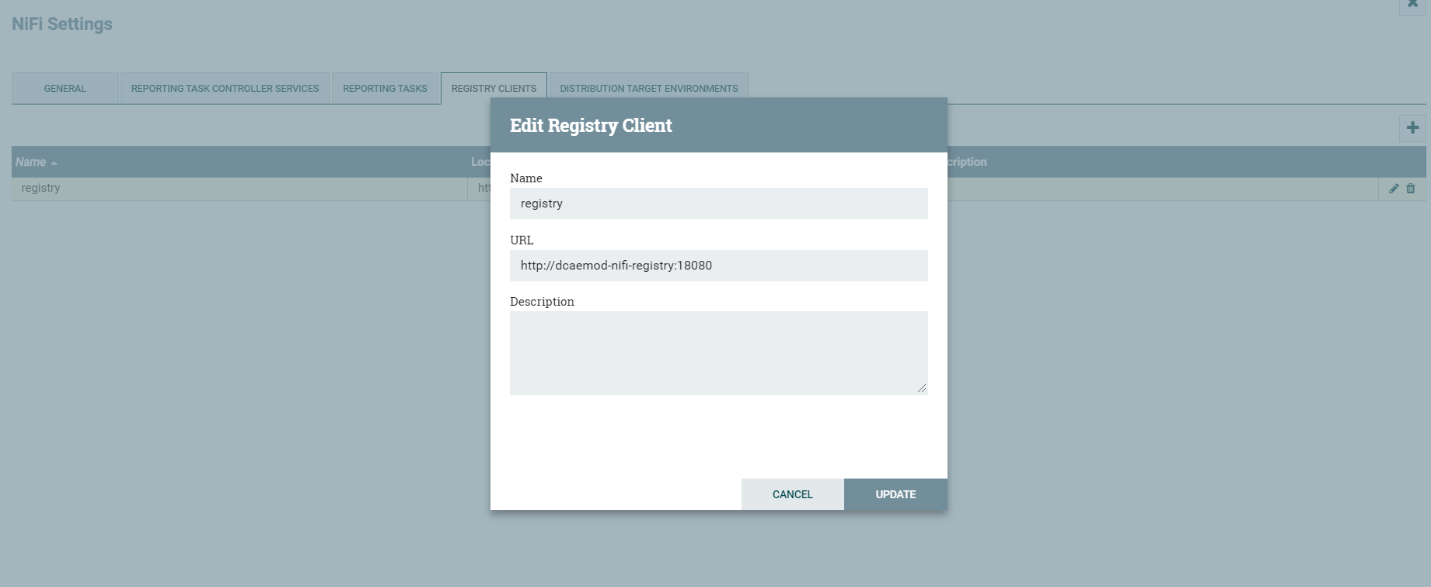
Add a registry client. The Registry client url will be http://dcaemod-nifi-registry:18080
b. Add distribution target which will be the runtime api url
Set the distribution target in the controller settings
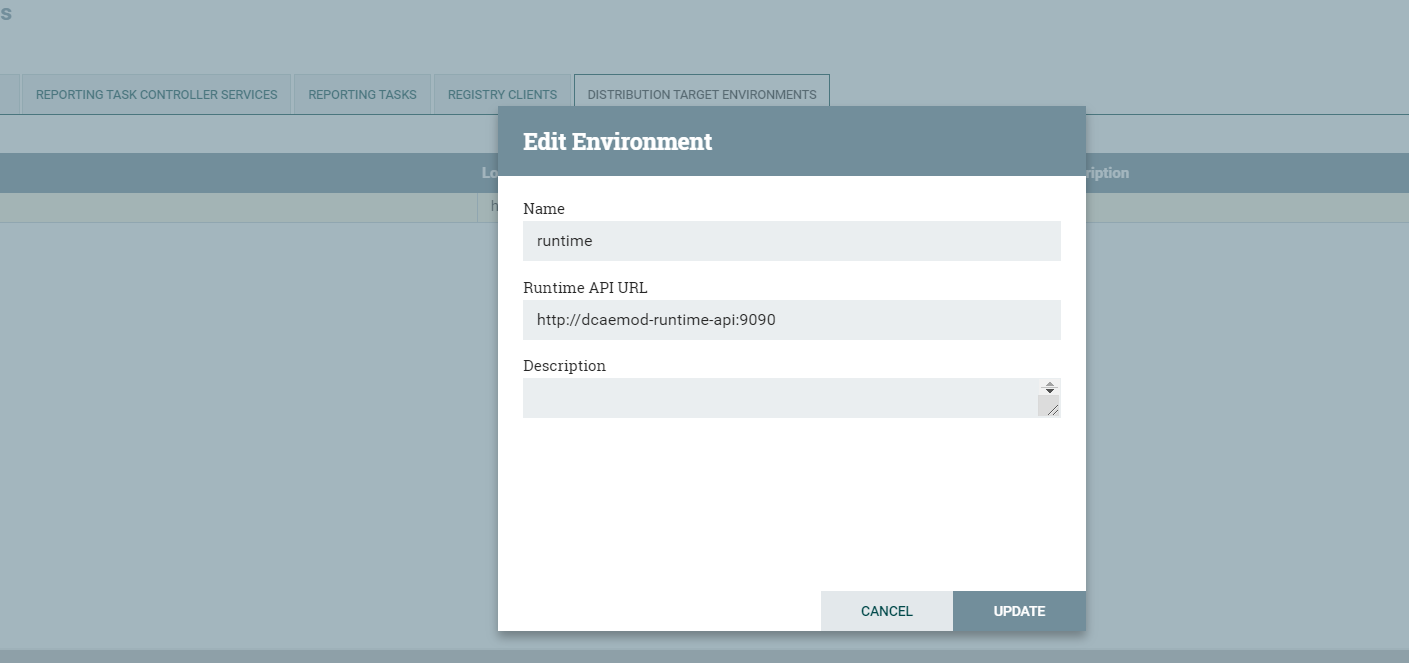
Distribution target URL will be http://dcaemod-runtime-api:9090
Now let’s access the Nifi (DCAE designer) UI - http://dcaemod.simpledemo.onap.org/nifi
IPAddress is the host address or the DNS FQDN, if there is one, for one of the Kubernetes nodes.

c. Get the artifacts to test and onboard.
Let’s fetch the artifacts/ spec files
Component Spec for DCAE-VES-Collector : https://git.onap.org/dcaegen2/collectors/ves/tree/dpo/spec/vescollector-componentspec.json
Component Spec for DCAE-TCAgen2 : https://git.onap.org/dcaegen2/collectors/ves/tree/dpo/spec/vescollector-componentspec.json
VES 5.28.4 Data Format : https://git.onap.org/dcaegen2/collectors/ves/tree/dpo/data-formats/VES-5.28.4-dataformat.json
VES 7.30.2.1 Data Format : https://git.onap.org/dcaegen2/collectors/ves/tree/etc/CommonEventFormat_30.2.1_ONAP.jsonormat.json
VES Collector Response Data Format : https://git.onap.org/dcaegen2/collectors/ves/tree/dpo/data-formats/ves-response.json
TCA CL Data Format : https://git.onap.org/dcaegen2/analytics/tca-gen2/tree/dcae-analytics/dpo/dcaeCLOutput.json
For the purpose of onboarding, a Sample Request body should be of the type -:
{ "owner": "<some value>", "spec": <some json object> }
where the json object inside the spec field can be a component spec json.
Request bodies of this type will be used in the onboarding requests you make using curl or the onboarding swagger interface.
The prepared Sample Request body for a component dcae-ves-collector looks like so –
The prepared Sample request body for a sample data format looks like so -
See VES data Format
d. To onboard a data format and a component
Each component has a description that tells what it does.
These requests would be of the type
curl -X POST http://<onboardingapi host>/onboarding/dataformats -H “Content-Type: application/json” -d @<filepath to request>
curl -X POST http://<onboardingapi host>/onboarding/components -H “Content-Type: application/json” -d @<filepath to request>
In our case,
curl -X POST http://dcaemod.simpledemo.onap.org/onboarding/dataformats -H “Content-Type: application/json” -d @<filepath to request>
curl -X POST http://dcaemod.simpledemo.onap.org/onboarding/components -H “Content-Type: application/json” -d @<filepath to request>
e. Verify the resources were created using
curl -X GET http://<IPAddress>/onboarding/dataformats
curl -X GET http://<IPAddress>/onboarding/components
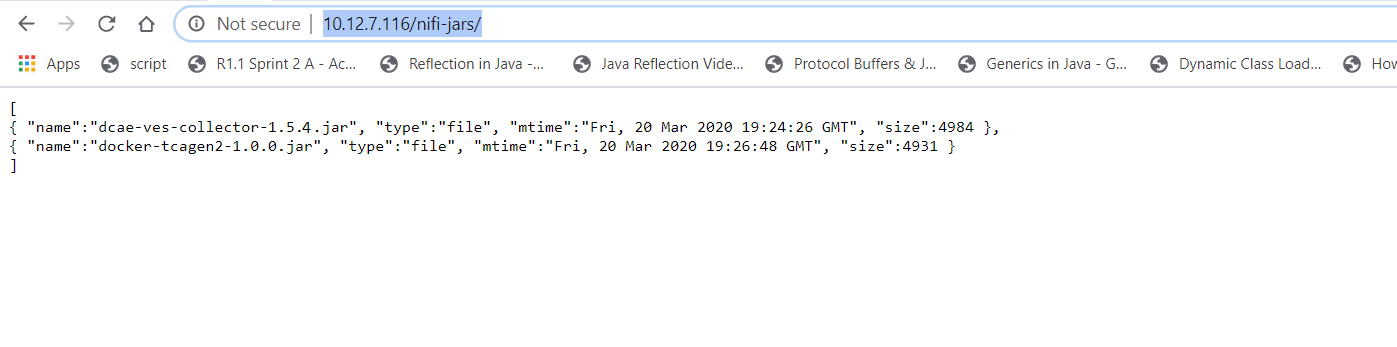
f. Verify the genprocessor (which polls onboarding periodically to convert component specs to nifi processor), converted the component
Open http://dcaemod.simpledemo.onap.org/nifi-jars in a browser.
These jars should now be available for you to use in the nifi UI as processors
3. Design & Distribution Flow
a. To start creating flows, we need to create a process group first. The name of the process group will be the name of the flow. Drag and Drop on the canvas, the ‘Processor Group’ icon from the DCAE Designer bar on the top.
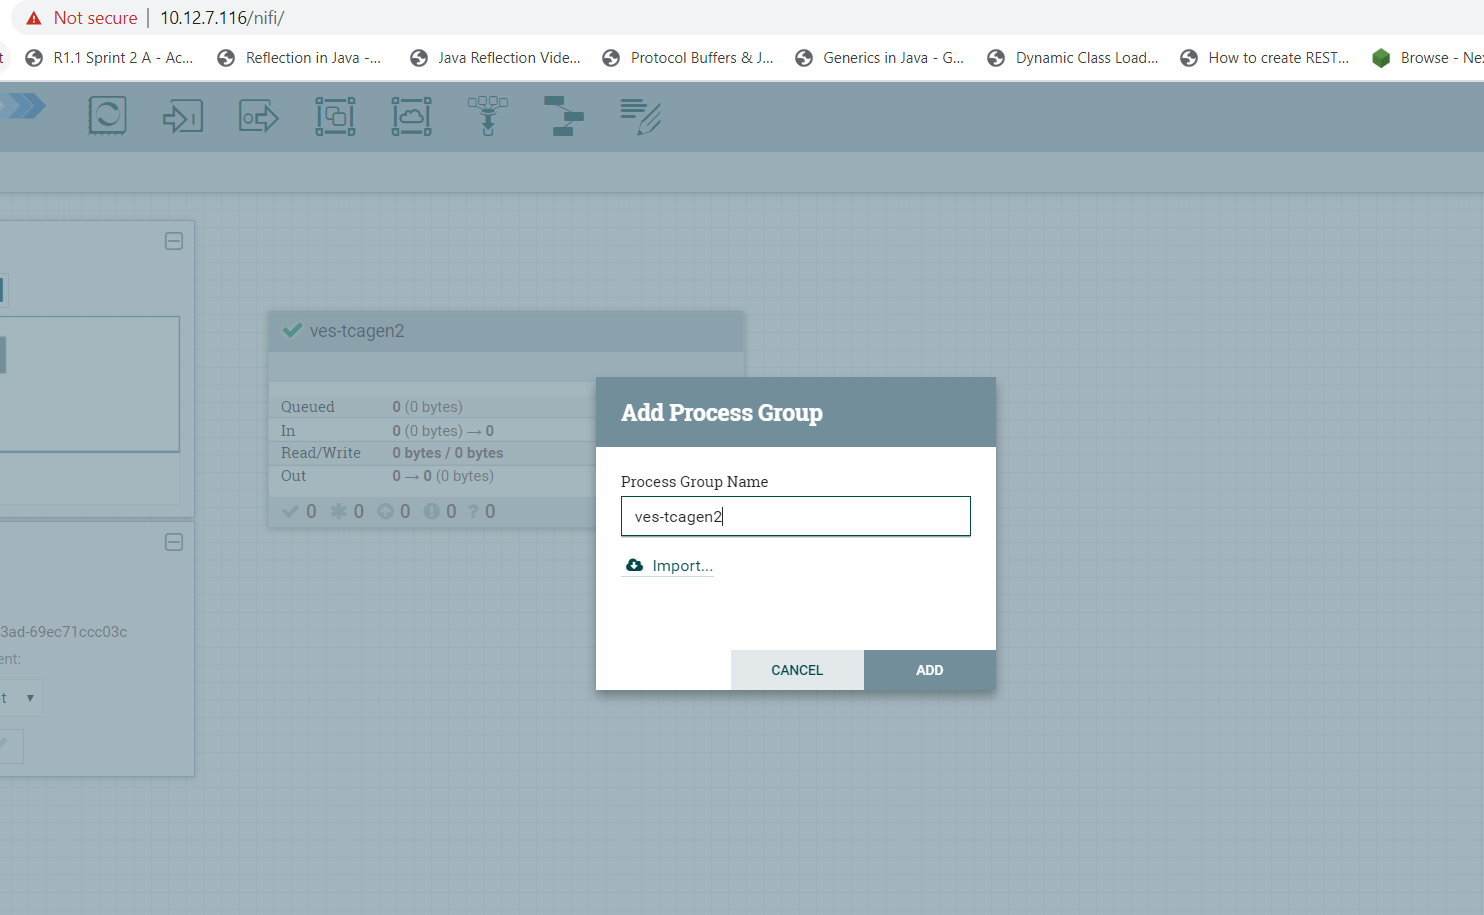
Now enter the process group by double clicking it,
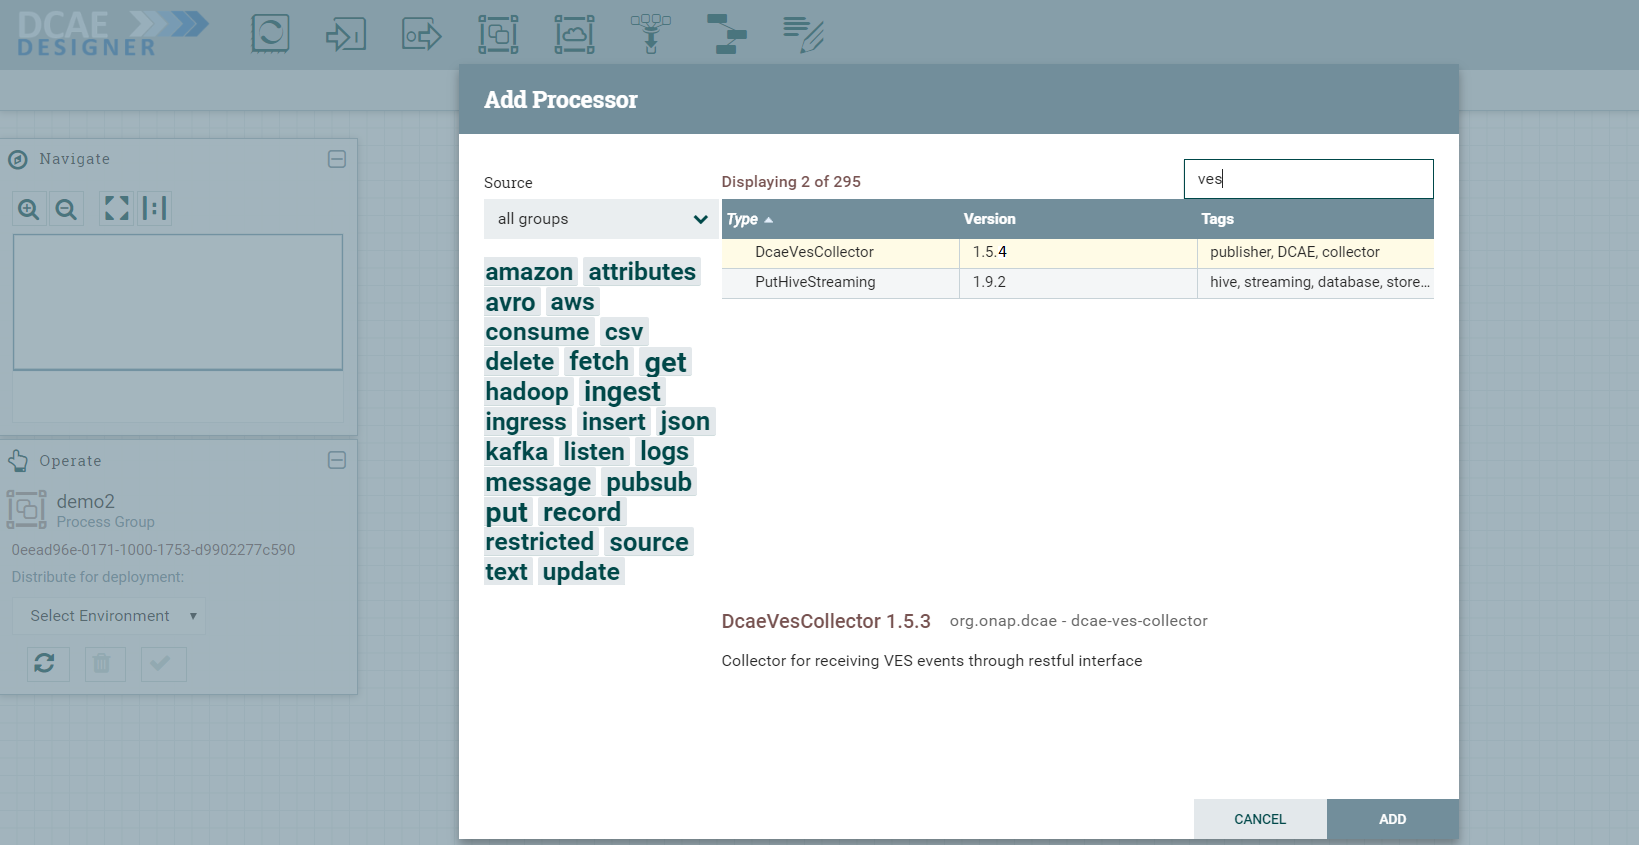
You can now drag and drop on the canvas ‘Processor’ icon from the top DCAE Designer tab. You can search for a particular component in the search box that appears when you attempt to drag the ‘Processor’ icon to the canvas.
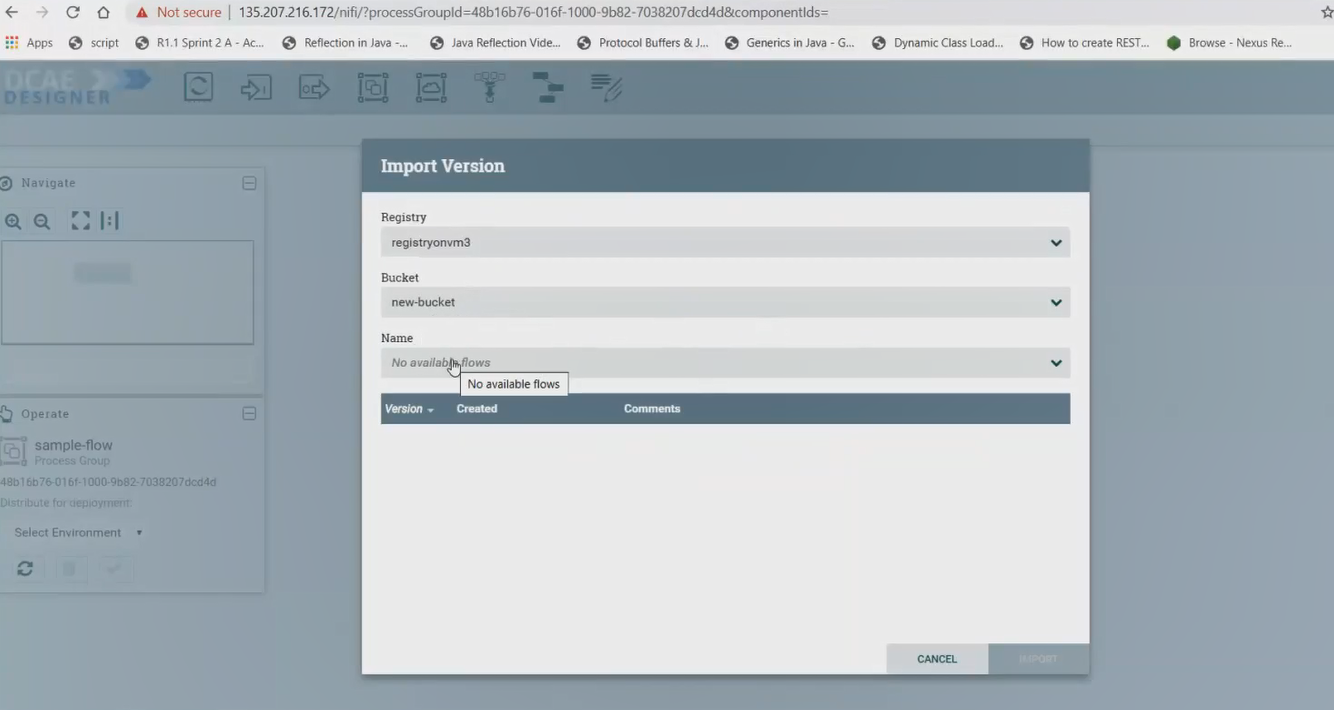
If the Nifi registry linking worked, you should see the “Import” button when you try to add a Processor or Process group to the Nifi canvas, like so-
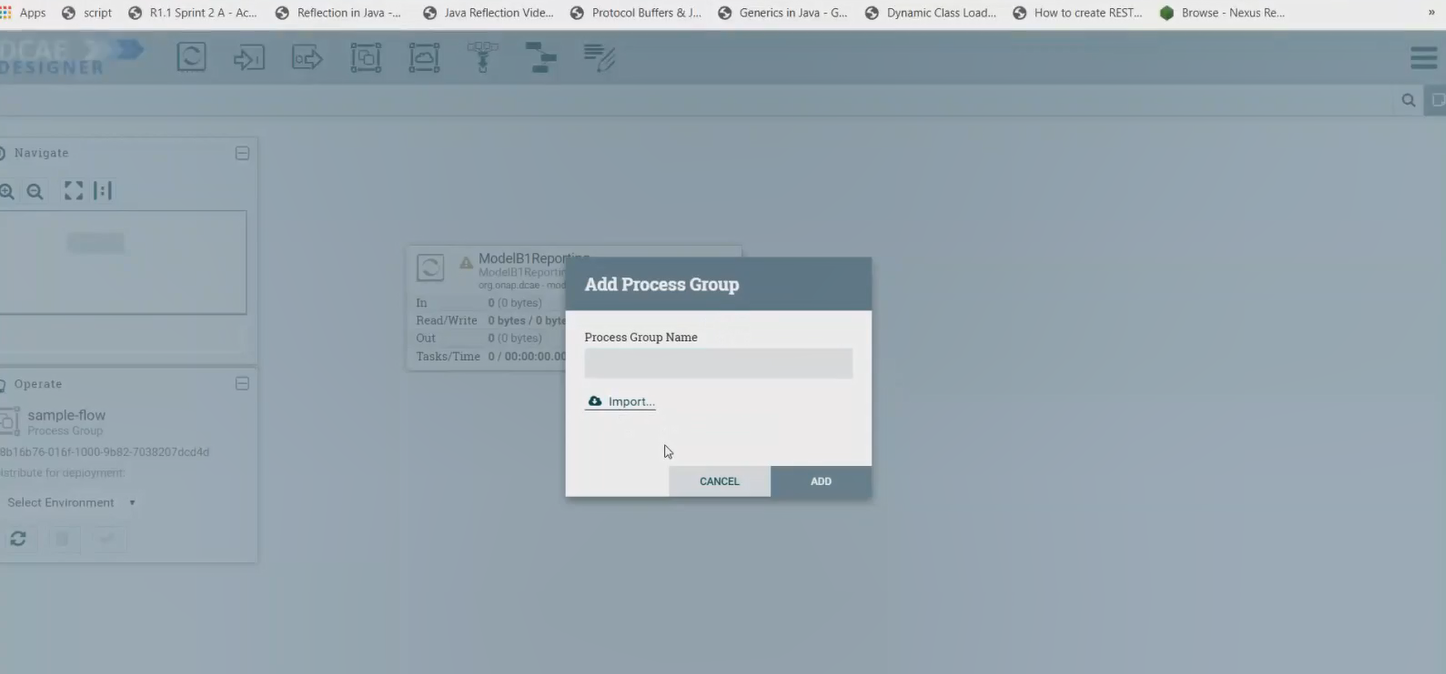
By clicking on the import button, we can import already created saved and version controlled flows from the Nifi registry, if they are present.
We can save created flows by version controlling them like so starting with a ‘right click’ anywhere on the canvas-
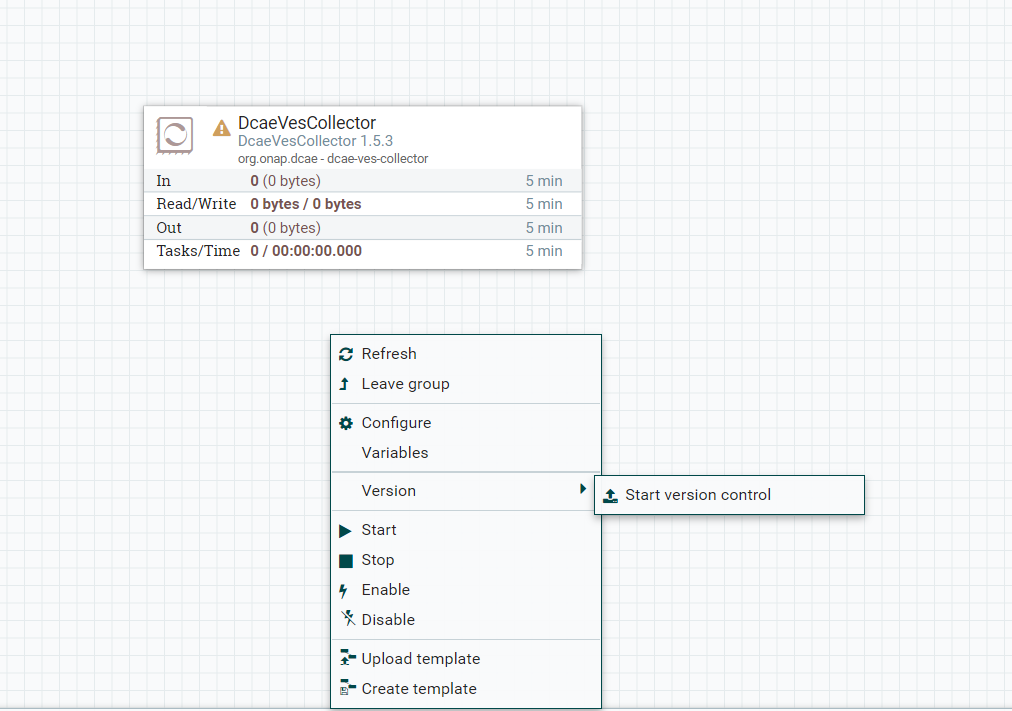
Ideally you would name the flow and process group the same, because functionally they are similar.
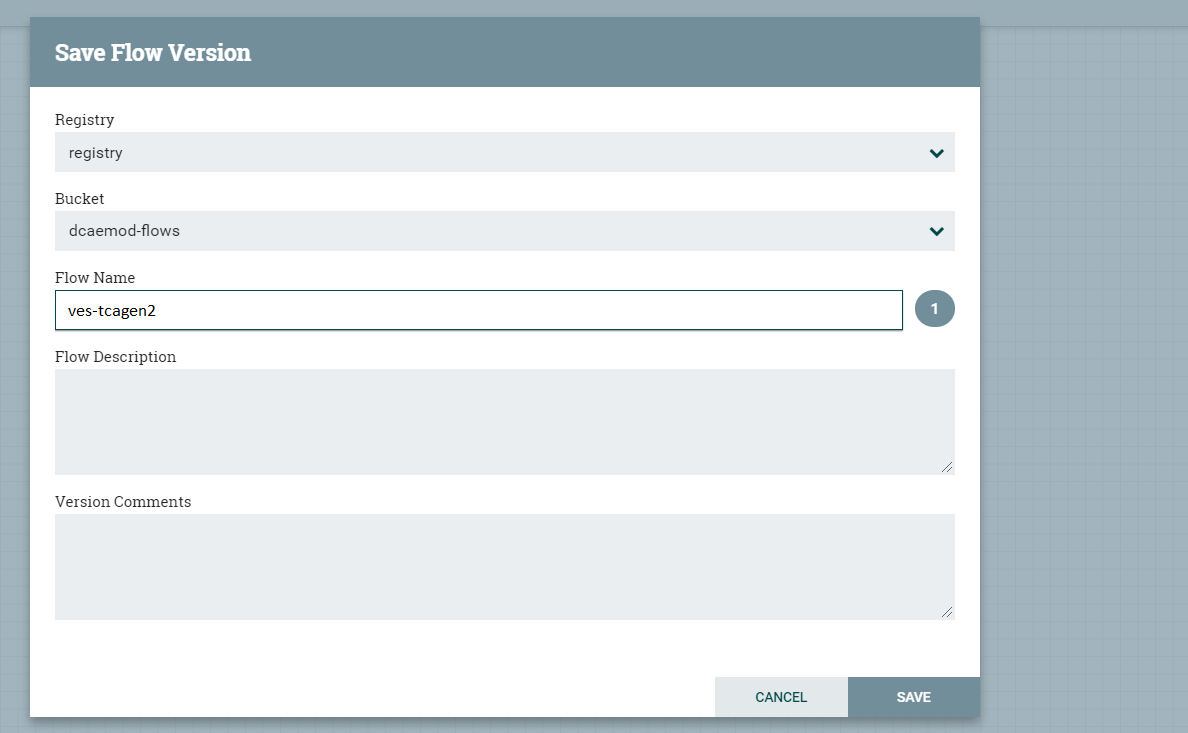
When the flow is checked in, the bar at the bottom shows a green checkmark

Note: Even if you move a component around on the canvas, and its position on the canvas changes, it is recognized as a change, and it will have to recommitted.
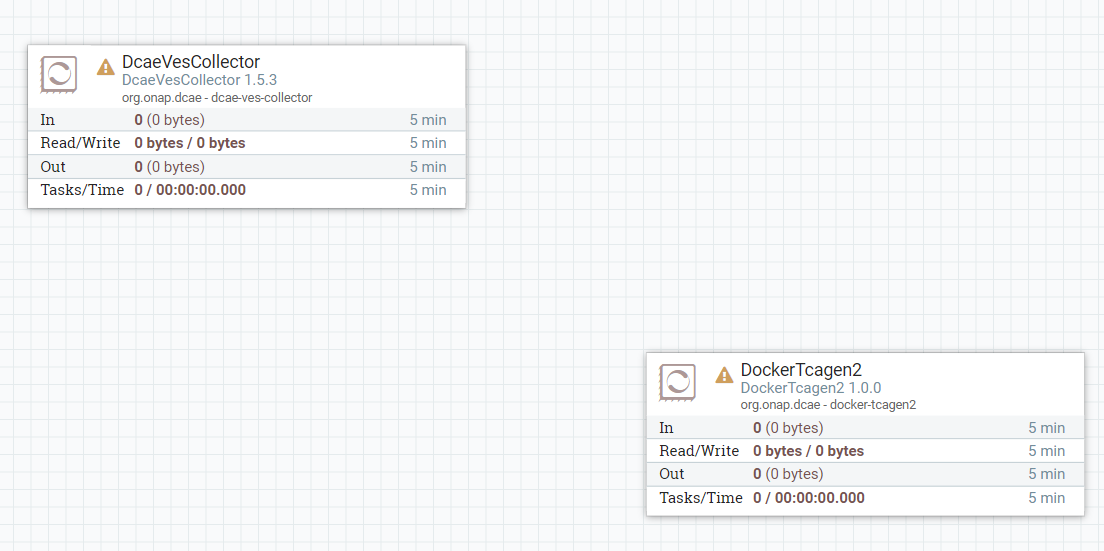
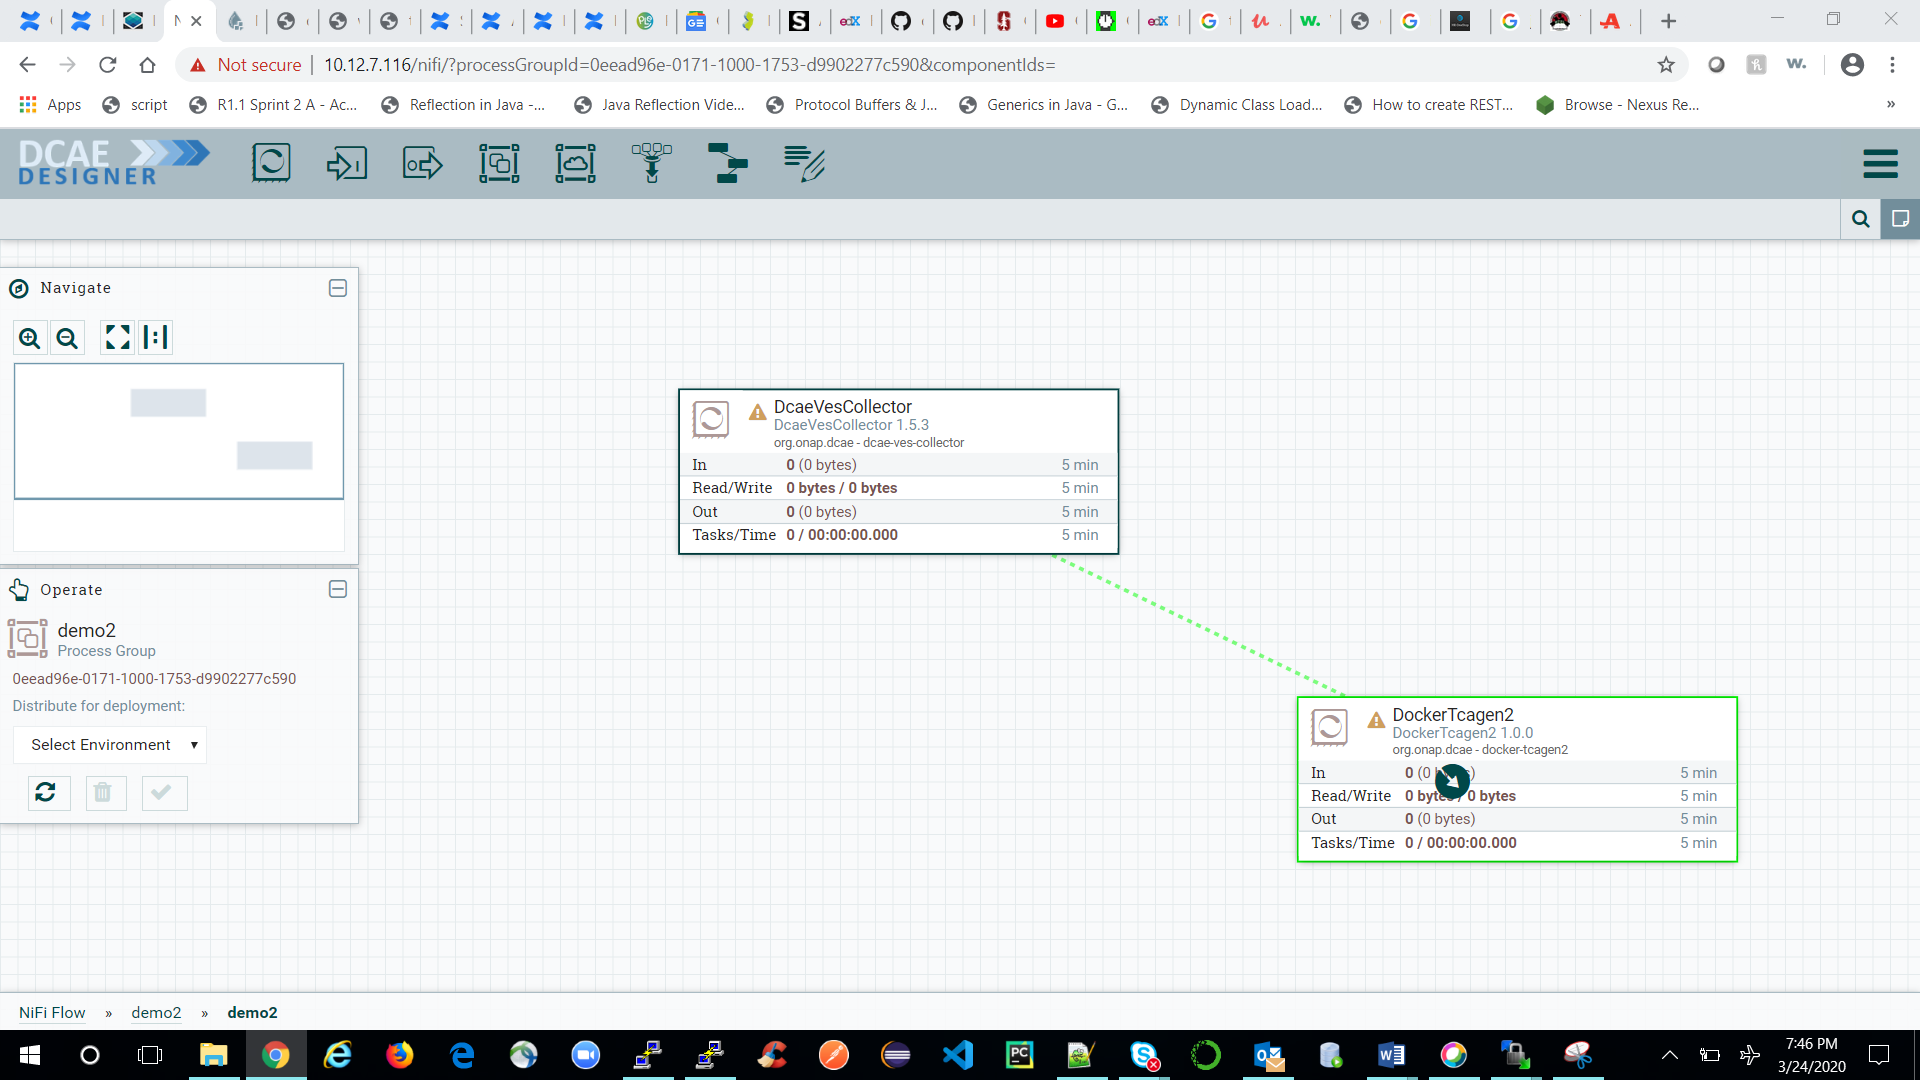
You can add additional components in your flow and connect them.
DcaeVesCollector connects to DockerTcagen2.
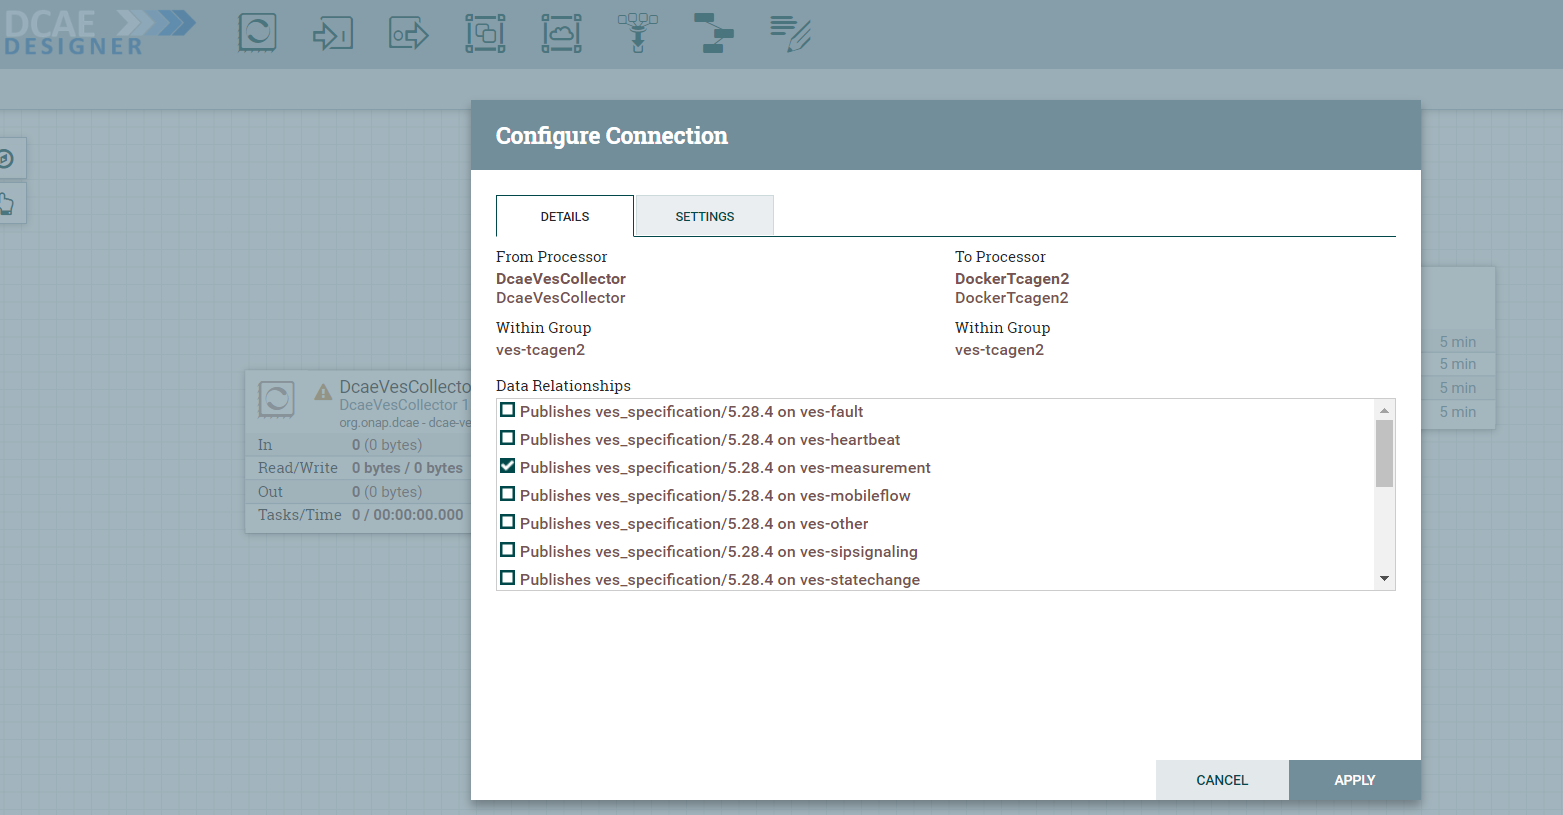
Along the way you need to also provide topic names in the settings section. These can be arbitrary names.

To recap, see how DcaeVesCollector connects to DockerTcagen2. Look at the connection relationships. Currently there is no way to validate these relationships. Notice how it is required to name the topics by going to Settings.
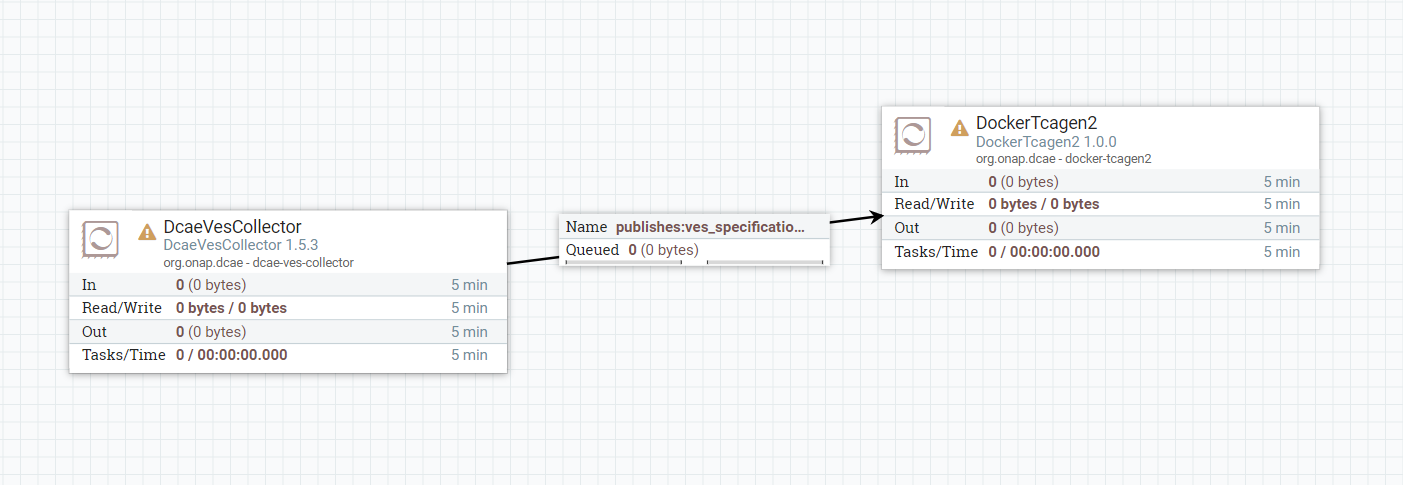
The complete flow after joining our components looks like so
b. Submit/ Distribute the flow:
Once your flow is complete and saved in the Nifi registry, you can choose to submit it for distribution.
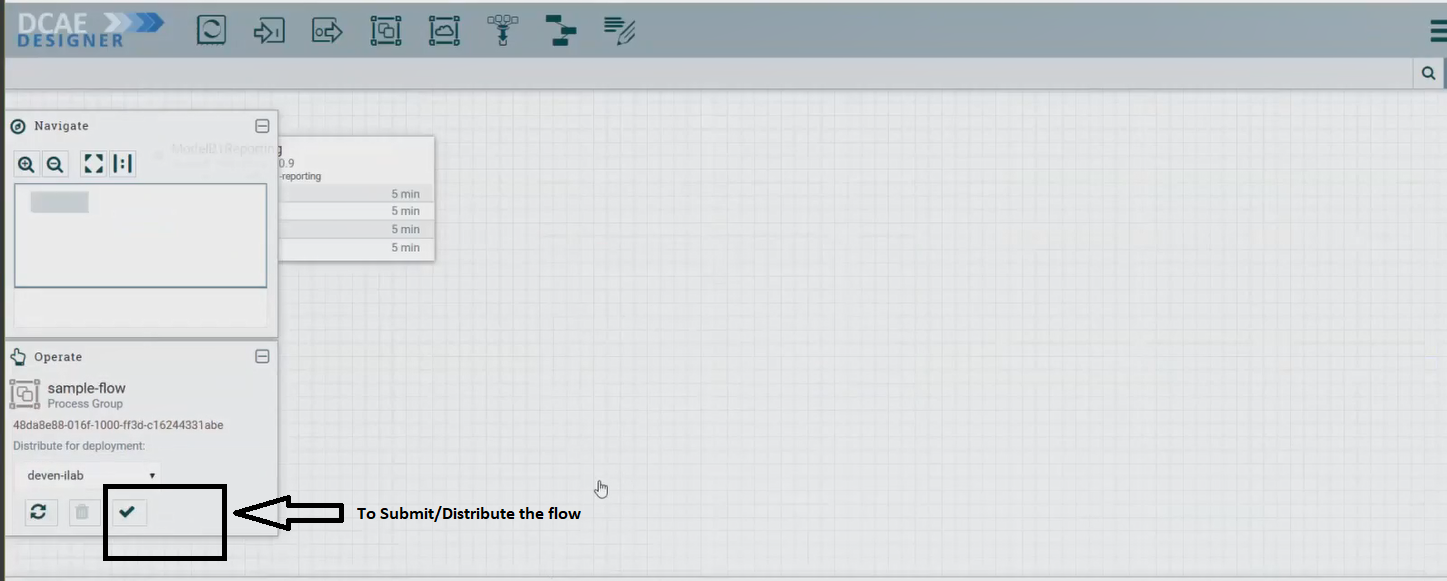
If the flow was submitted successfully to the runtime api, you should get a pop up a success message like so -
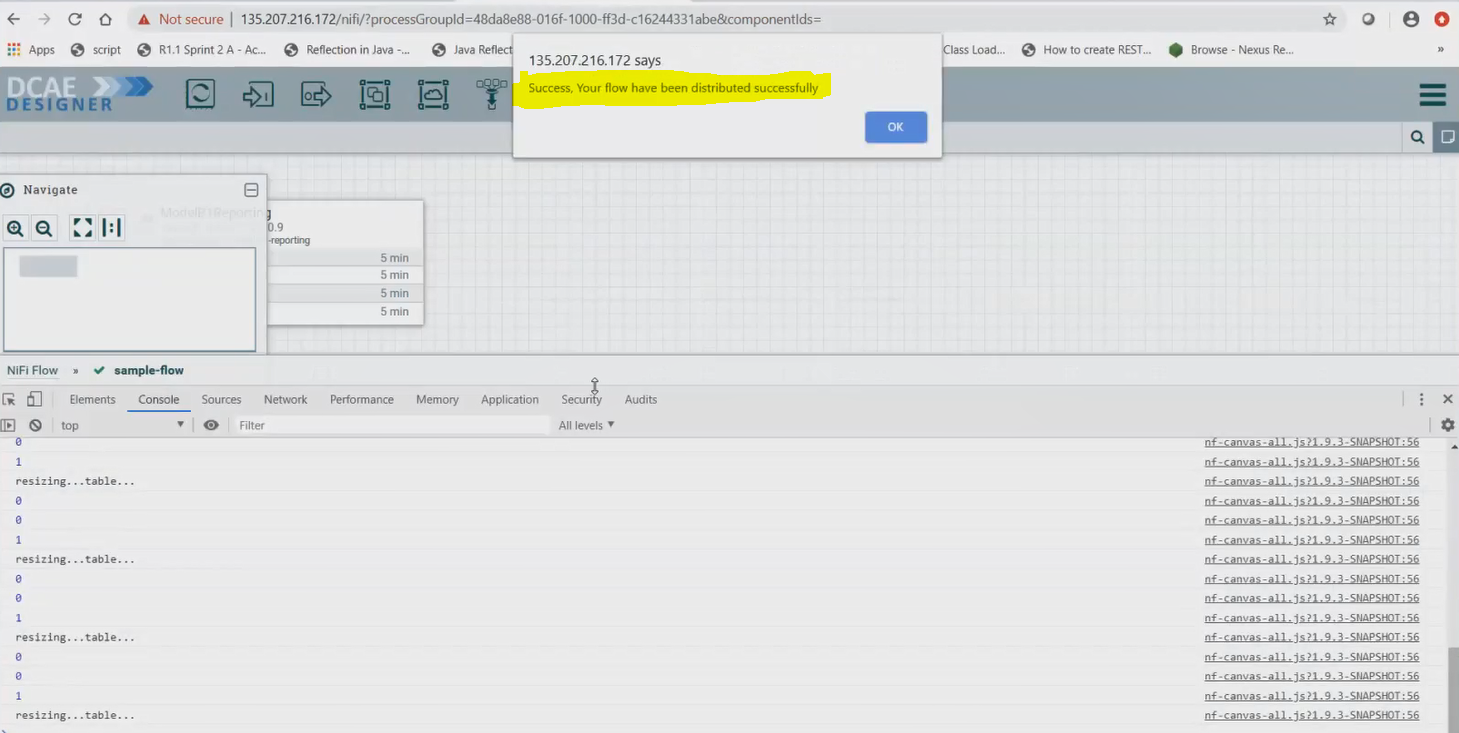
At this step, the design was packaged and sent to Runtime api.
The runtime is supposed to generate the blueprint out of the packaged design/flow and push it to the DCAE inventory and the DCAE Dasboard.
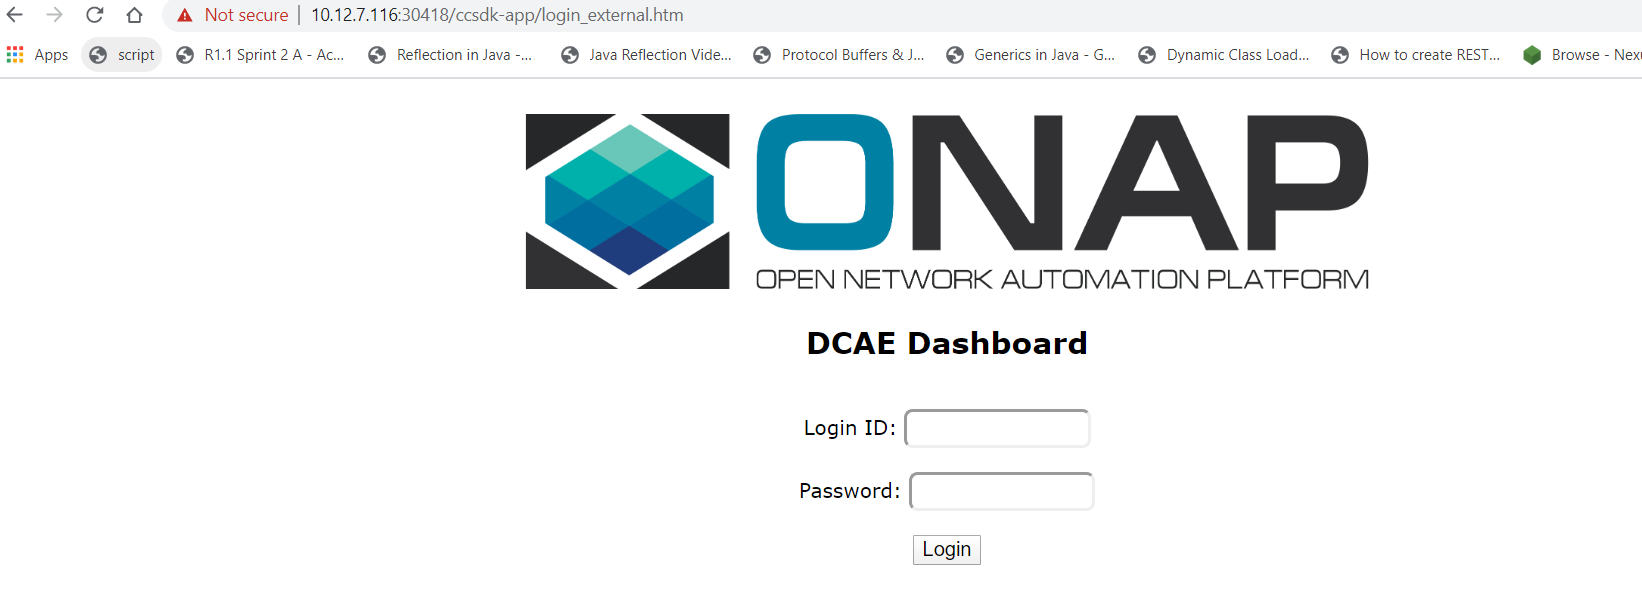
c. Checking the components in the DCAE Dashboard
You should see the generated artifact/ blueprint in the DCAE Dashboard dashboard at https://<IPAddress>:30418/ccsdk-app/login_external.htm in our deployment. The name for each component will be appended by the flow name followed by underscore followed by the component’s name.
The credentials to access the DCAE Dashboard
Login: su1234 Password: fusion
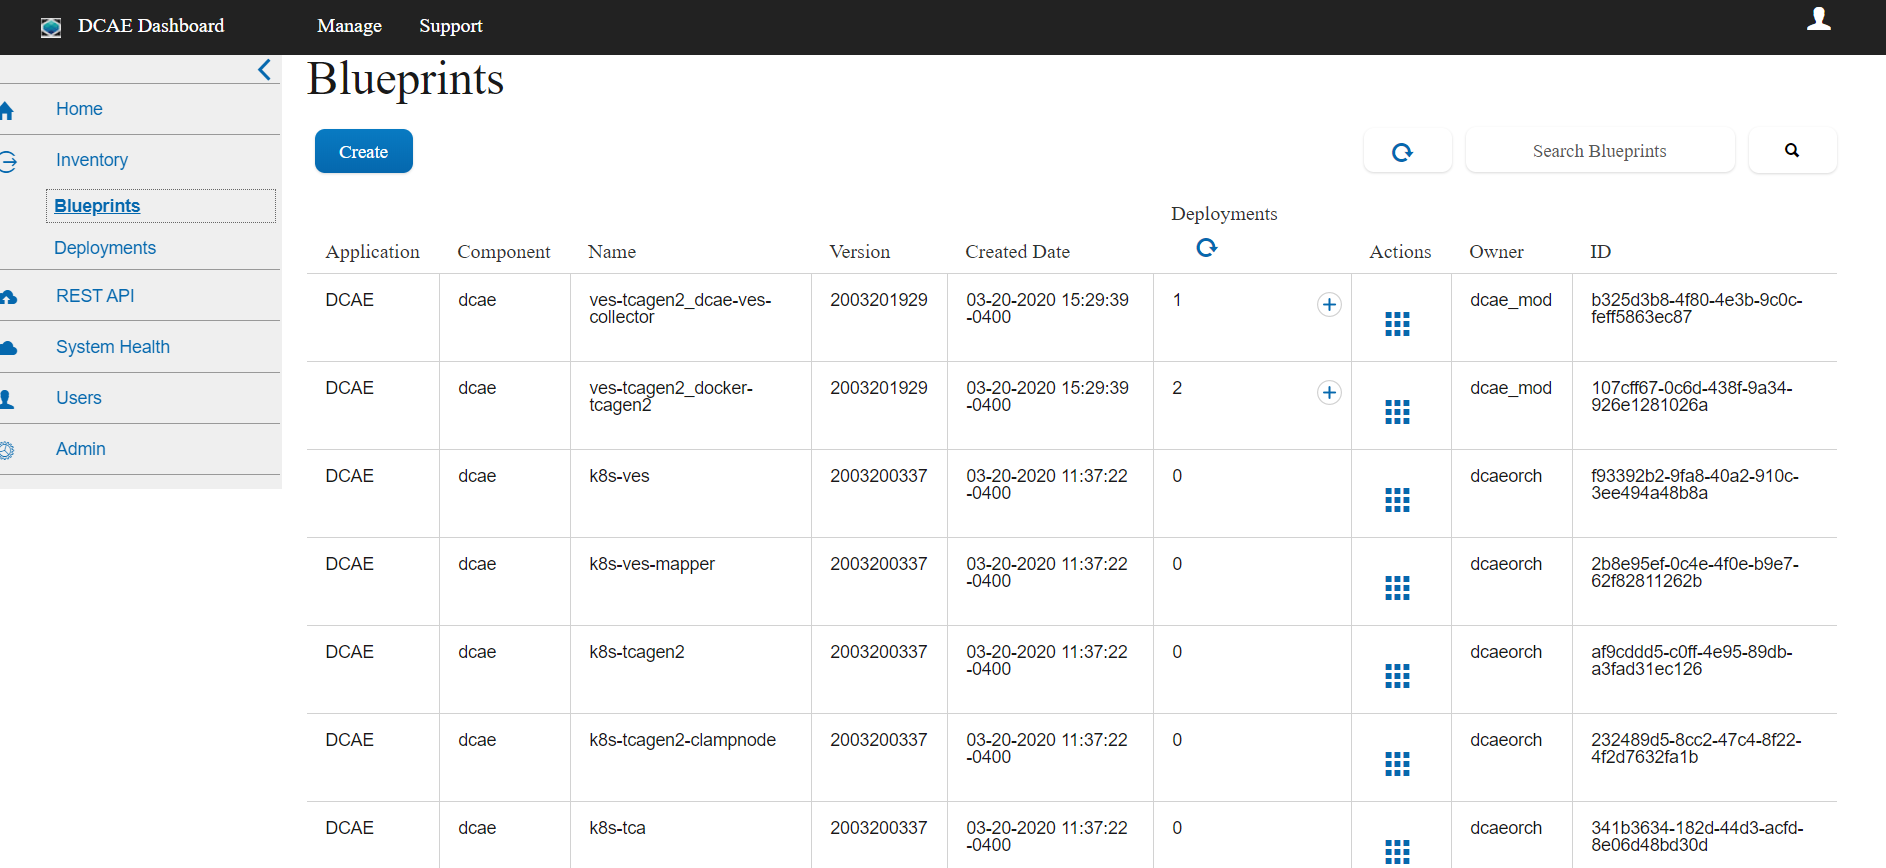
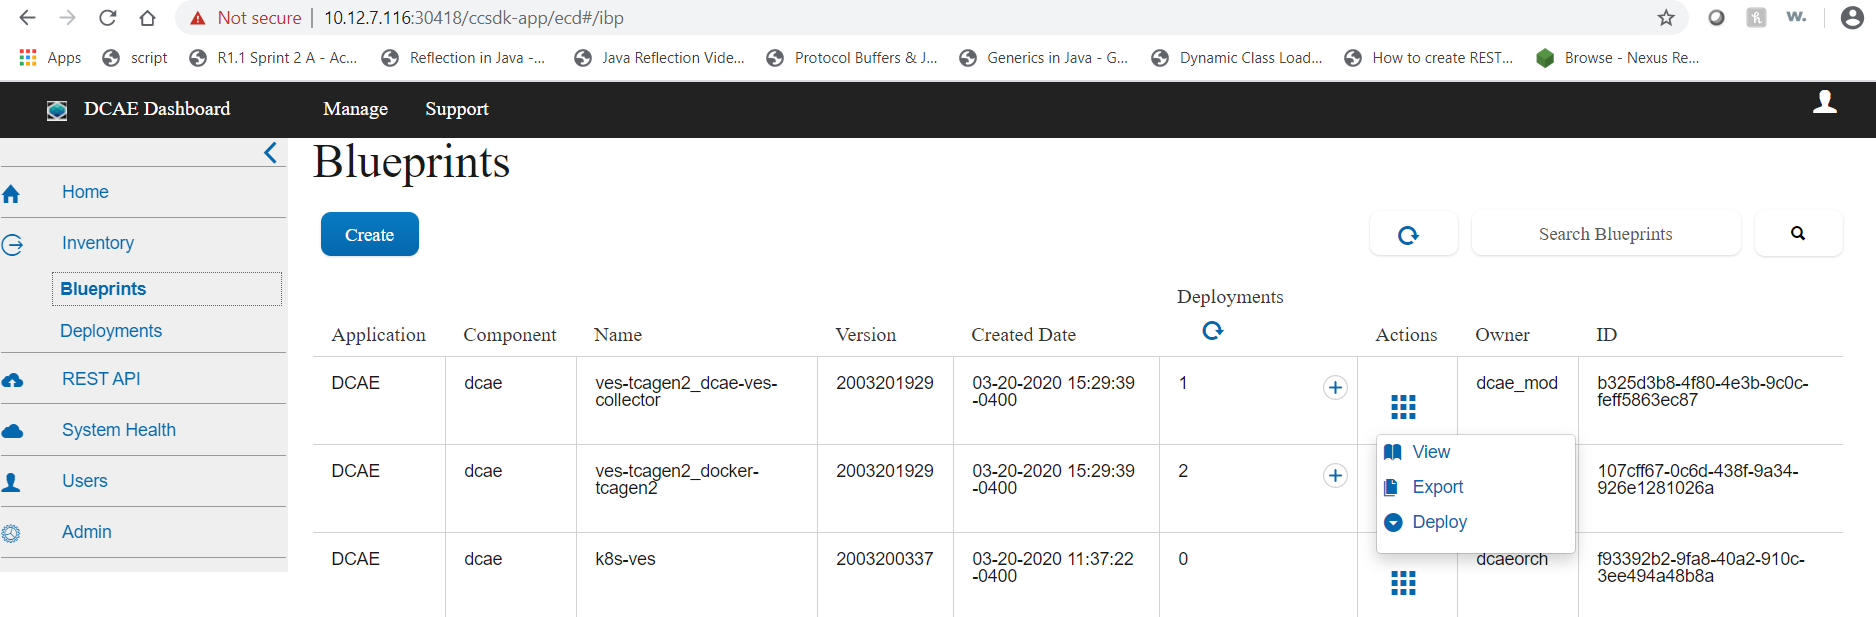
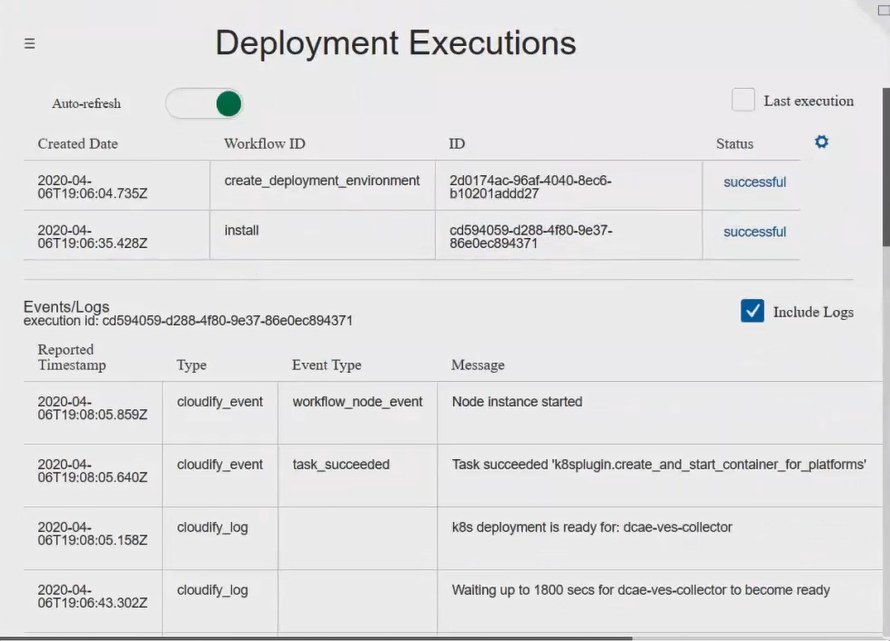
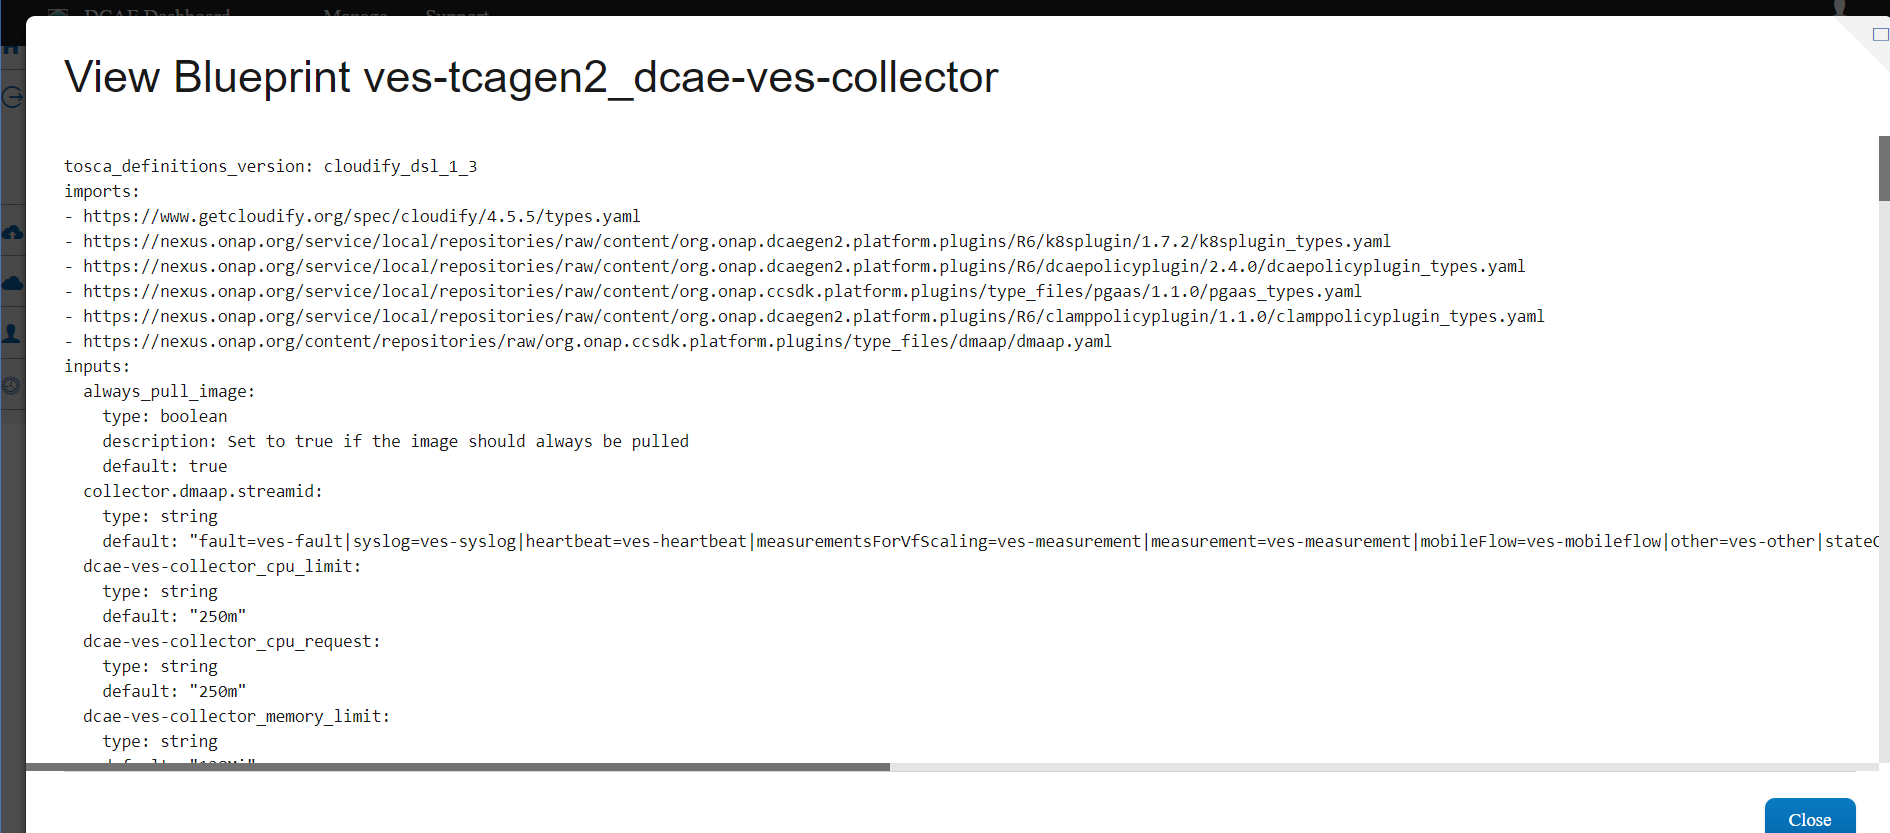
The generated Blueprint can be viewed.
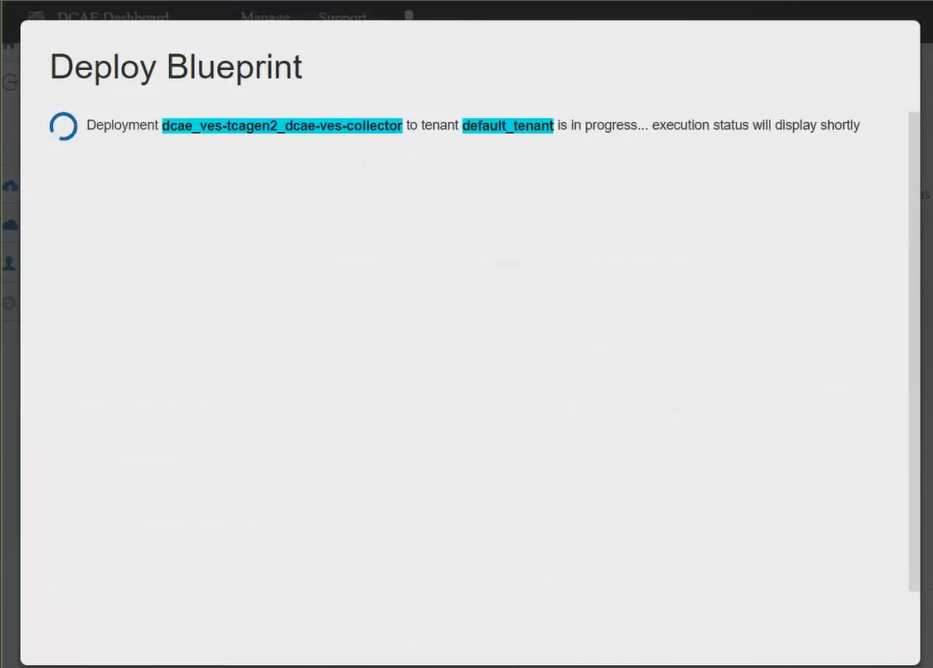
Finally, the generated Blueprint can be deployed.
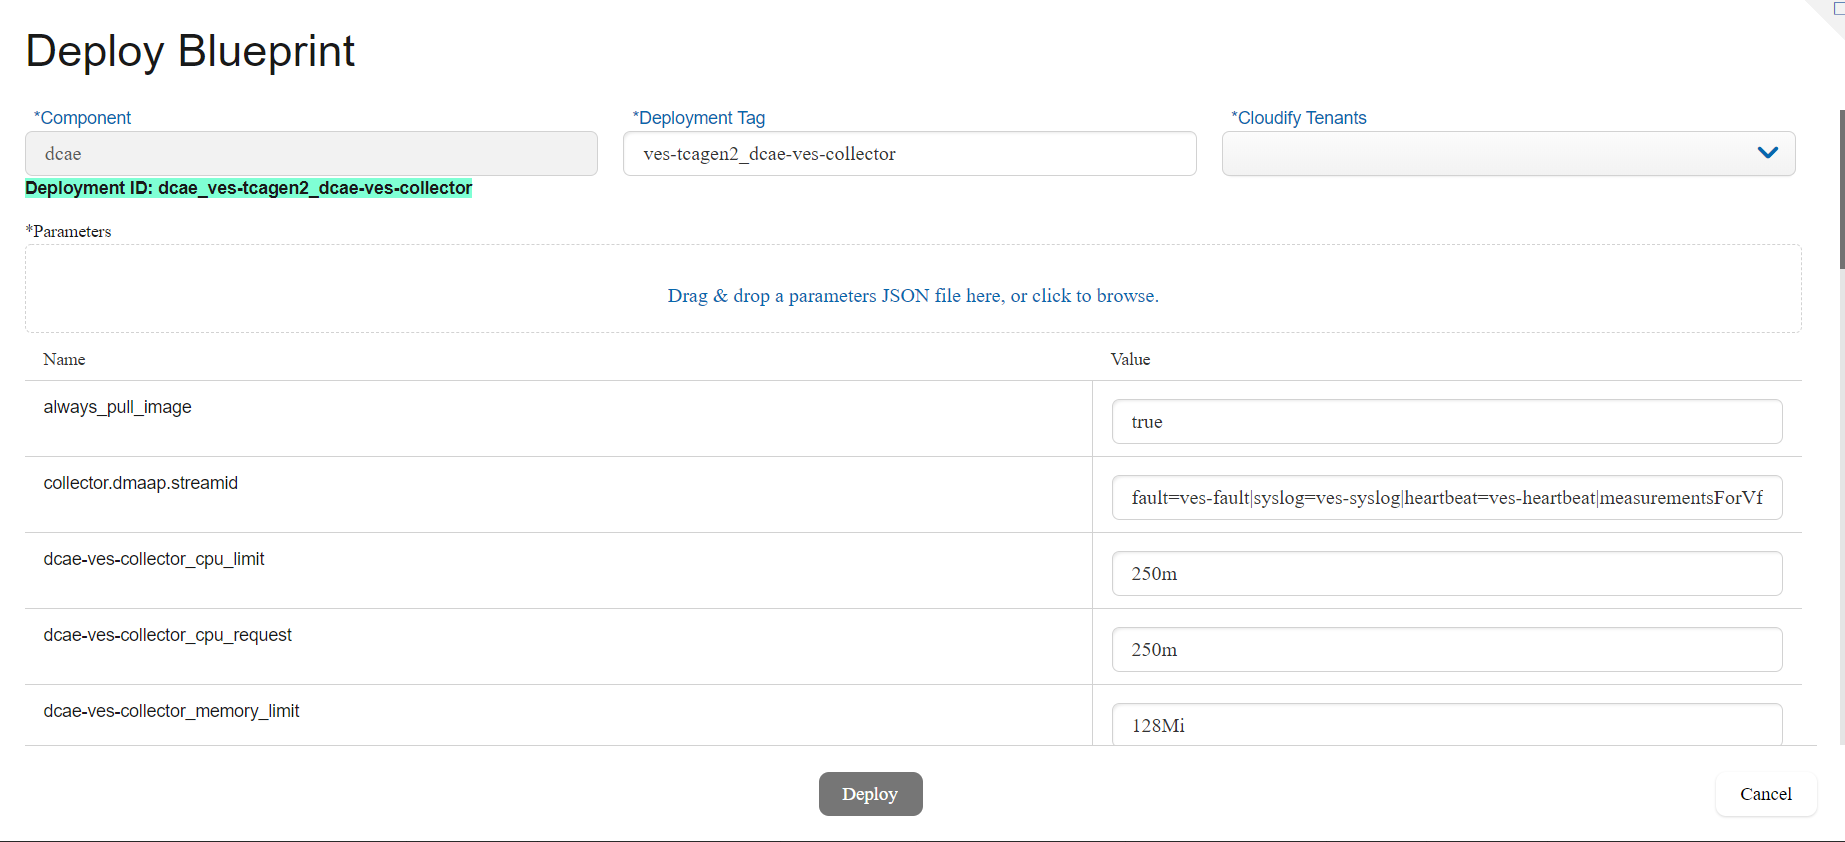
You can use/import the attached input configurations files to deploy. Drag and Drop these sample JSON files to fill in the configuration values.
See VES Collector Input Configuration
See Tcagen2 Input Configuration