How to create a “Hello World” Package with CDS Designer UI? The Script Executor Type
Note
How to Get Started with CDS Designer UI
If you’re new to CDS Designer UI and need to get set up, the following guides may be helpful:
Note
NOTE:
In order to see the latest version described below in the tutorial, we will need to use the latest cds-ui-server docker image: nexus3.onap.org:10001/onap/ccsdk-cds-ui-server:1.1.0-STAGING-latest
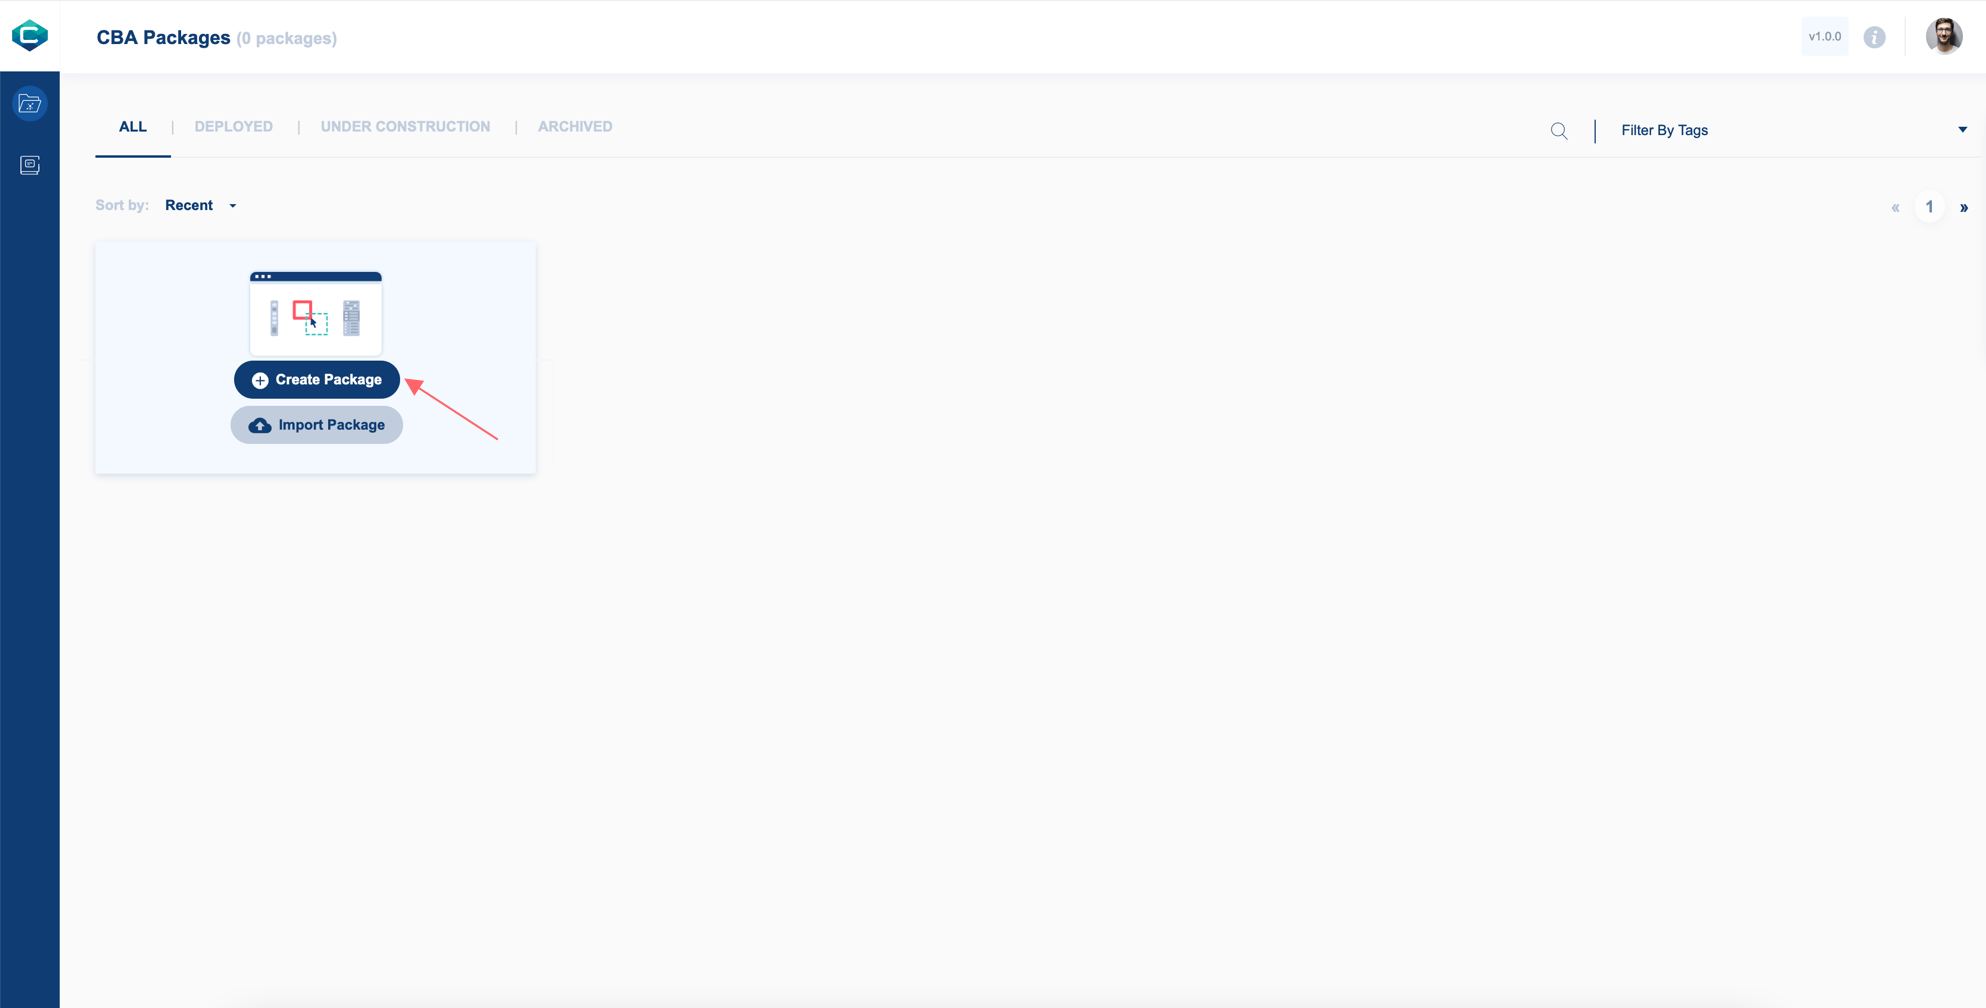
Create New CBA Package
In the Package List, click on the Create Package button.
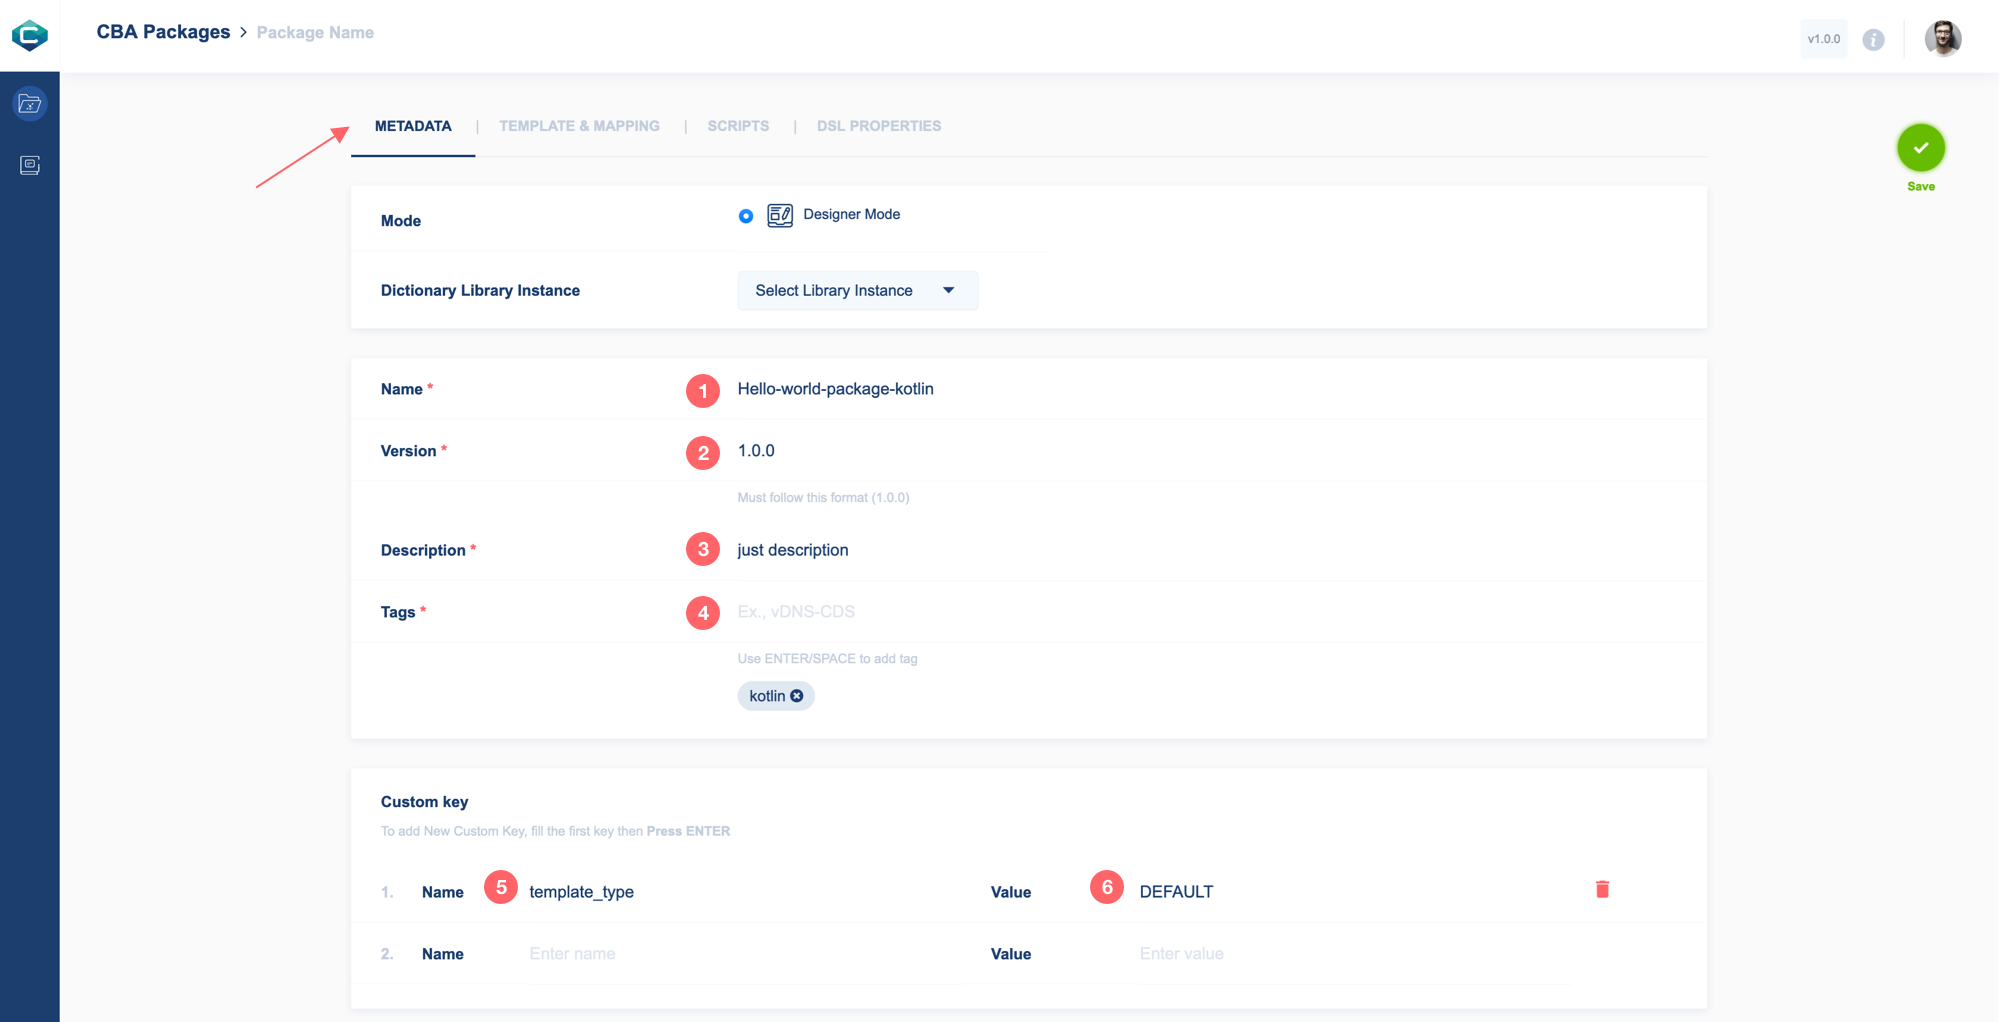
Define Package MetaData
In METADATA Tab:
Package name (Required), type “Hello-world-package-kotlin”
Package version (Required), type “1.0.0”
Package description (Required), type “just description”
Package Tags (Required), type “kotlin” then use the Enter key on the keyboard
In the Custom Key section, add Key name “template_type” and
For Key Value “DEFAULT”
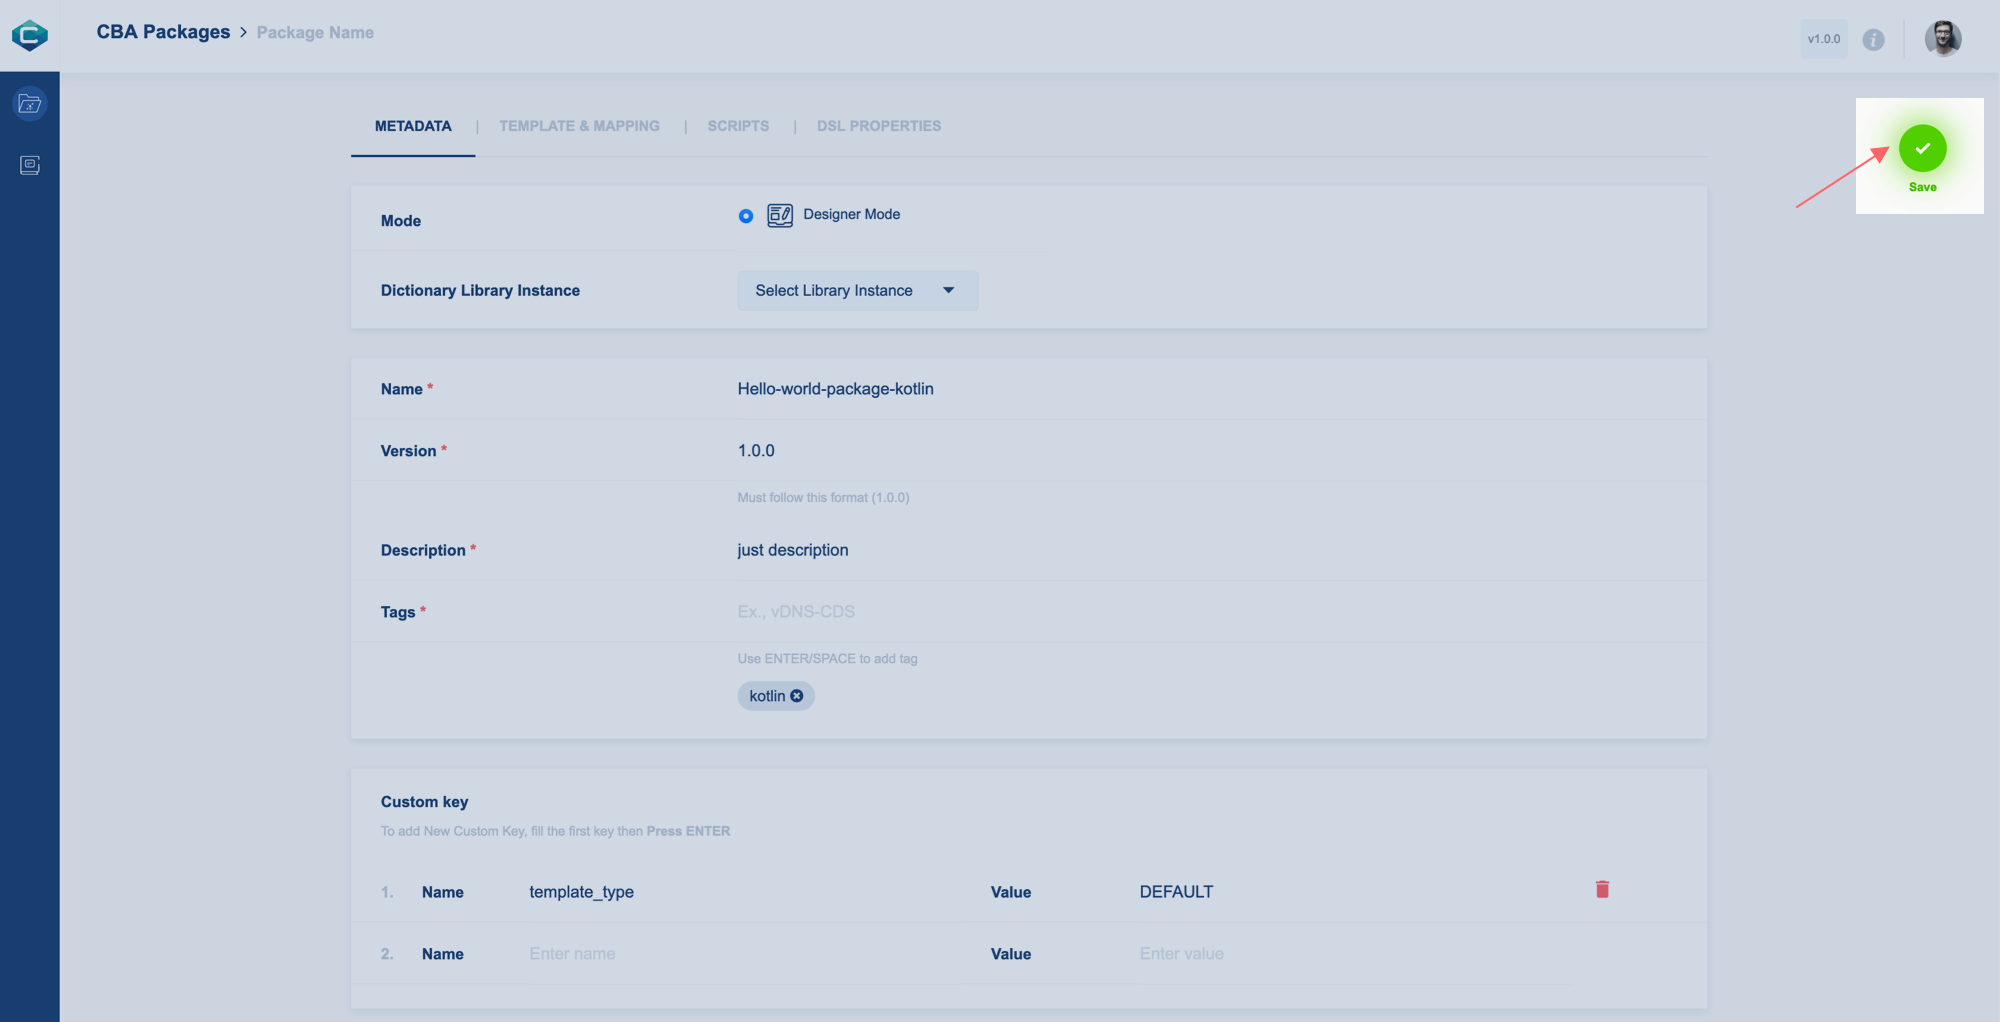
Once you enter all fields you will be able to save your package. Click on the Save button and continue to define your package.
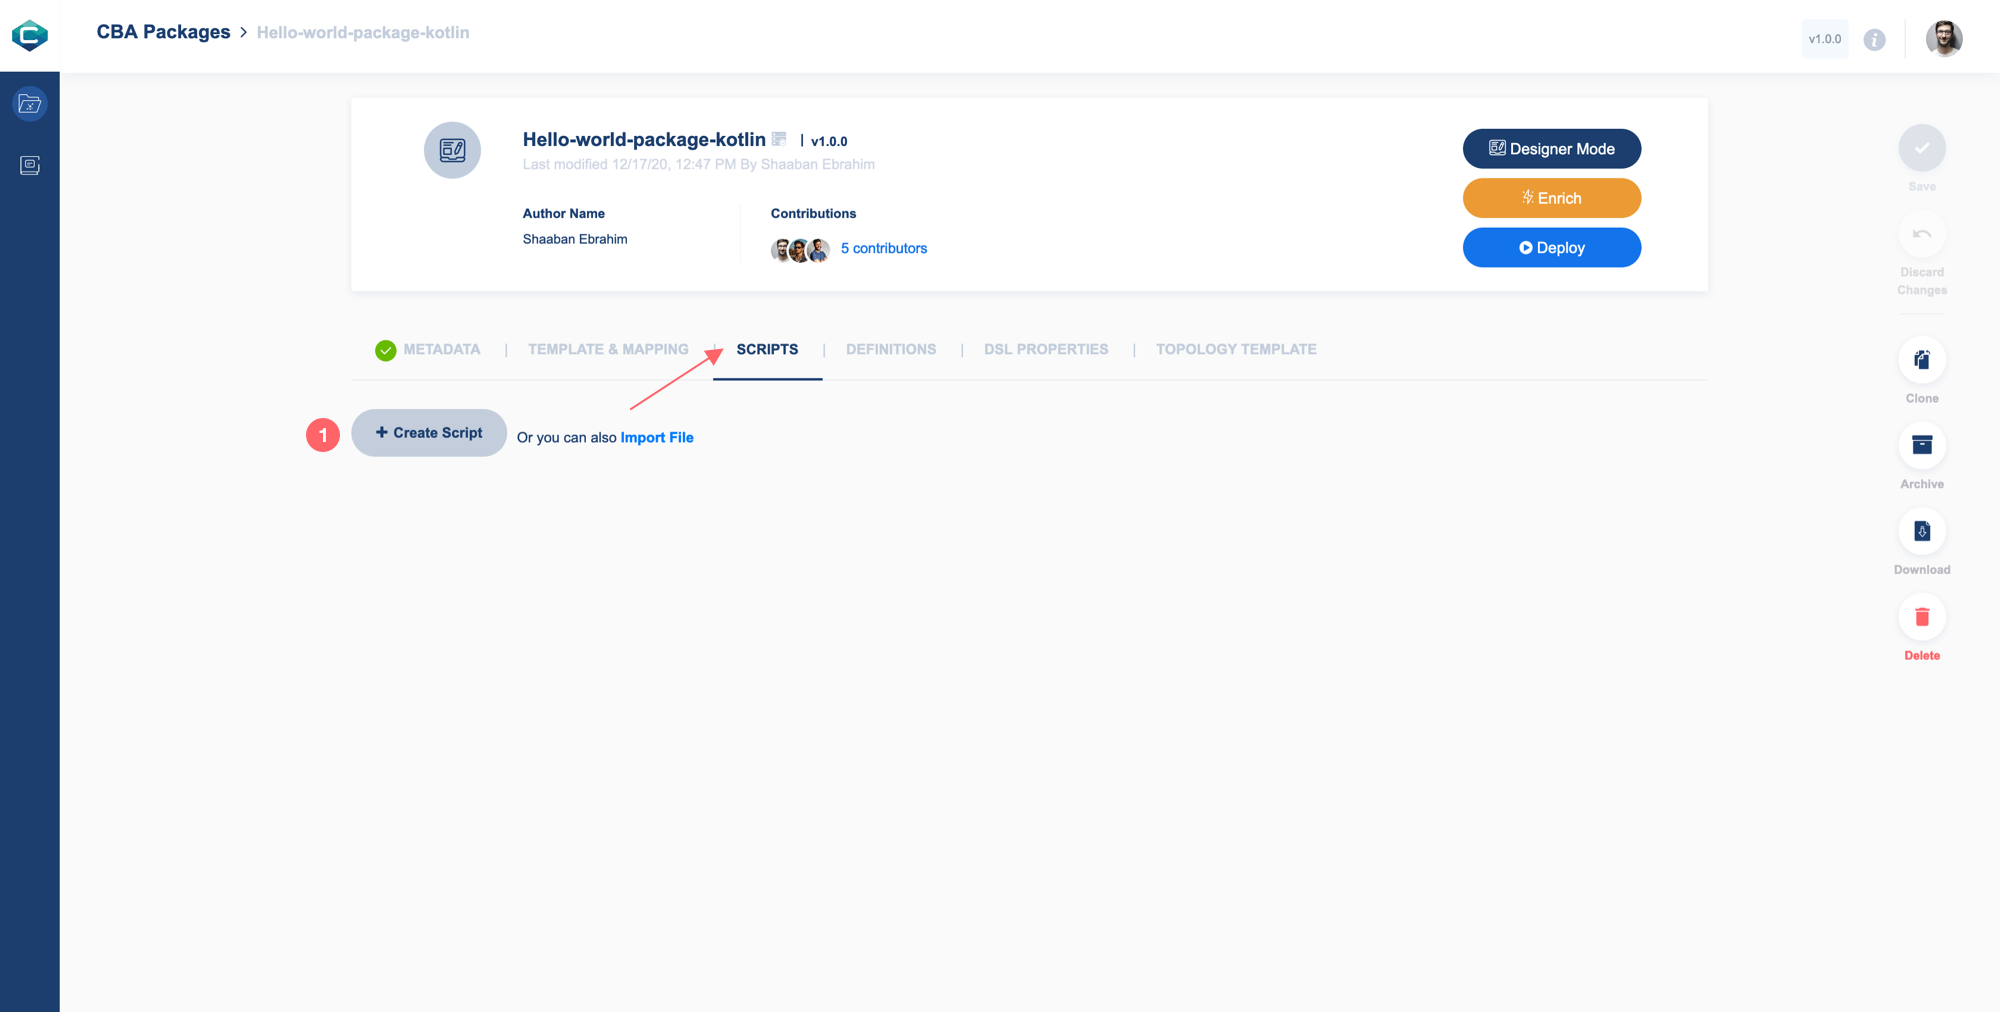
Define Scripts
In the SCRIPTS Tab:
Click on the Create Script button
In the Create Script File modal:
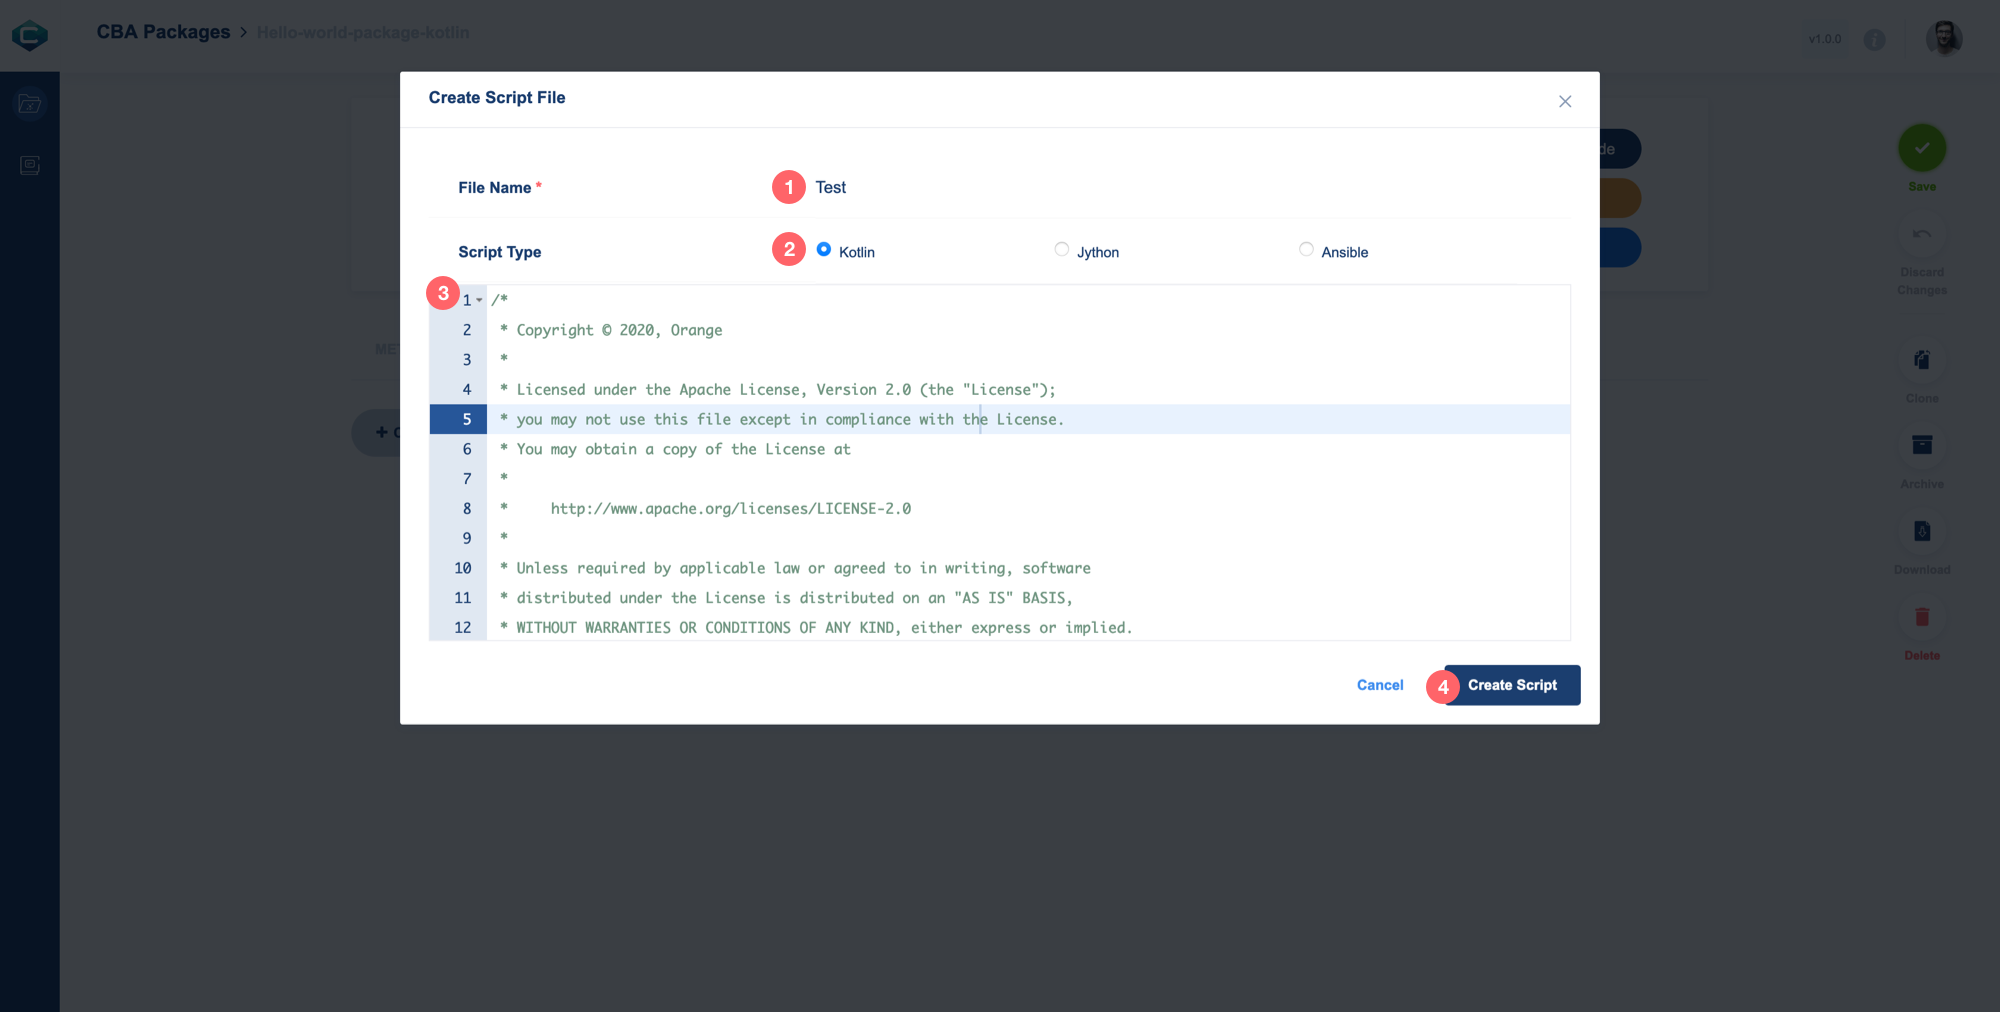
Enter script file name “Test”
Choose the script type “Kotlin”
Type or copy and paste the below script in the code editor
/*
 \* Copyright © 2020, Orange
 \*
 \* Licensed under the Apache License, Version 2.0 (the "License");
 \* you may not use this file except in compliance with the License.
 \* You may obtain a copy of the License at
 \*
 \* http://www.apache.org/licenses/LICENSE-2.0
 \*
 \* Unless required by applicable law or agreed to in writing, software
 \* distributed under the License is distributed on an "AS IS" BASIS,
 \* WITHOUT WARRANTIES OR CONDITIONS OF ANY KIND, either express or implied.
 \* See the License for the specific language governing permissions and
 \* limitations under the License.
*/

package org.onap.ccsdk.cds.blueprintsprocessor.services.execution.scripts

import org.onap.ccsdk.cds.blueprintsprocessor.core.api.data.ExecutionServiceInput
import org.onap.ccsdk.cds.blueprintsprocessor.services.execution.AbstractScriptComponentFunction
import org.onap.ccsdk.cds.blueprintsprocessor.services.execution.ComponentRemoteScriptExecutor
import org.onap.ccsdk.cds.controllerblueprints.core.asJsonPrimitive
import org.slf4j.LoggerFactory

open class HelloWorld : AbstractScriptComponentFunction() {
    private val log = LoggerFactory.getLogger(HelloWorld::class.java)!!

    override fun getName(): String {
         return "Check"
    }

    override suspend fun processNB(executionRequest: ExecutionServiceInput) {
          log.info("executing hello world script ")
          val username = getDynamicProperties("username").asText()
          log.info("username : $username")
          //executionRequest.payload.put("Action1-response","hello from $username")
          setAttribute("response-data", "Hello, $username".asJsonPrimitive())
    }

    override suspend fun recoverNB(runtimeException: RuntimeException, executionRequest: ExecutionServiceInput) {
           log.info("Executing Recovery")
           bluePrintRuntimeService.getBluePrintError().addError("${runtimeException.message}")
     }
}
Click on the Create Script button to save the script file

Now, you can view and edit your script file.

After the new script is added to the scripts list, click on the Save button to save the package updates.

Define DSL Properties
In the DSL PROPERTIES Tab:
Copy and paste the below DSL definition
{
    "Action1-properties": {
        "username": {
            "get_input": "username"
        }
    }
}

Then click on the Save button to update the package.

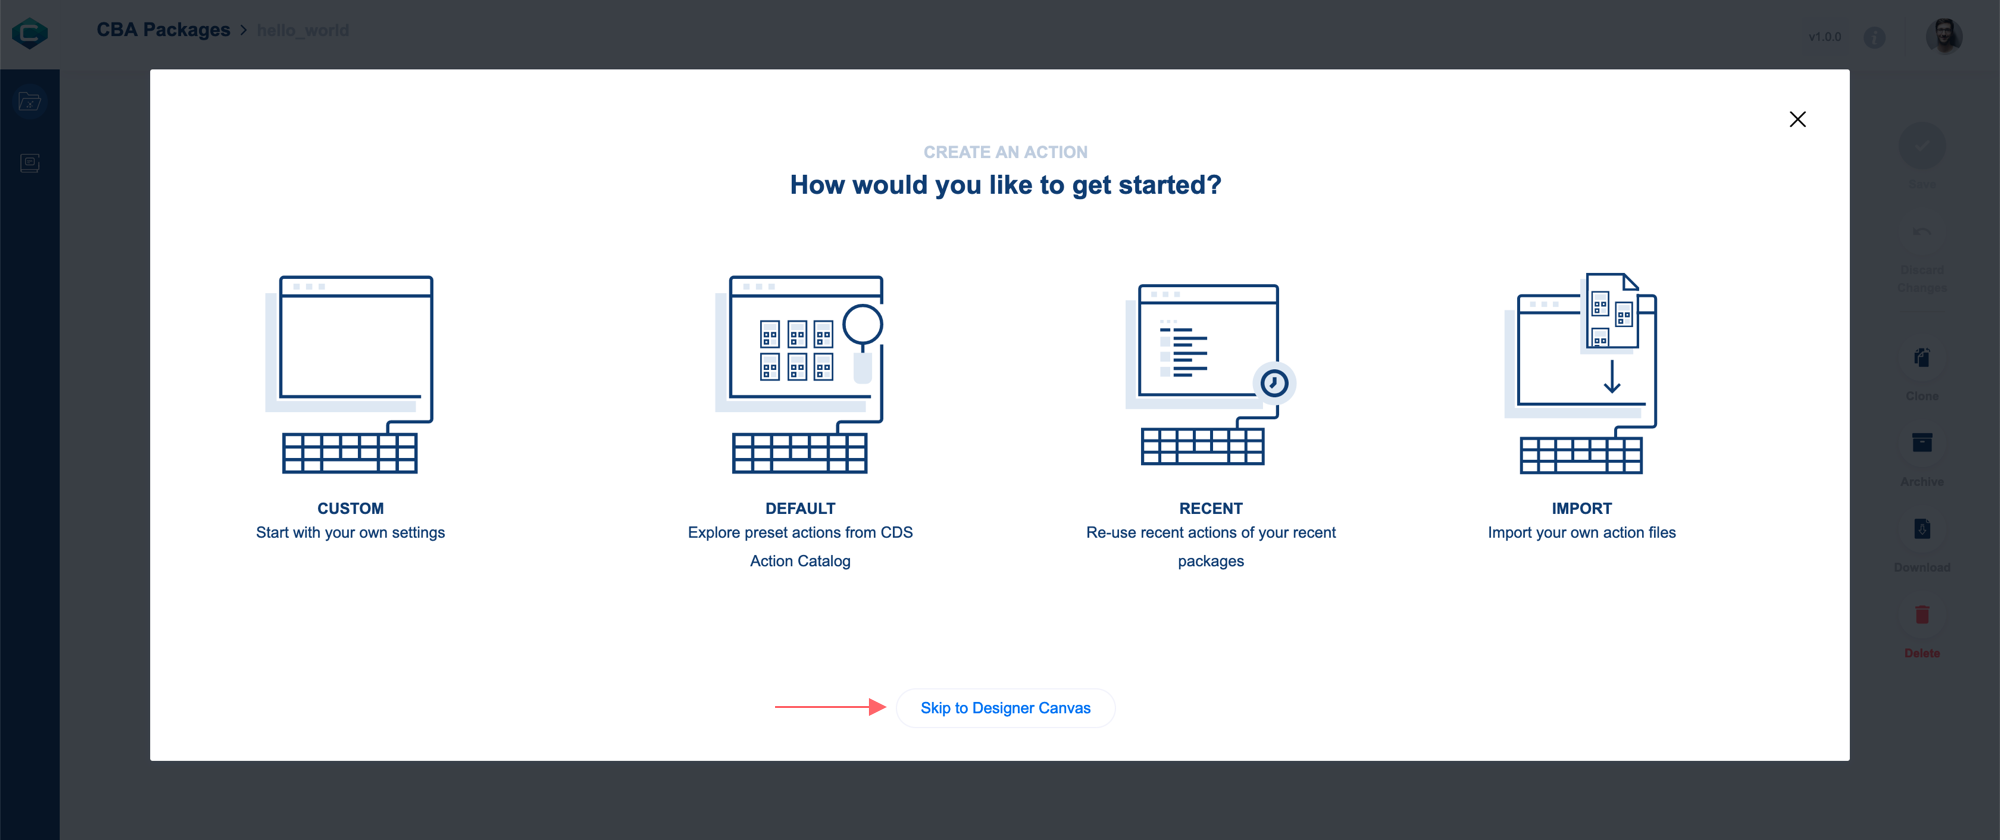
Create An Action
From the Package information box on top, click on the Designer Mode button.

Click on the Skip to Designer Canvas button to go directly to Designer Mode.
Now the designer has zero action added. Let’s start adding the first Action.
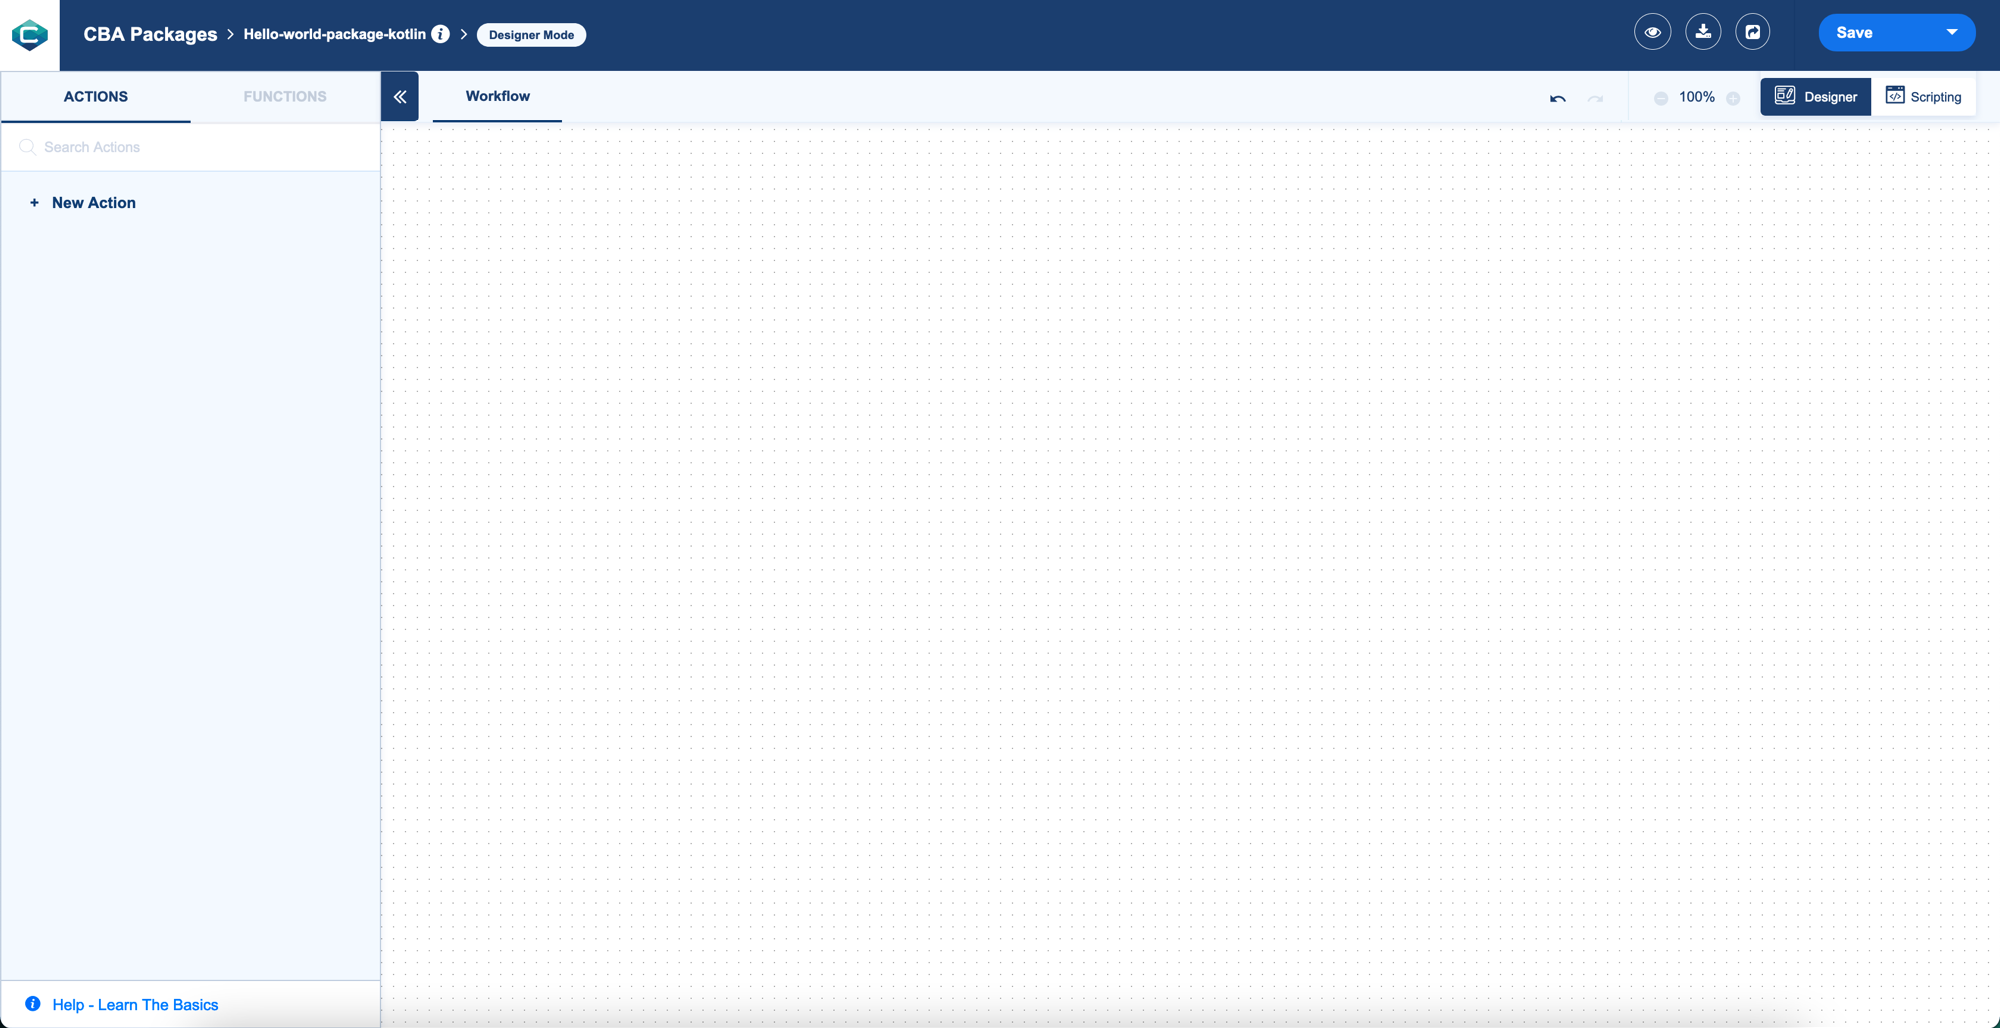
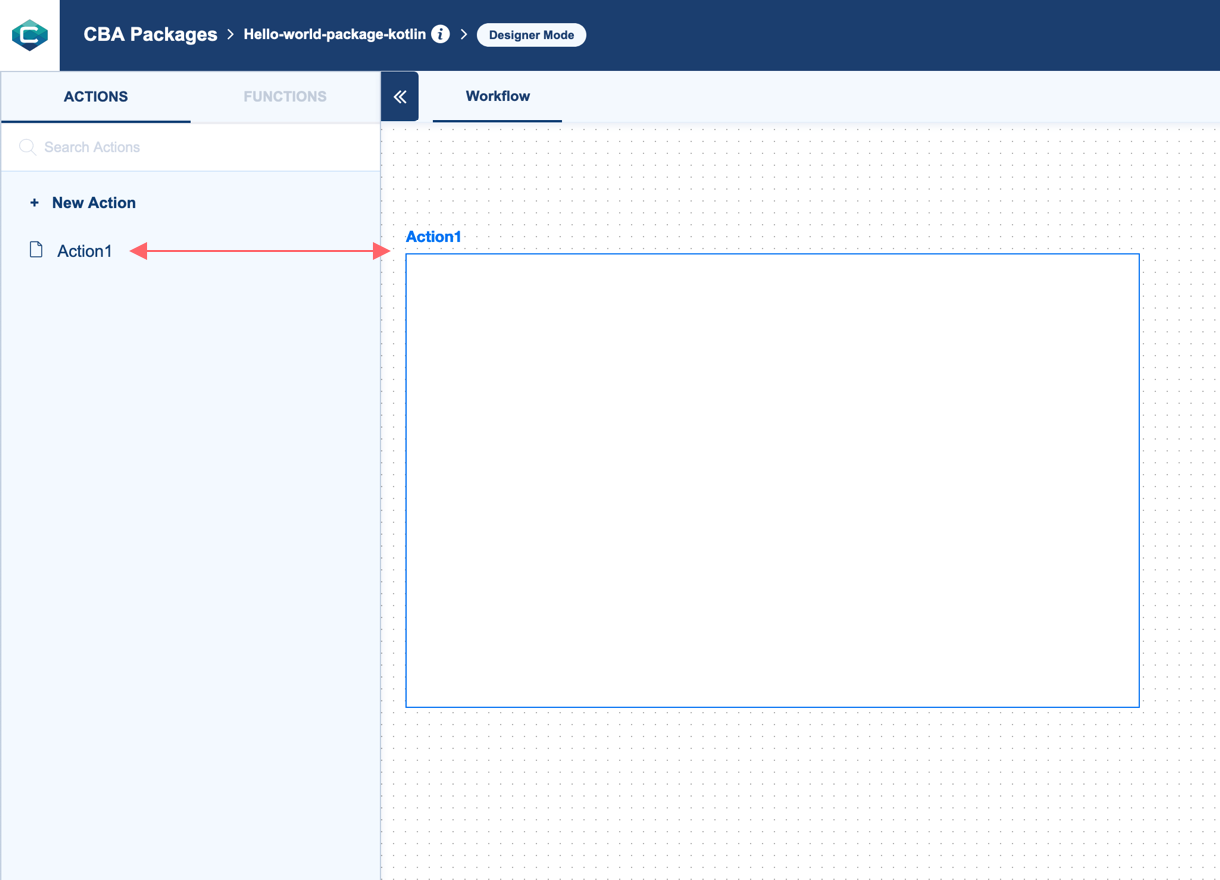
Go to the left side of the designer screen and in the ACTIONS tab, click on the + New Action button.

Now, the first Action Action1 is added to the Actions list and in the Workflow canvas.
Add Script Executor Function To The Action
On the left side of the designer screen, Click on the FUNCTIONS tab to view all the Functions List.

Drag the function type “component-script-executor”
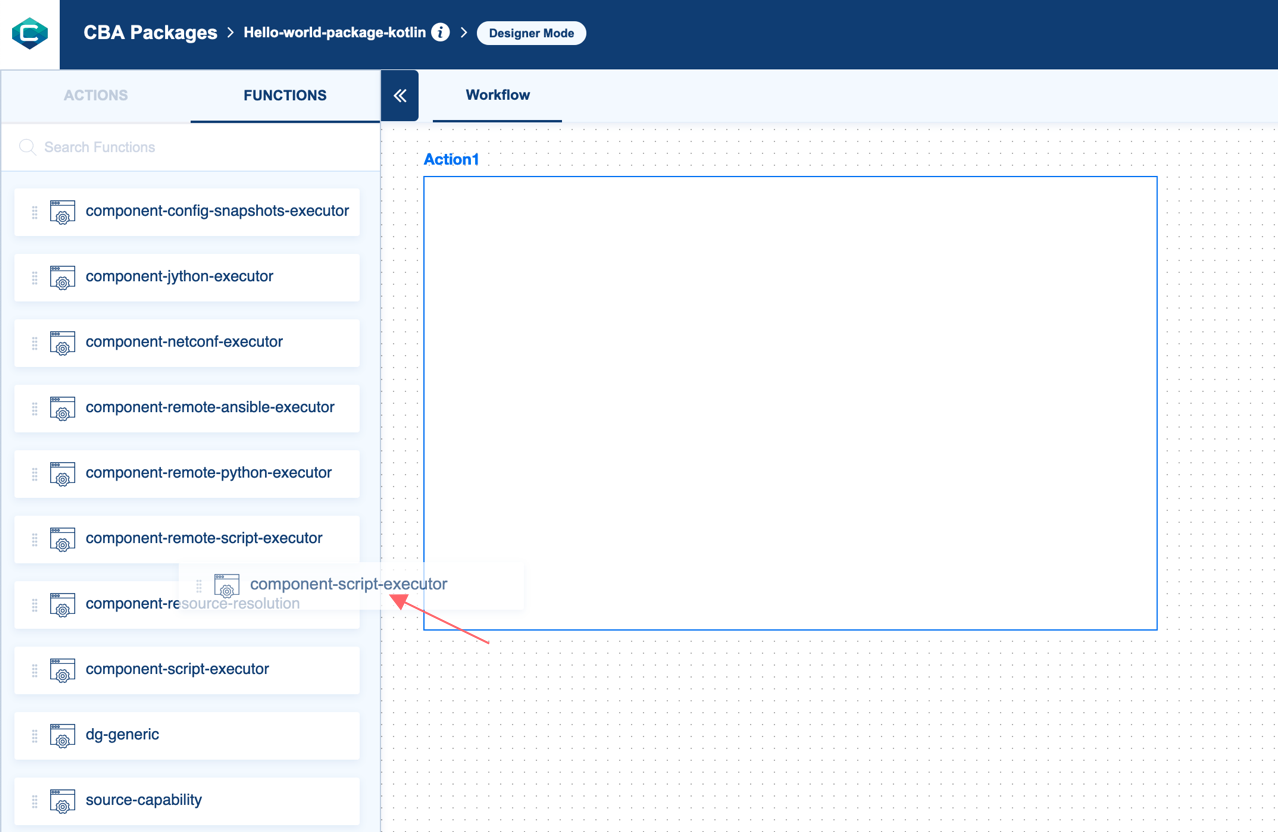
Drop the function to the “Action1” Action container.

Define Action Attributes
Click on Action1 from the ACTIONS tab to open the ACTION ATTRIBUTES section on designer screens’ right side.
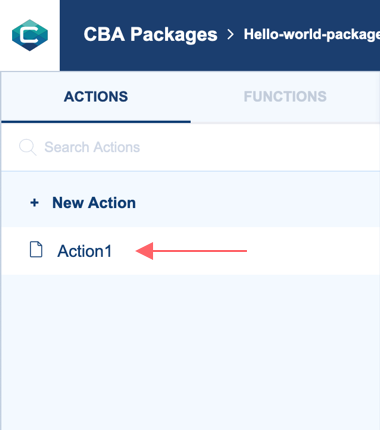
Let’s customize the first action’s attribute by click on the + Create Custom button to open Add Custom Attributes modal window.

In the Add Custom Attributes Window, and the INPUTS tab starts to add the first input attribute for Action1. INPUTS Tab: Enter the required properties for the inputs’ attribute:
Name: “username”
Type: “Other”
Attribute type name: “dt-resource-assignment-properties”
Required: “True”

After you add the username input’s attribute, click on In the OUTPUT Tab to create the output attribute too.

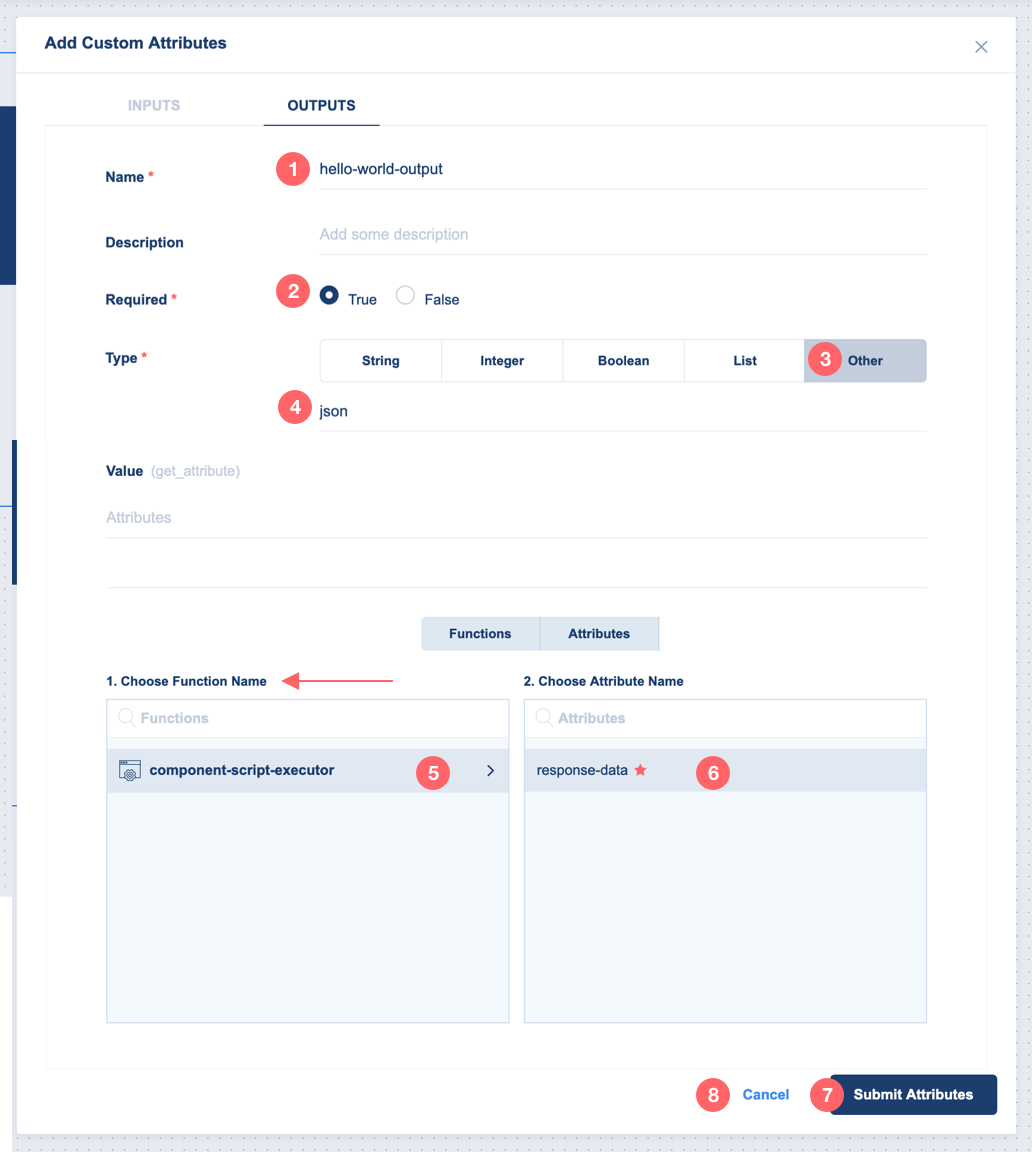
OUTPUTS Tab: Enter the required properties for the output’ attribute:
Name: “hello-world-output”
Required: “True”
Type: “Other”
Type name: “json”
Value (get_attribute): From the Functions list, select “component-script-executor” that will show all attributes included in this function
Select parameter name “response-data”
Click on the Submit Attributes button to add input and output attributes to Actions’ Attributes list
Click on the Close button to close the modal window and go back to the designer screen.
Now, you can see all the added attributes listed in the ACTION ATTRIBUTES area.

Define Function Attributes
From ACTIONS List, Click on the function nam “component-script-executor”.

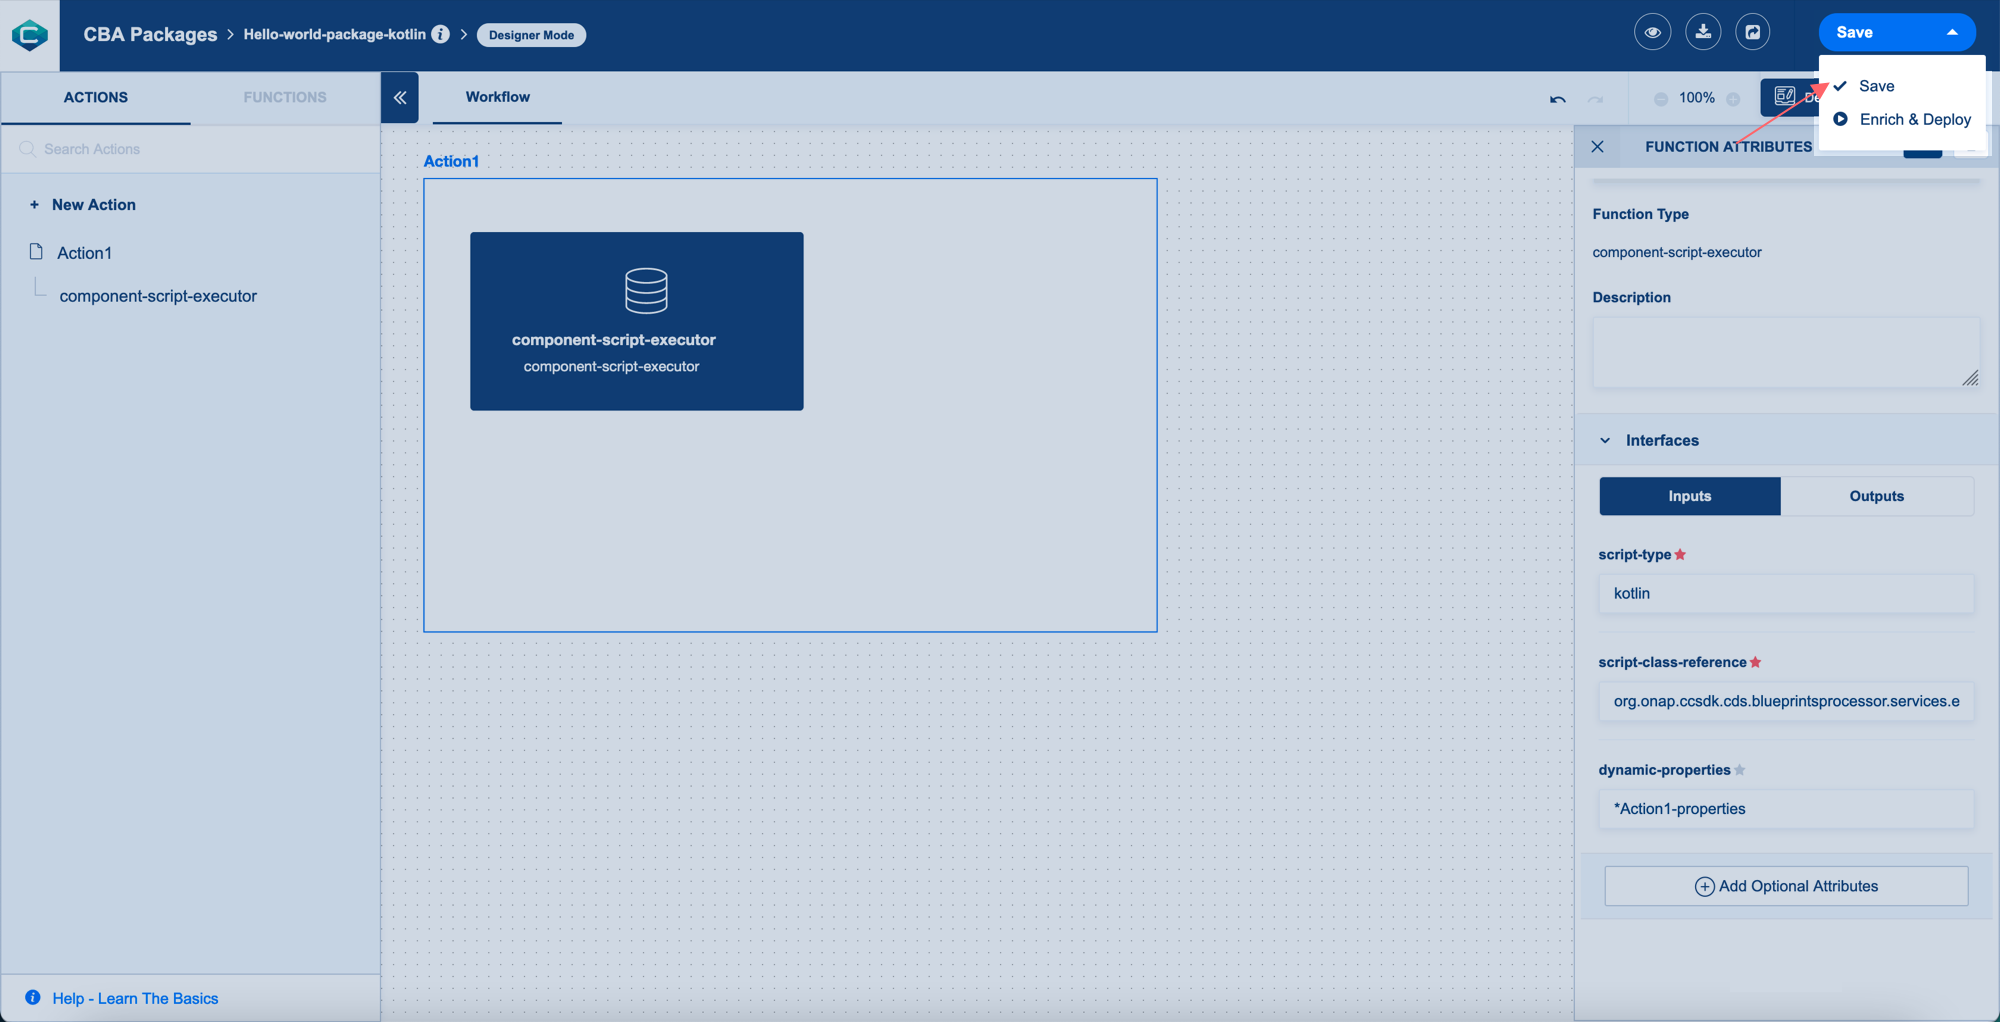
When you click on the component-script-executor function, the FUNCTION ATTRIBUTES section will be open on the right side of the designers’ screen. Now, you need to add the values of Inputs required attributes in the Interfaces section.

script-type: “kotlin”
script-class-reference: “org.onap.ccsdk.cds.blueprintsprocessor.services.execution.scripts.HelloWorld”
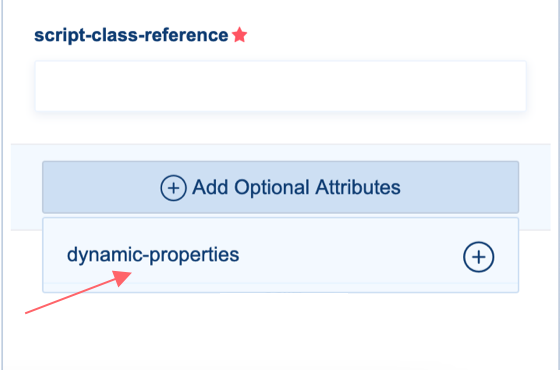
Add optional attribute by click on Add Optional Attributes button, add “dynamic-properties” then enter the value “*Action1-properties”
From the page header and inside the Save menu, click on the Save button to save all the changes.
Enrich And Deploy The CBA Package
From the page header and inside the Save menu, click on the Enrich & Deploy button.

Once the process is done, a confirmation message will appear.

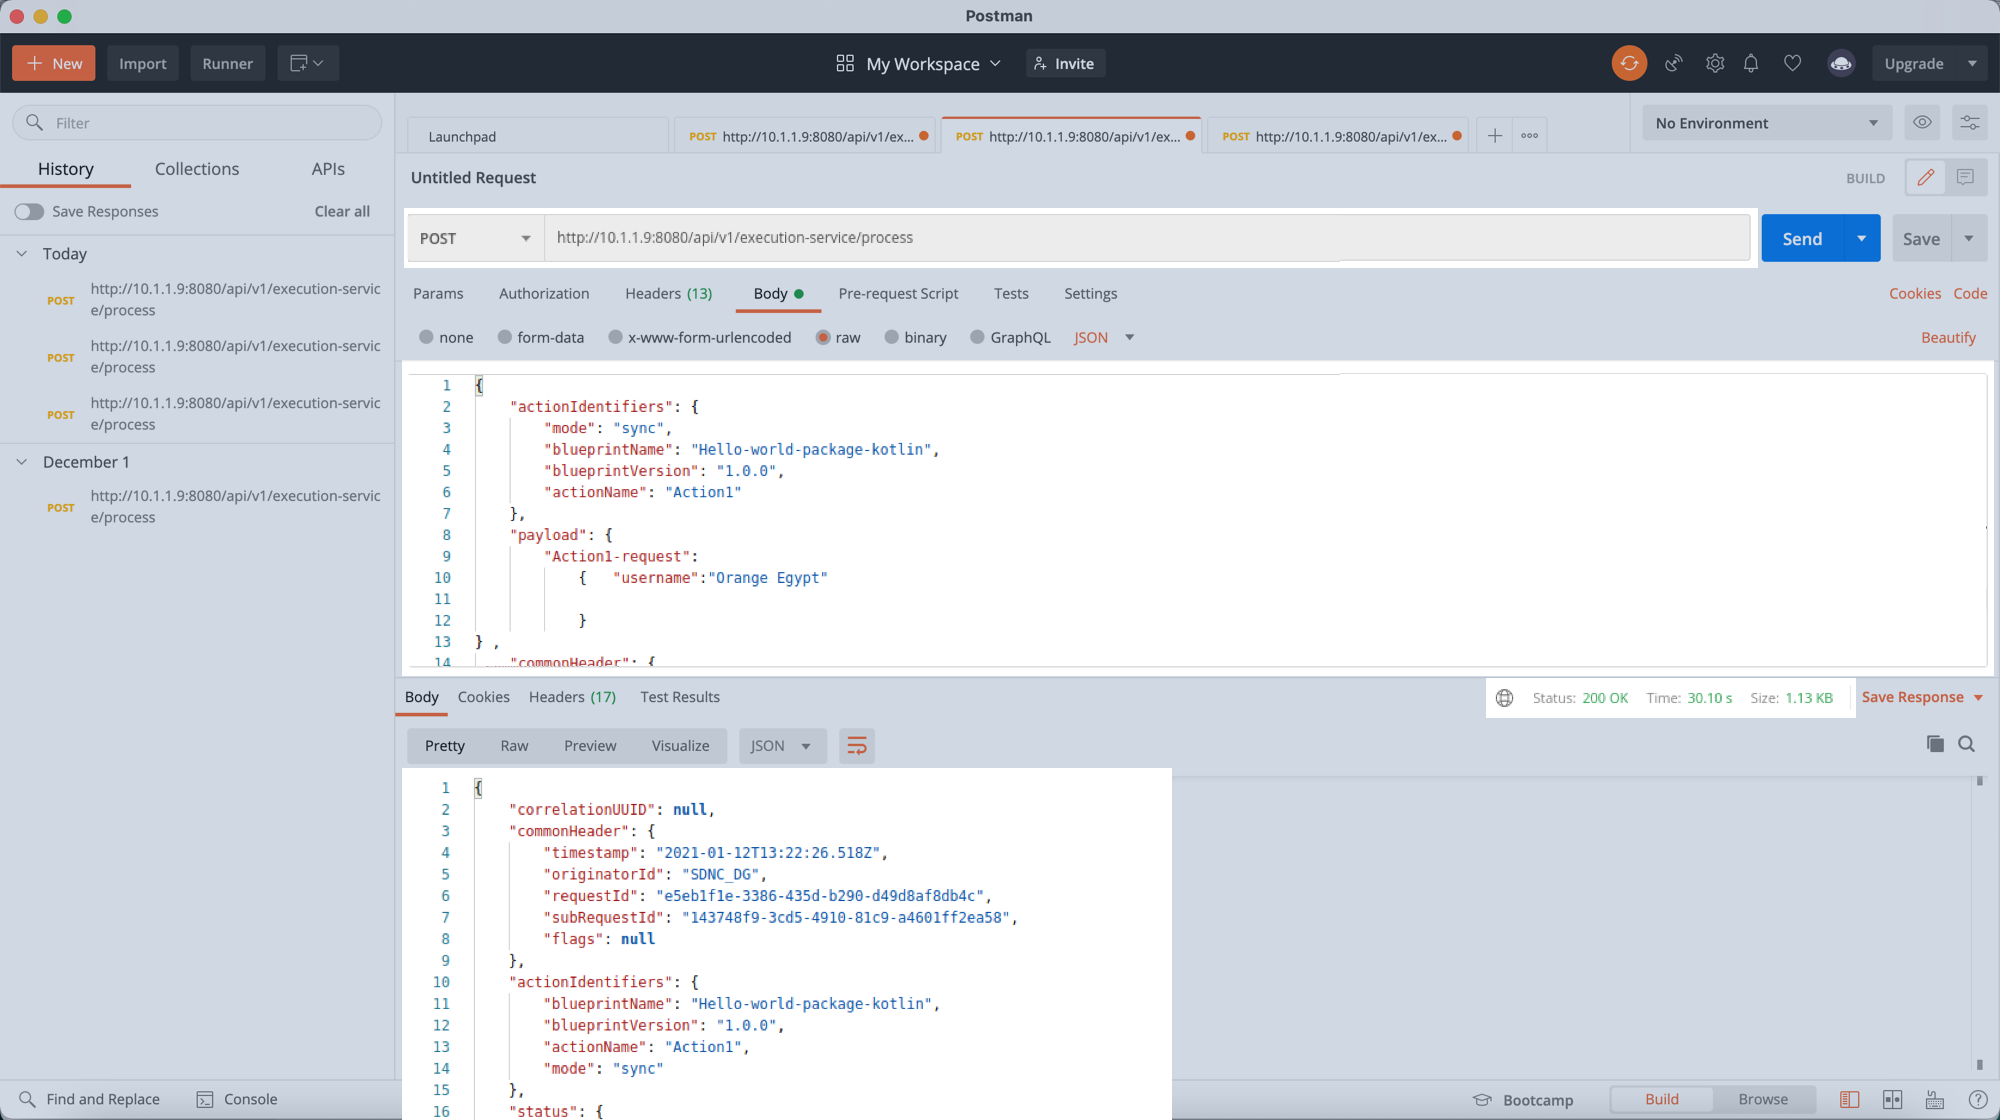
Test The CBA package With CDS REST API
To test the CDS hello_world package we created, we can use the REST API shown below to run the script executor workflow in the Hello-world-package-kotlin package, which will resolve the value of the “username” resource from the REST Call input, and will send it back to the user in the form of “Hello, $username!”.
CURL Request to RUN CBA Package
curl --location --request POST 'http://10.1.1.9:8080/api/v1/execution-service/process' \
--header 'Content-Type: application/json;charset=UTF-8' \
--header 'Accept: application/json;charset=UTF-8,application/json' \
--header 'Authorization: Basic Y2NzZGthcHBzOmNjc2RrYXBwcw==' \
--header 'Host: cds-blueprints-processor-http:8080' \
--header 'Cookie: JSESSIONID=7E69BC3F752FD5A3D7D1663FE583ED71' \
--data-raw '{
               "actionIdentifiers": {
                   "mode": "sync",
                   "blueprintName": "Hello-world-package-kotlin",
                   "blueprintVersion": "1.0.0",
                   "actionName": "Action1"
               },
               "payload": {
                   "Action1-request": {
                       "username":"Orange Egypt"
                   }
               },
               "commonHeader": {
                   "subRequestId": "143748f9-3cd5-4910-81c9-a4601ff2ea58",
                   "requestId": "e5eb1f1e-3386-435d-b290-d49d8af8db4c",
                   "originatorId": "SDNC_DG"
               }
            }'
CDS Response showing result of running package
200 OK
    {
        "correlationUUID": null,
        "commonHeader": {
            "timestamp": "2021-01-12T13:22:26.518Z",
            "originatorId": "SDNC_DG",
            "requestId": "e5eb1f1e-3386-435d-b290-d49d8af8db4c",
            "subRequestId": "143748f9-3cd5-4910-81c9-a4601ff2ea58",
            "flags": null
        },
        "actionIdentifiers": {
            "blueprintName": "Hello-world-package-kotlin",
            "blueprintVersion": "1.0.0",
            "actionName": "Action1",
            "mode": "sync"
        },
        "status": {
            "code": 200,
            "eventType": "EVENT_COMPONENT_EXECUTED",
            "timestamp": "2021-01-12T13:22:56.144Z",
            "errorMessage": null,
            "message": "success"
        },
        "payload": {
            "Action1-response": {
                "hello-world-output": {
                    "hello_world_template": "Hello, Orange Egypt"
                 }
             }
        }
    }
Screenshot from POSTMAN showing how to run the Hello_world-package-kotlin package, and the CDS Response: