Designer Guide
Note
How to Get Started with CDS Designer UI
If you’re new to CDS Designer UI and need to get set up, the following guides may be helpful:
Getting Started
This is your CDS Designer UI guide. No matter how experienced you are or what you want to achieve, it should cover everything you need to know — from navigating the interface to making the most of different features.
What is CDS Designer UI?
CDS Designer UI is a framework to automate the resolution of resources for instantiation and any config provisioning operation, such as day0, day1, or day2 configuration. CDS has both design-time and run-time activities; during design time, Designer can define what actions are required for a given service, along with anything comprising the action. The design produces a CBA Package Its content is driven from a catalog of reusable data dictionary and component, delivering a reusable and simplified self-service experience. CDS modeling is mainly based on the TOSCA standard, using JSON as a representation. |
|
What’s new?
Create full CBA packages from built-in forms without programming
Customizable CBA Package actions |
Import old packages for edit and collaboration
Easily create and manage lists of data via interface (Data Dictionary, controller catalog, and config management) |
Create sophisticated package workflows in a no-code graphical designer
Integration between CDS UI and SDC Services |


Overview of CDS Interface
Full CDS UI screens are available in InVision

CDS main menu: Access all CDS module list including Packages, Data Dictionary, Controller Catalog, etc.
Profile: Access user profile information
Module Title: See the current module name and the total number of items in the module list
Module list: View all active items in module and tools for search and filtering
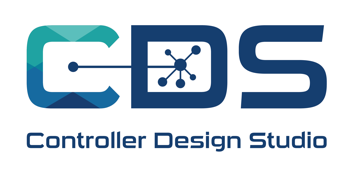
CBA Packages
Package List
It gives you quick access to all and most recent created/edit packages
Module Tabs: Access All, Deployed, Under Construction, or Archived packages
Search: Search for a package by title
Filter: Filter packages by package tags
Package Sort: Sort packages by recent or alphanumeric (name) or version
List Pagination: navigate between package list pages
Create Package: Create a new CBA package
Import Package: Import other packages that are created previously on CDS Editor or Designer or created by other/current user
Package box: It shows a brief detail of the package and gives access to some actions of the package
Deployed package indicator
Package name and version
More menu: Access a list of actions including Clone, Archive, Download, and Delete
Last modified: Shows user name and date and time of last modifications made in the package
Package Description
Package Tags
Collaborators: See who’s collaborating to edit in the package
Configuration button: Go directly to package configuration
Designer Mode: It indicates package mode (Designer, Scripting, and Generic scripting) and by clicking on it, it will load to mode screen
Create a New CBA Package
User Flow
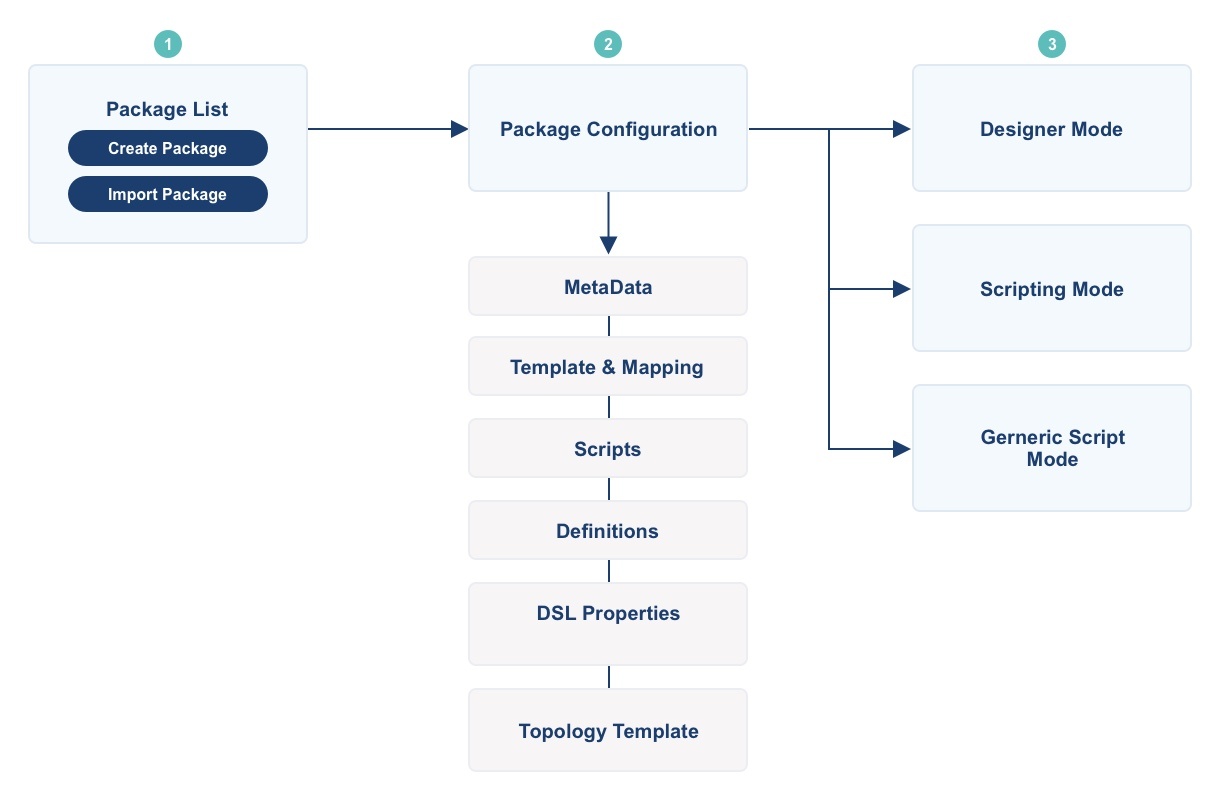
Create a New Package
You can create a new CBA Package by creating a new custom package or by import a package file that is already created before.
Note
Create/Import Package You can’t create/import a CBA package that has the same name and version of an existing package. Packages can be in the same name but in different version numbers (ex., Package one v1.0.0 & Package one v1.0.1).
Create a New Custom CBA Package From the Packages page, click on the Create Package button to navigate to Package Configuration

MetaData
In MetaData Tab, select Package Mode, enter package Name, Version, Description and other configurations
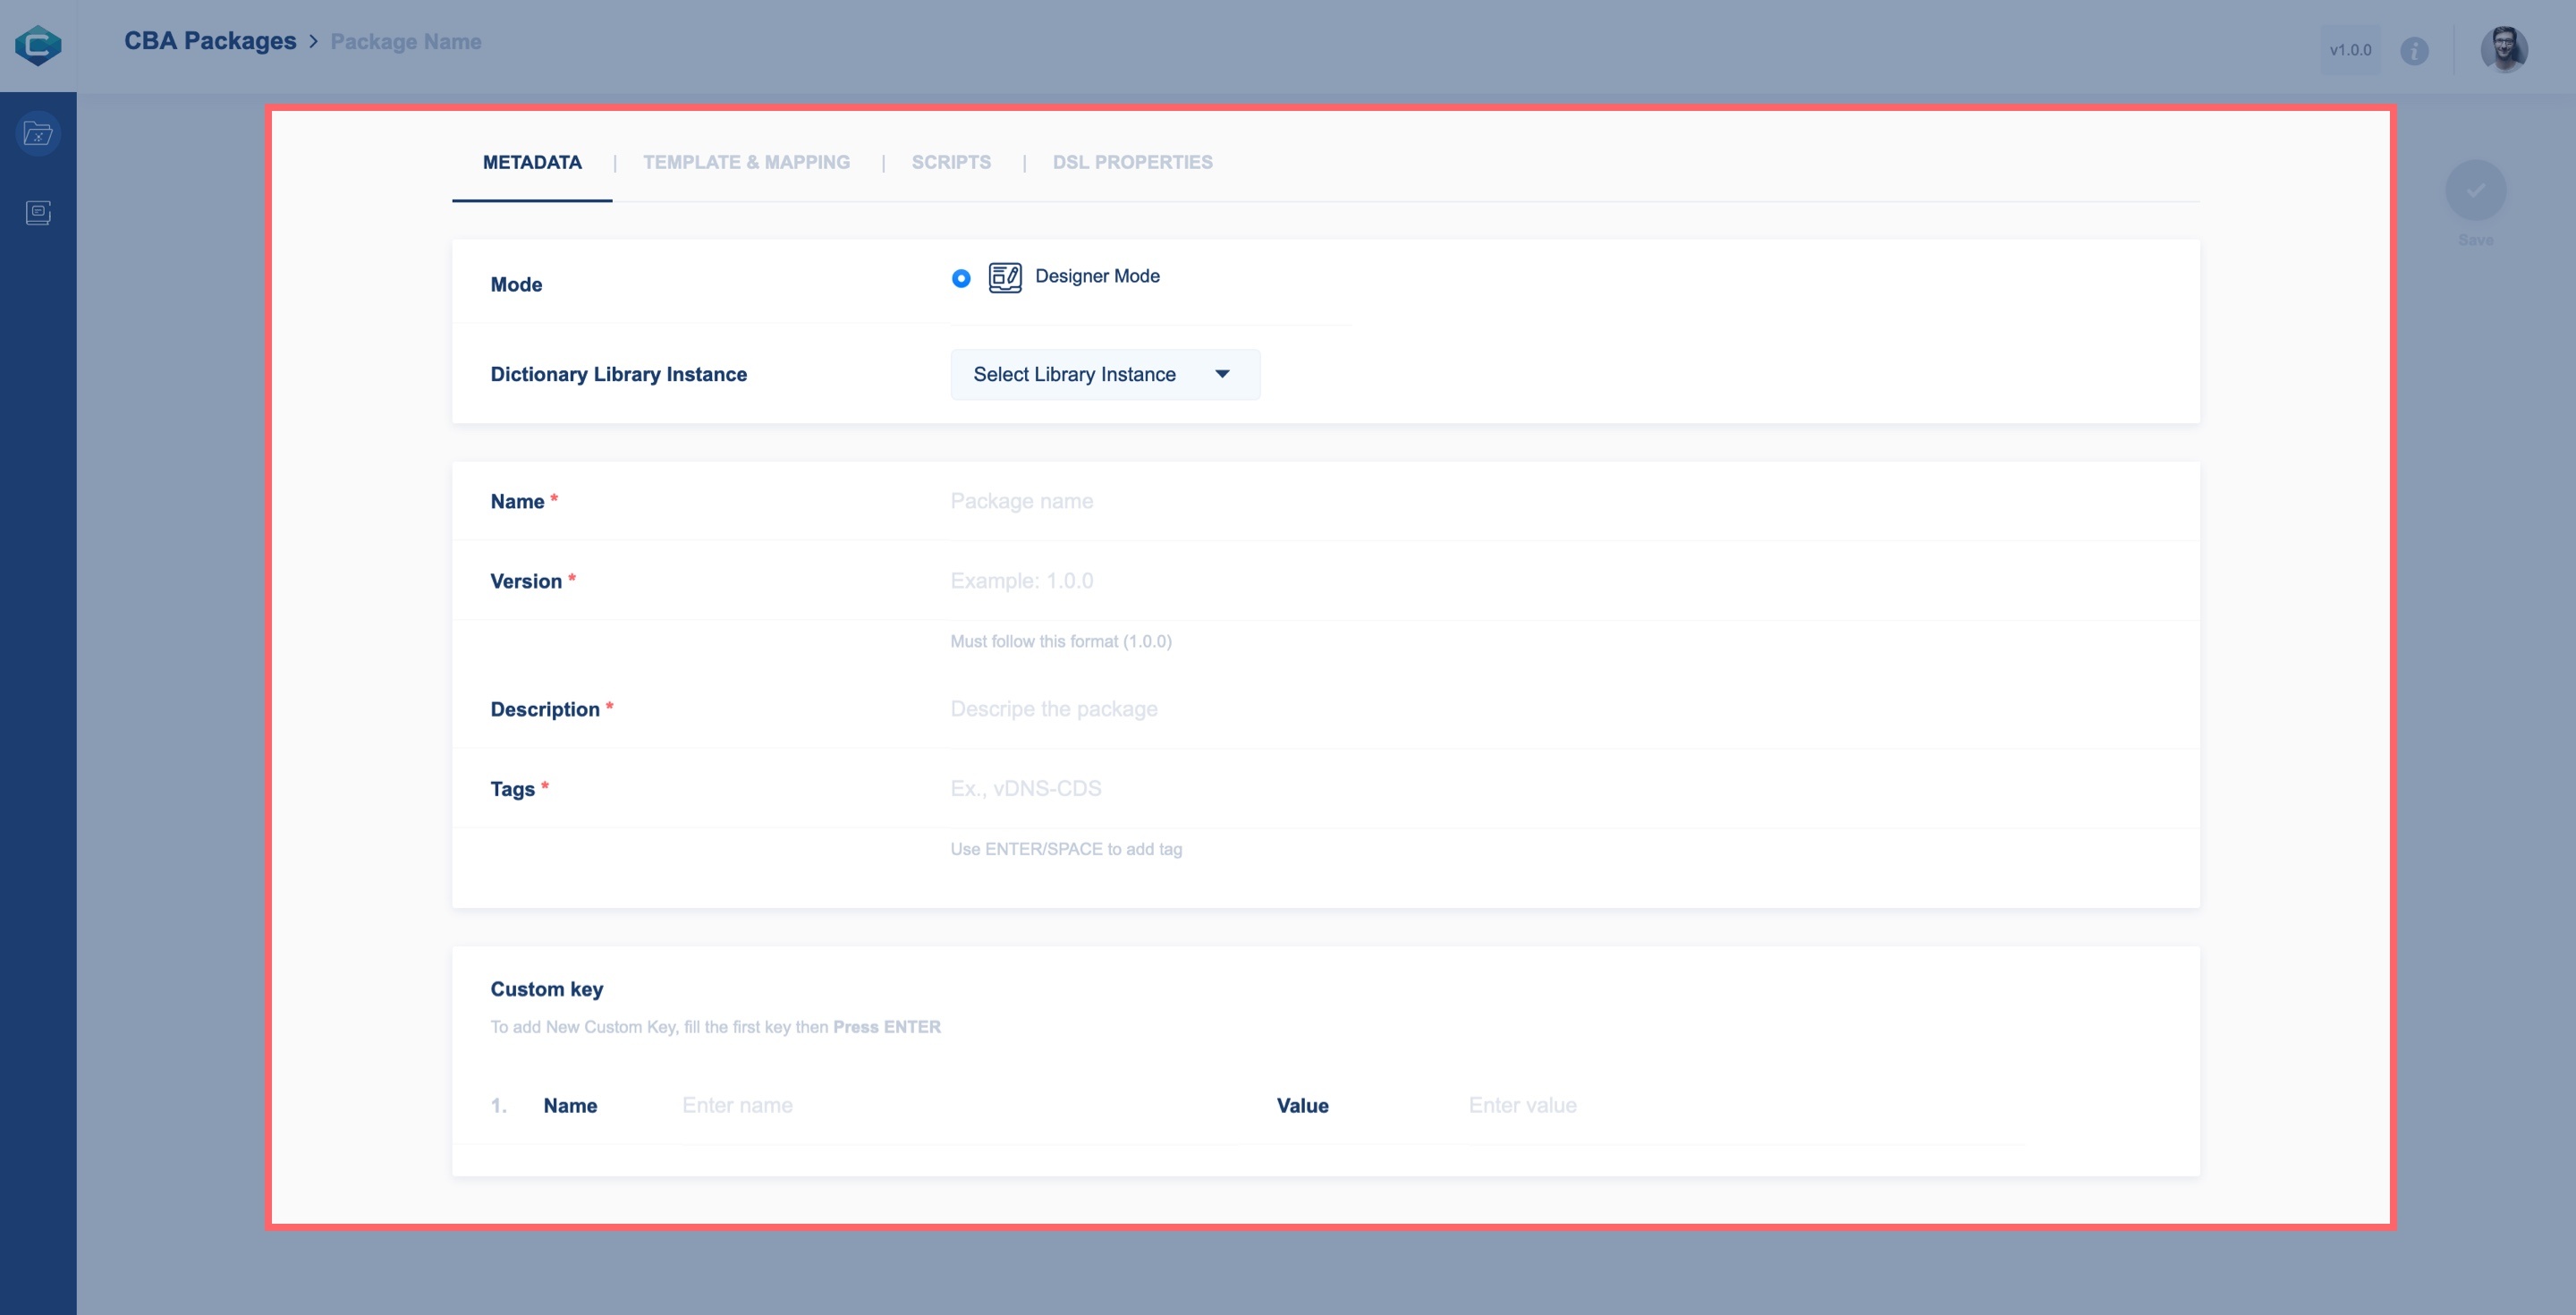
Once you fill in all required inputs, you can save this package by clicking the Save button in the Actions menu
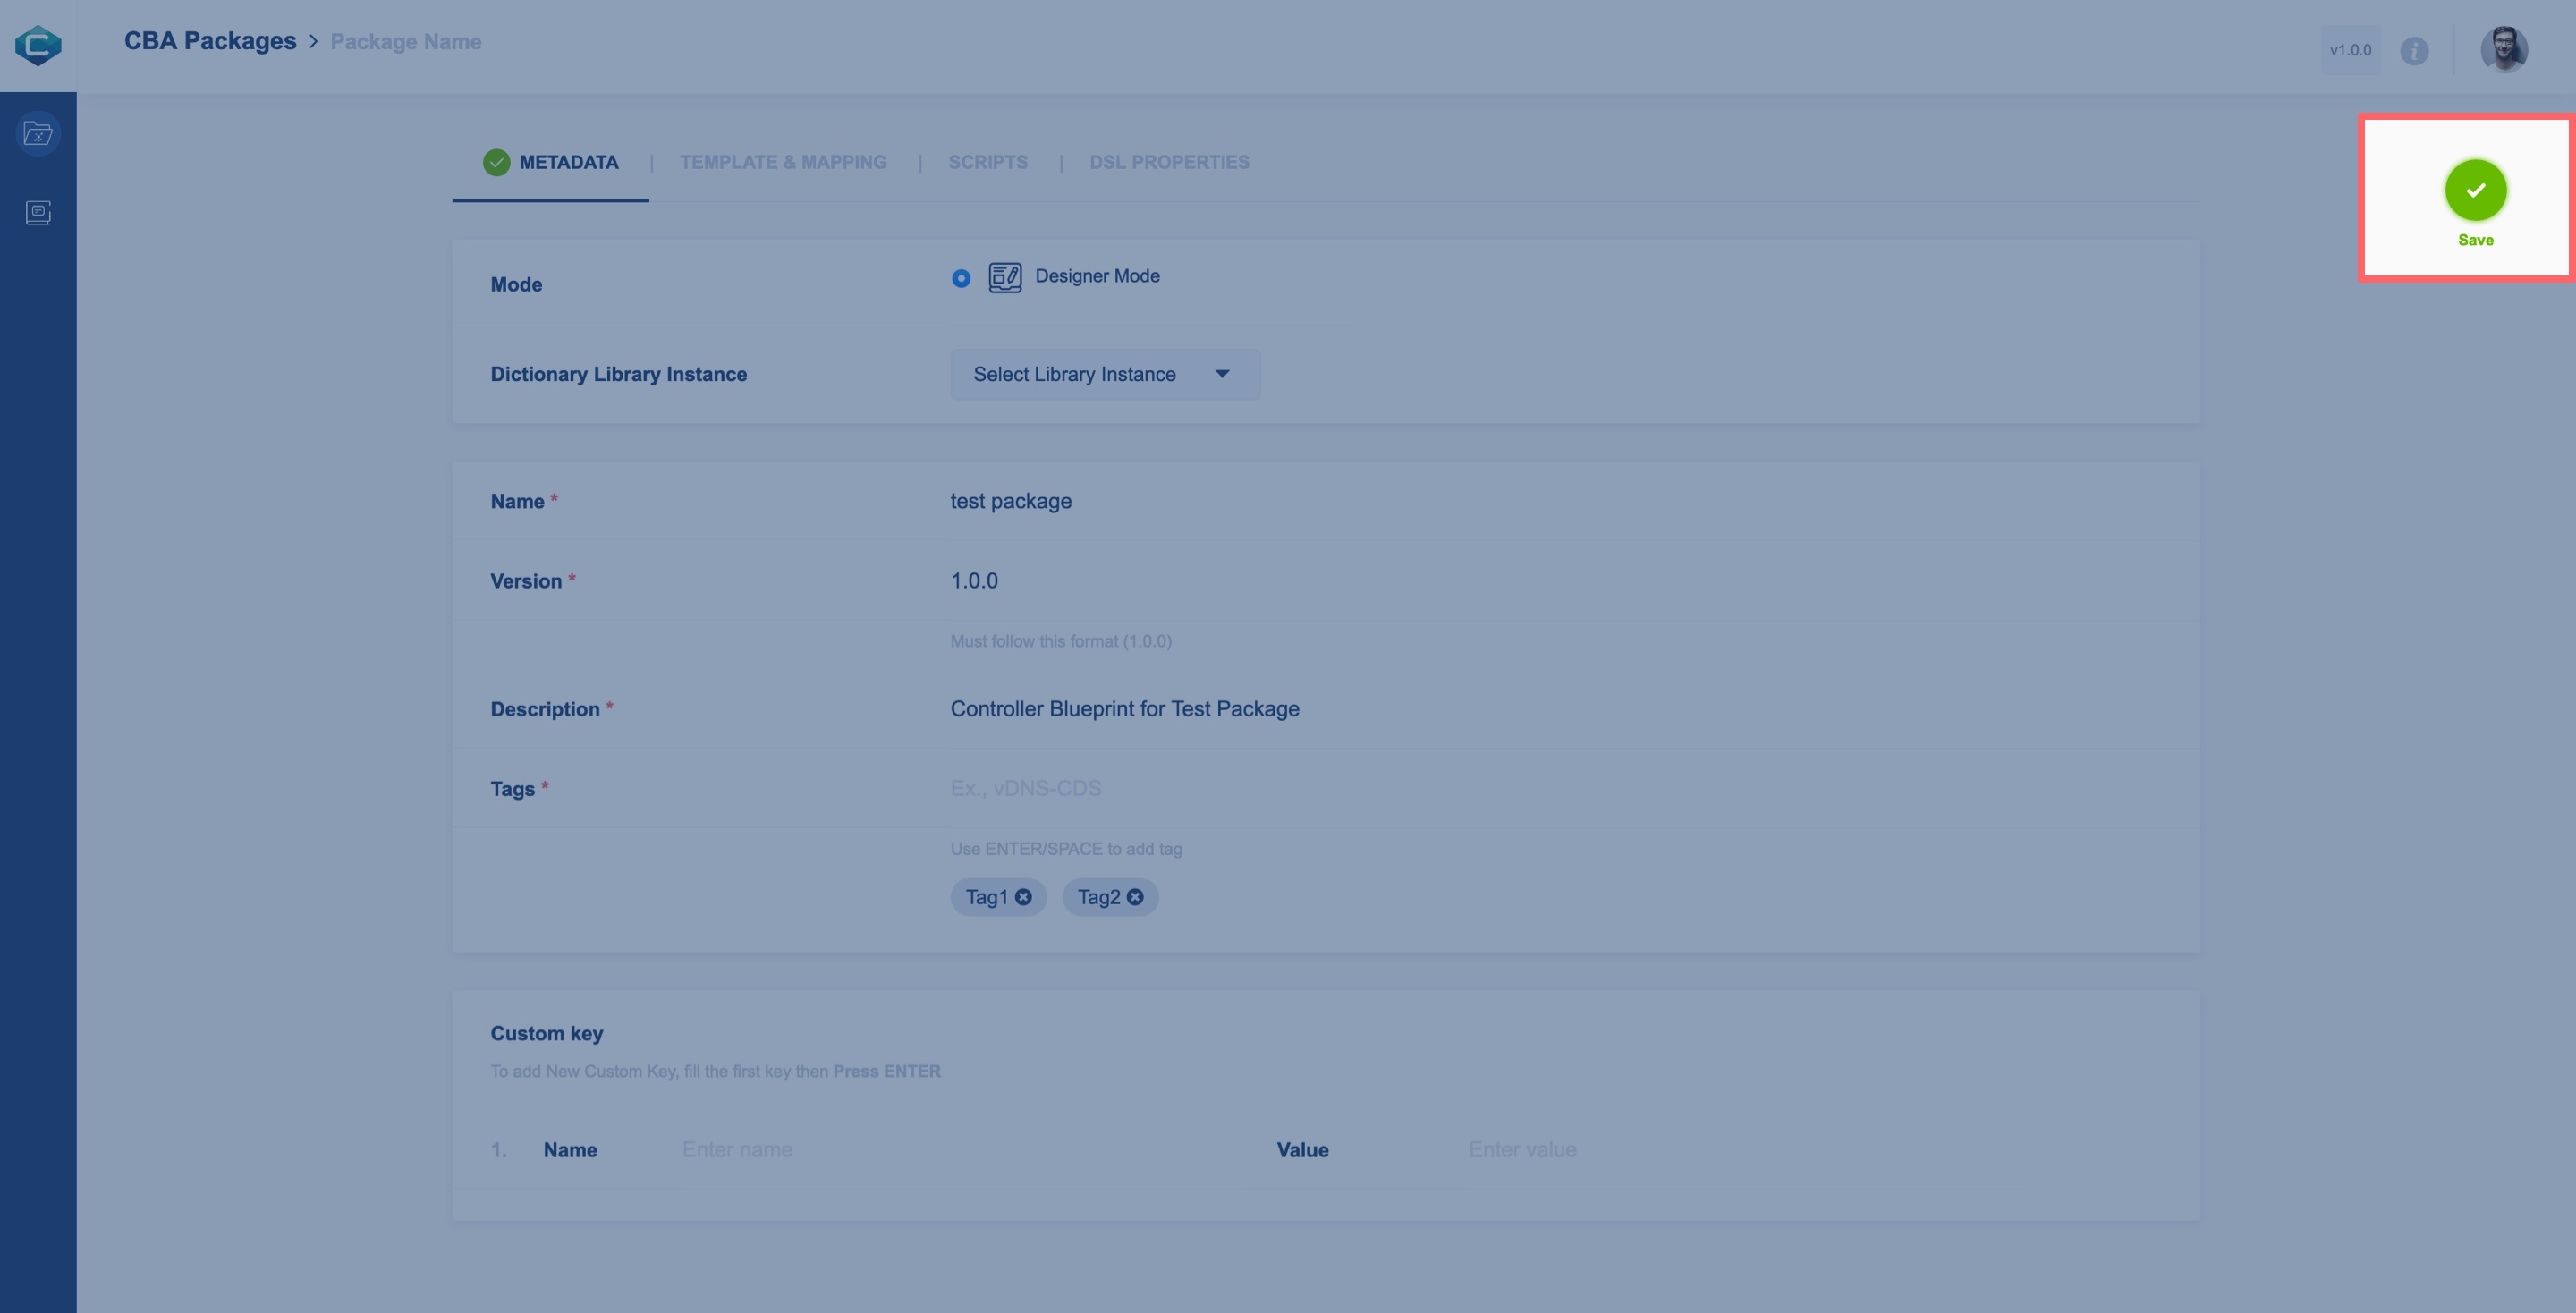
Package Info Box: It is in top of configurations tabs and it appears after you save a package for the first time
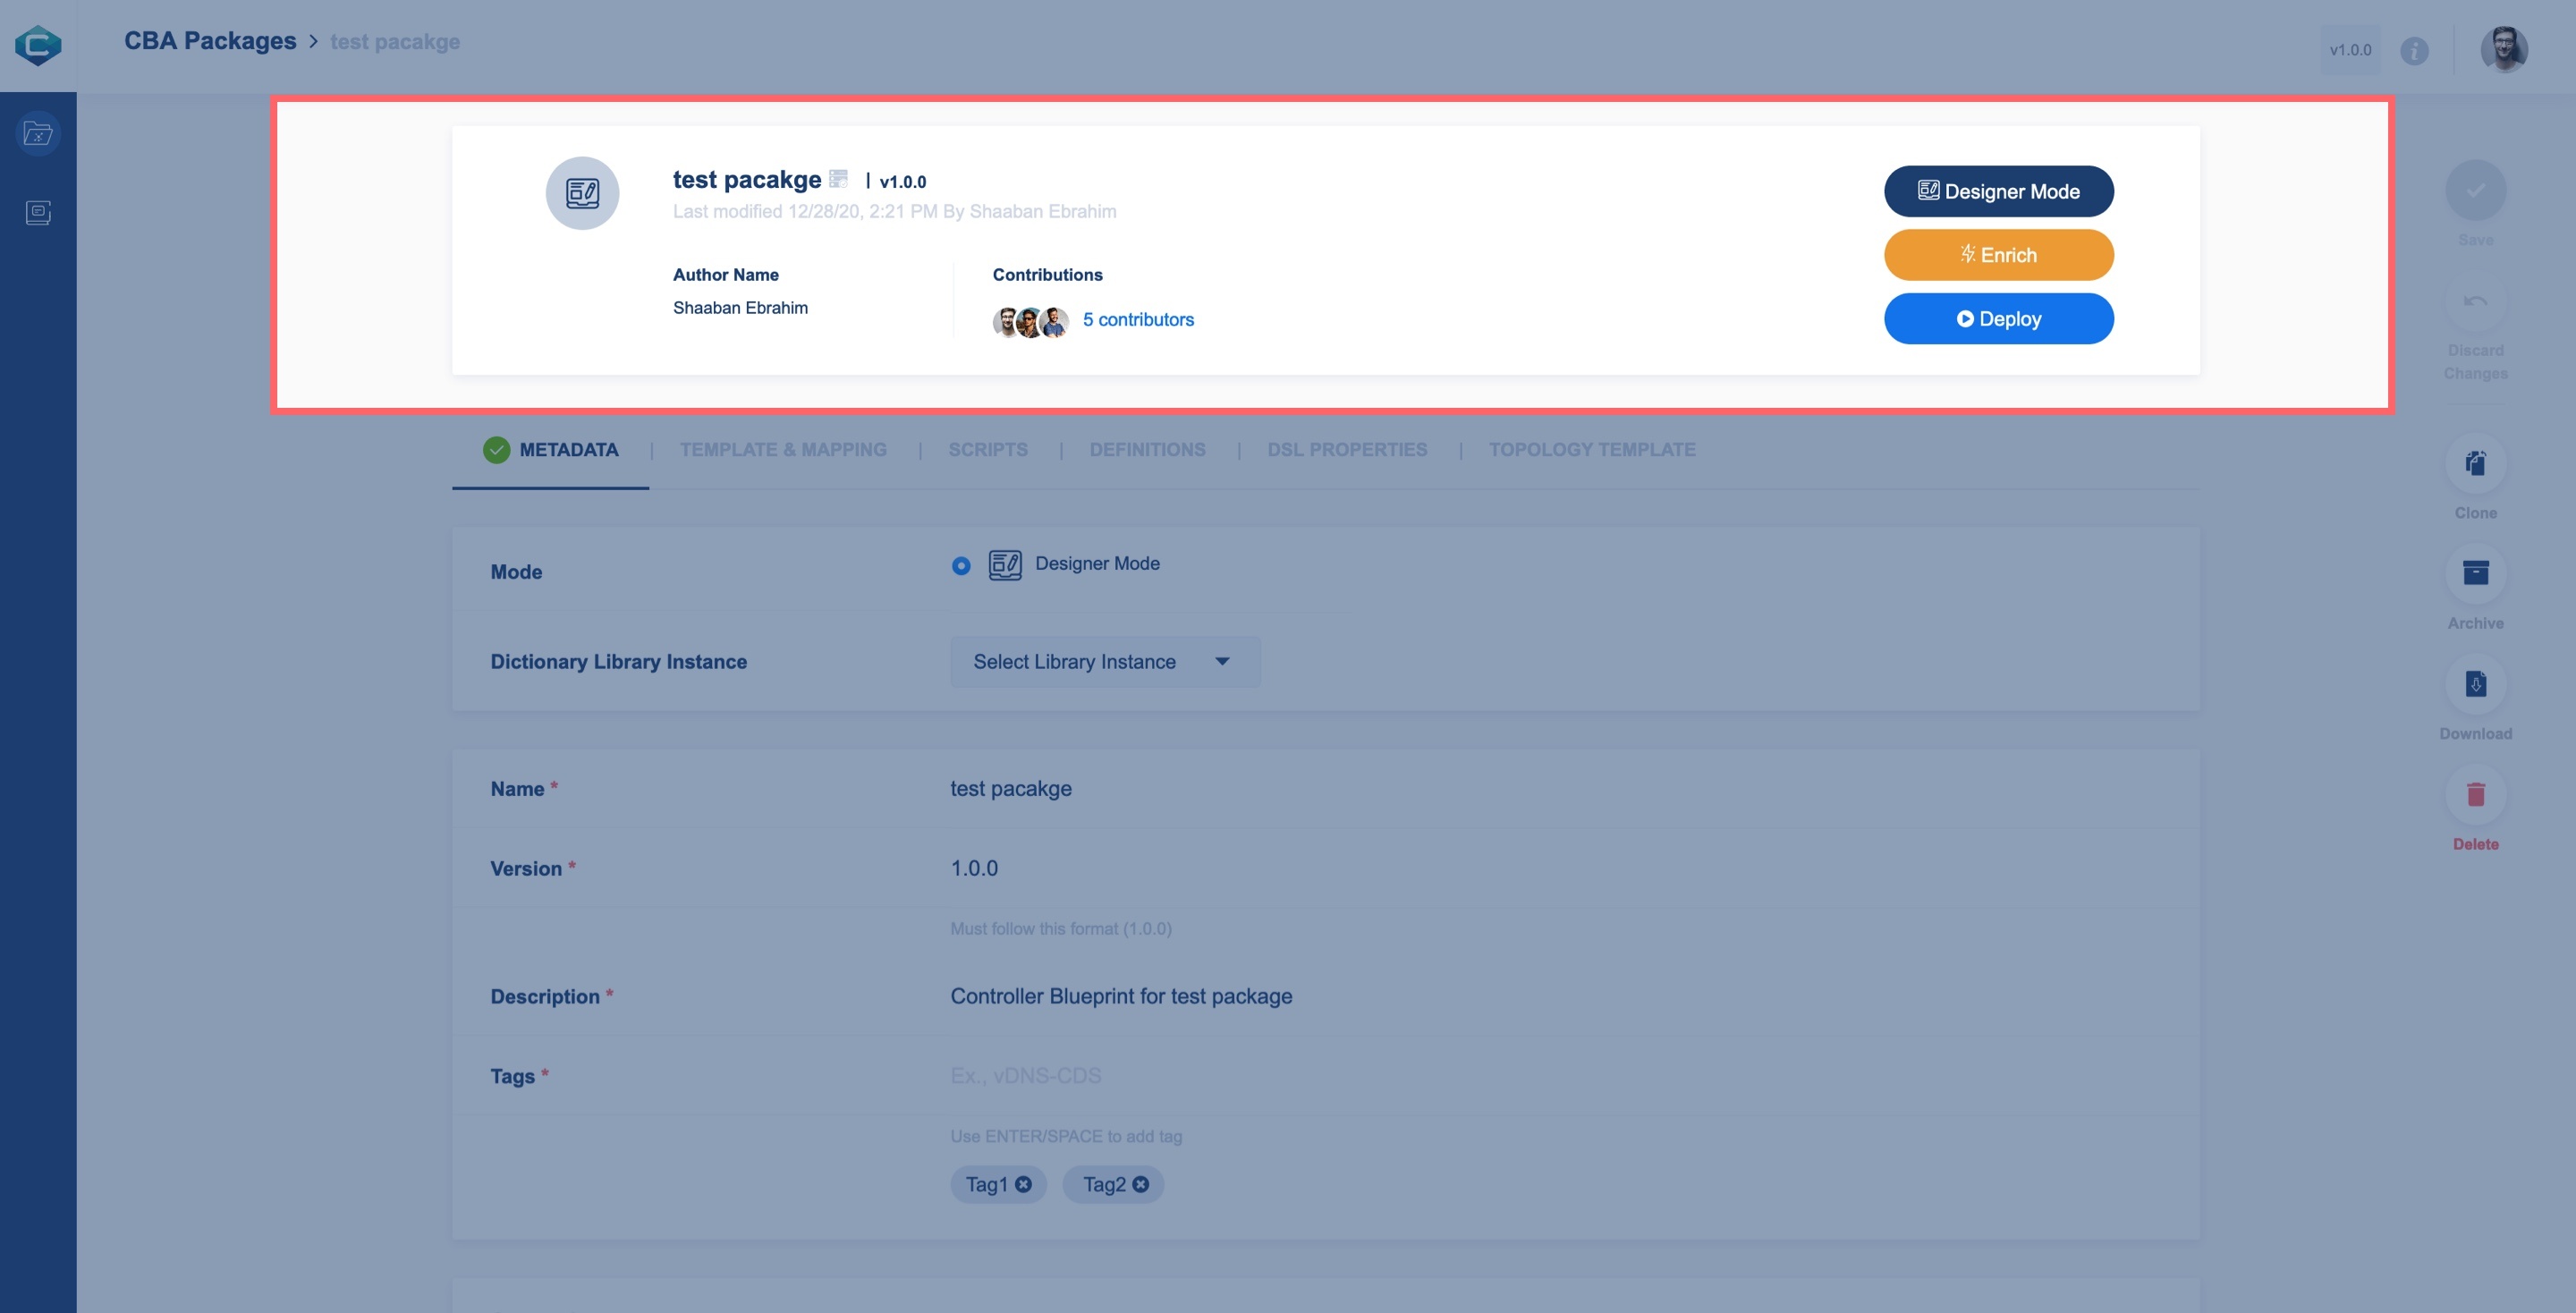
You can continue adding package configuration or go directly to the Designer Mode screen from Package info box
All changes will be saved when you click on the Save button
To close the package configuration and go back to the Package list, navigate to the top left in breadcrumb and click the CBA Packages link or click on the Packages link in the Main menu.
Template & Mapping
You can create as many templates using
artifact-mapping-resource (Artifact Type -> Mapping) or/and artifact-template-velocity (Artifact Type -> Velocity)
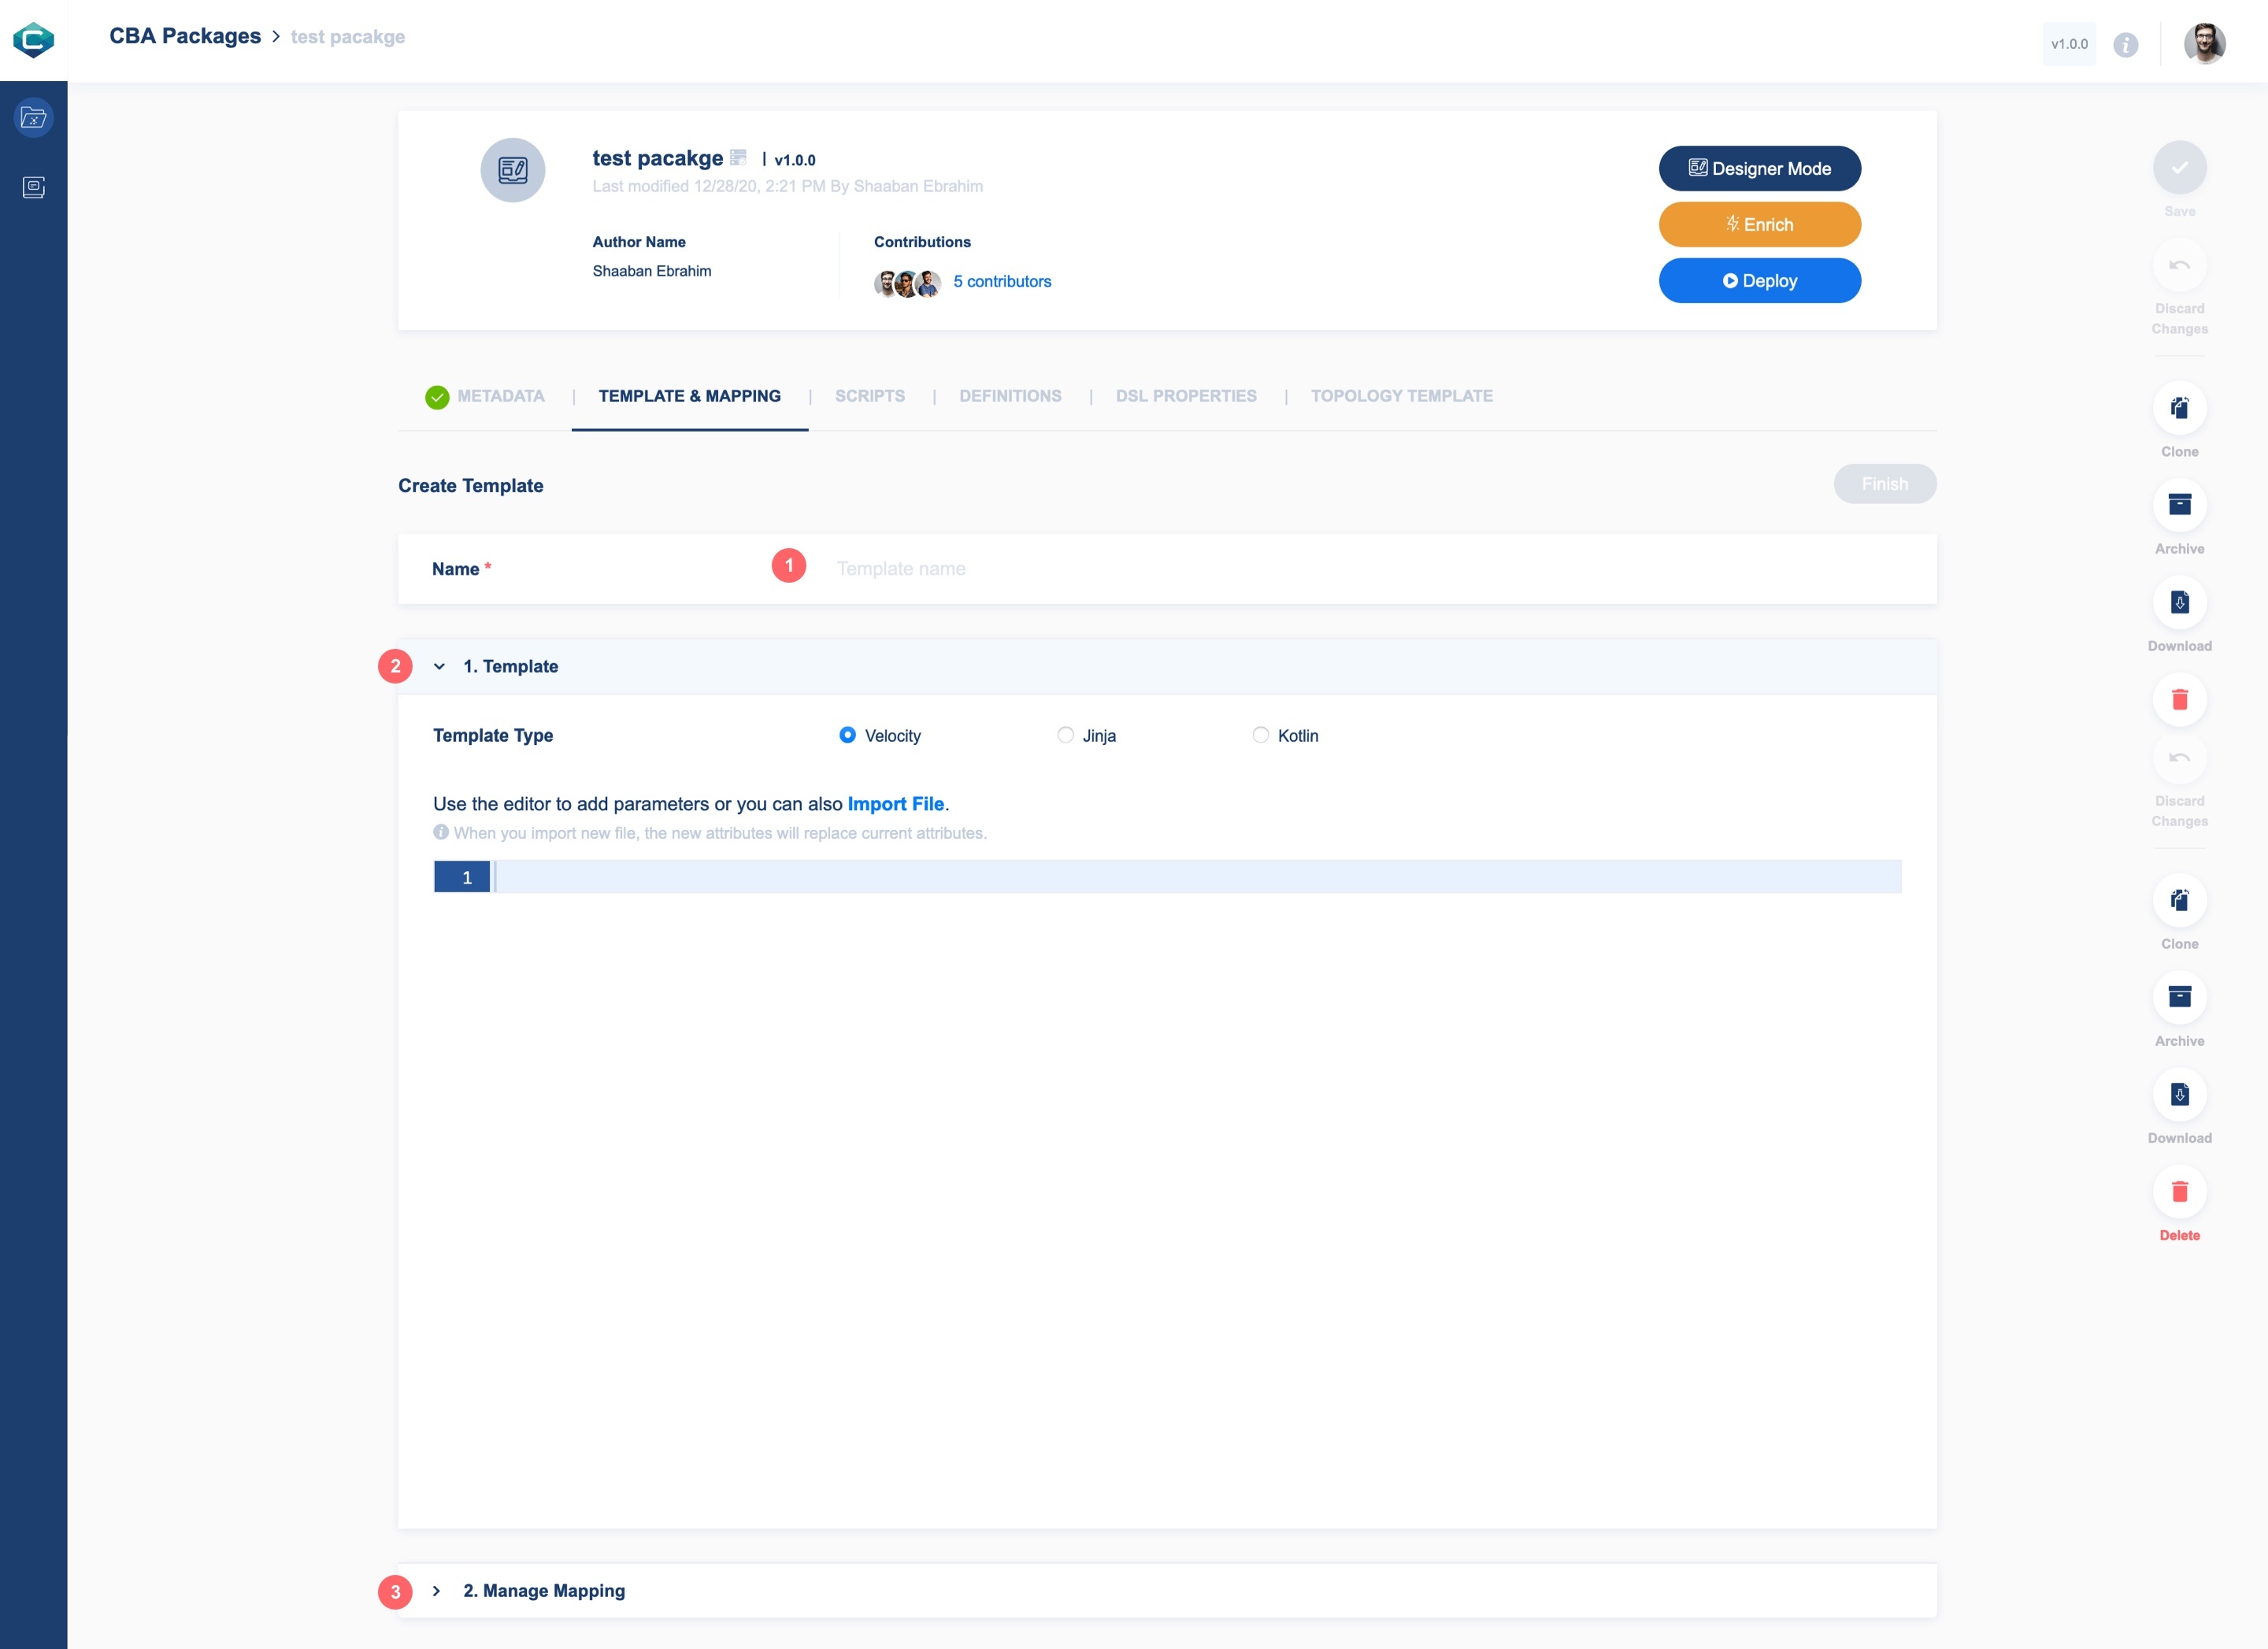
Template name
Template Section: Where you include template attributes
Manage Mapping: Here the automapping process occurs to template attributes to refer to the data dictionary that will be used to resolve a particular resource.
Template Section
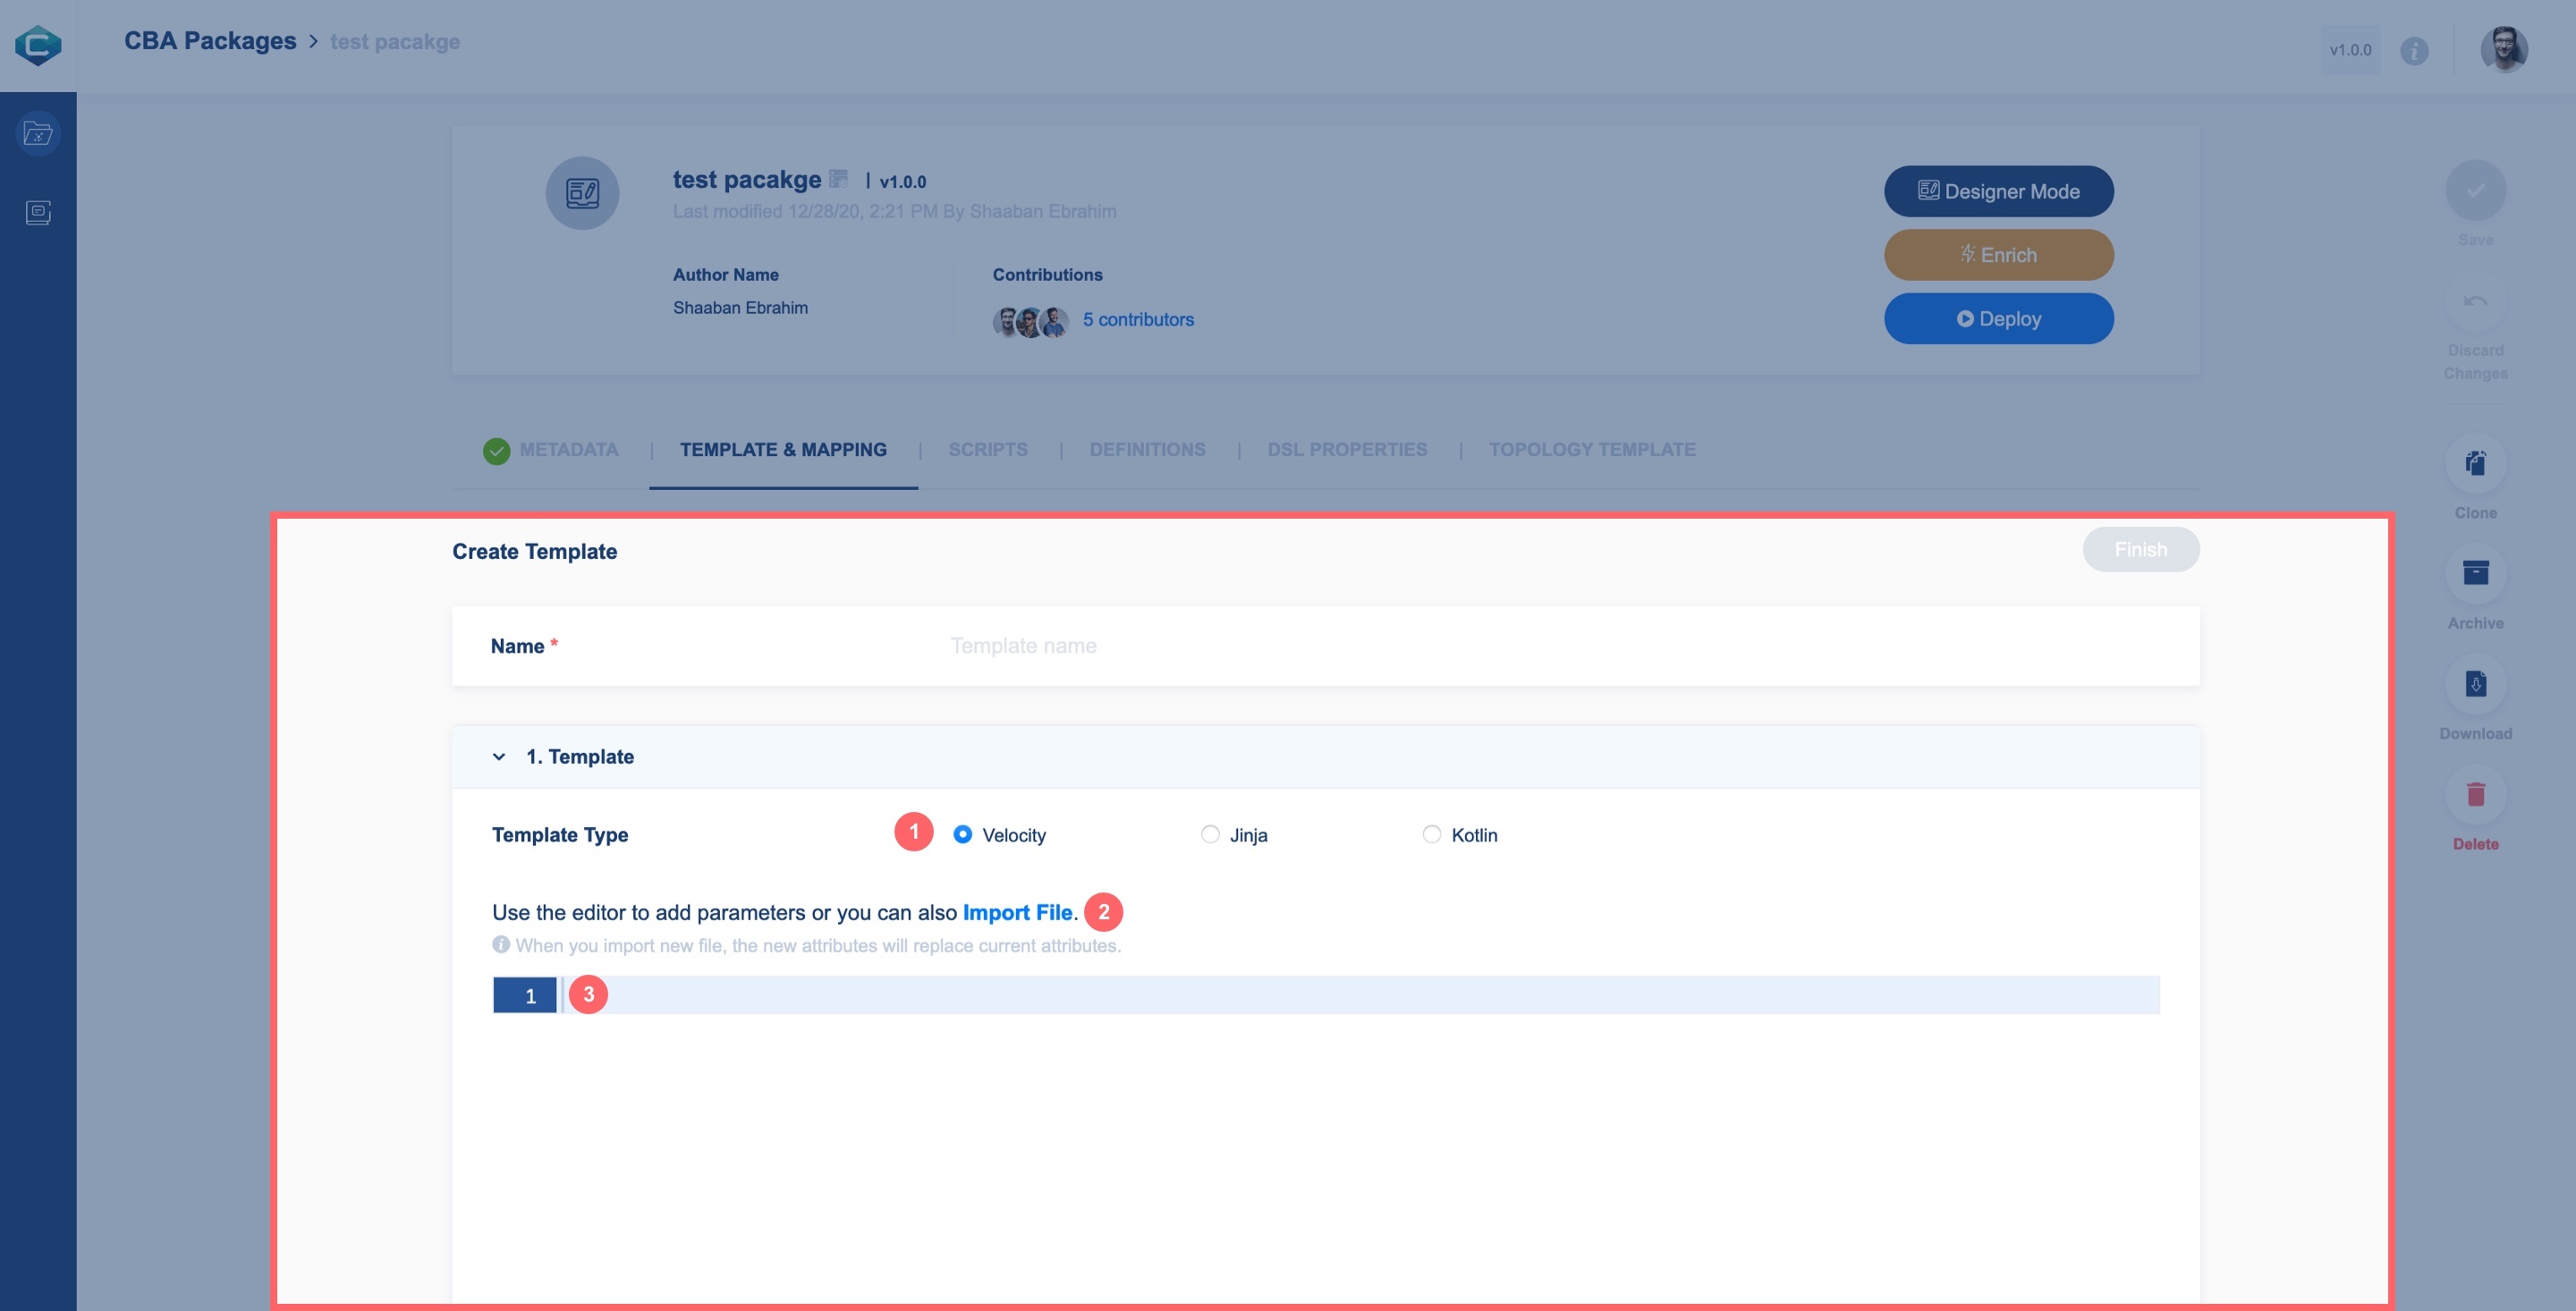
Template Type: Template is defined by one of three templates (Velocity, Jinja, Kotlin)
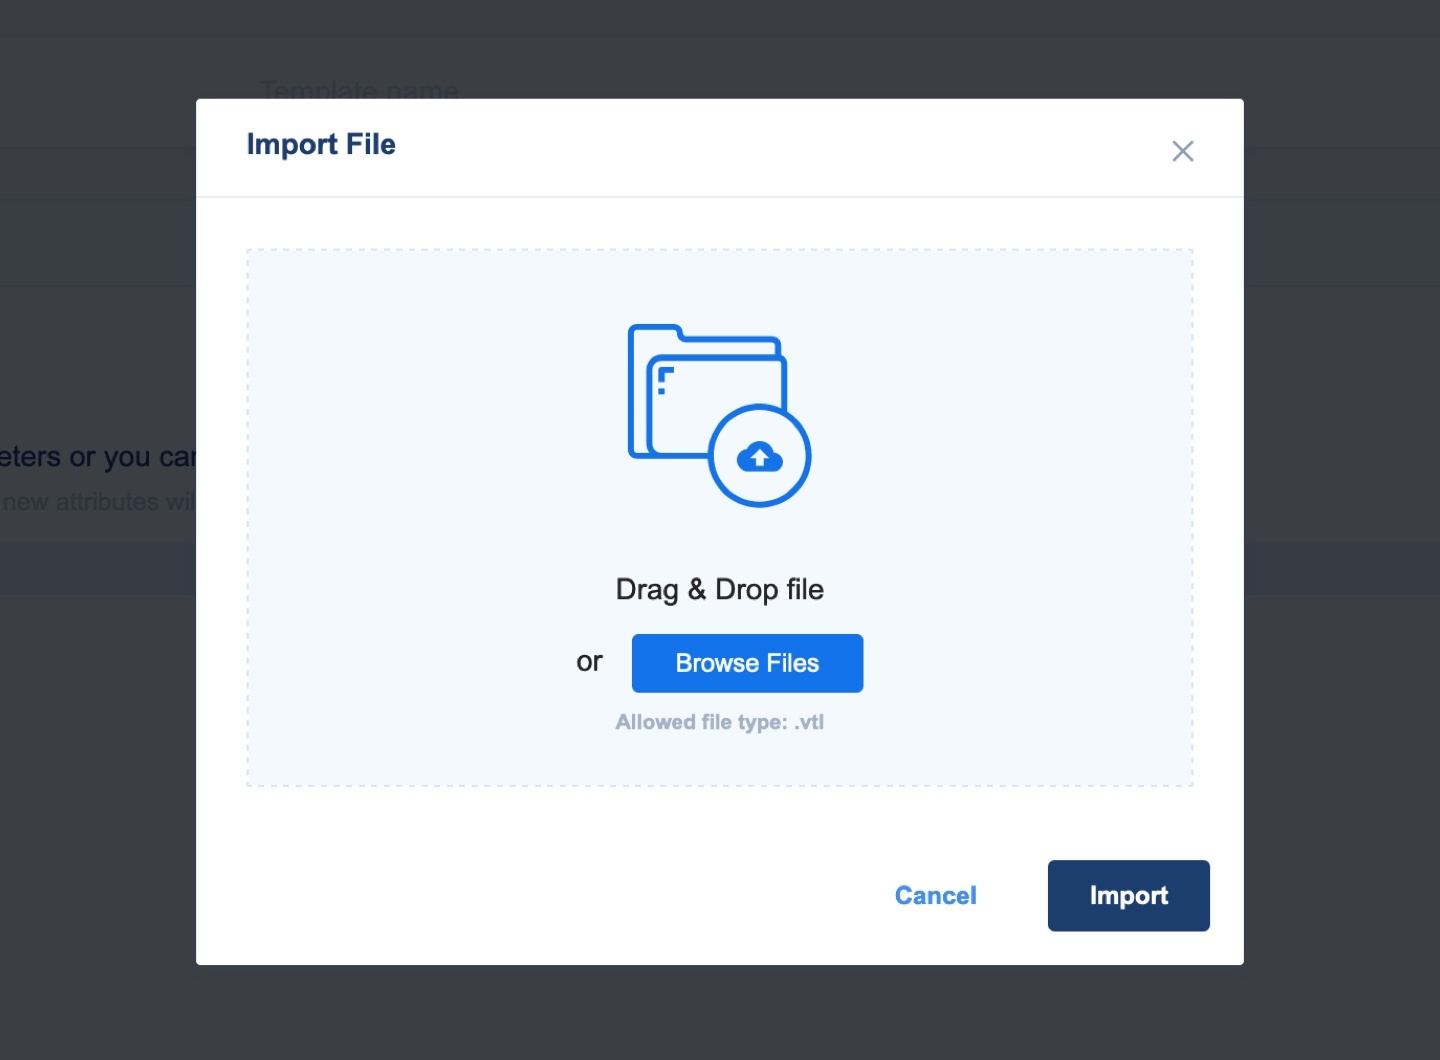
Import Template Attributes/Parameters: You can add attributes by Import attribute list file or by
Insert Template Attributes/Parameters Manually: You can insert Attributes manually in the code editor. Code editor validates attributes according to the pre-selected template type
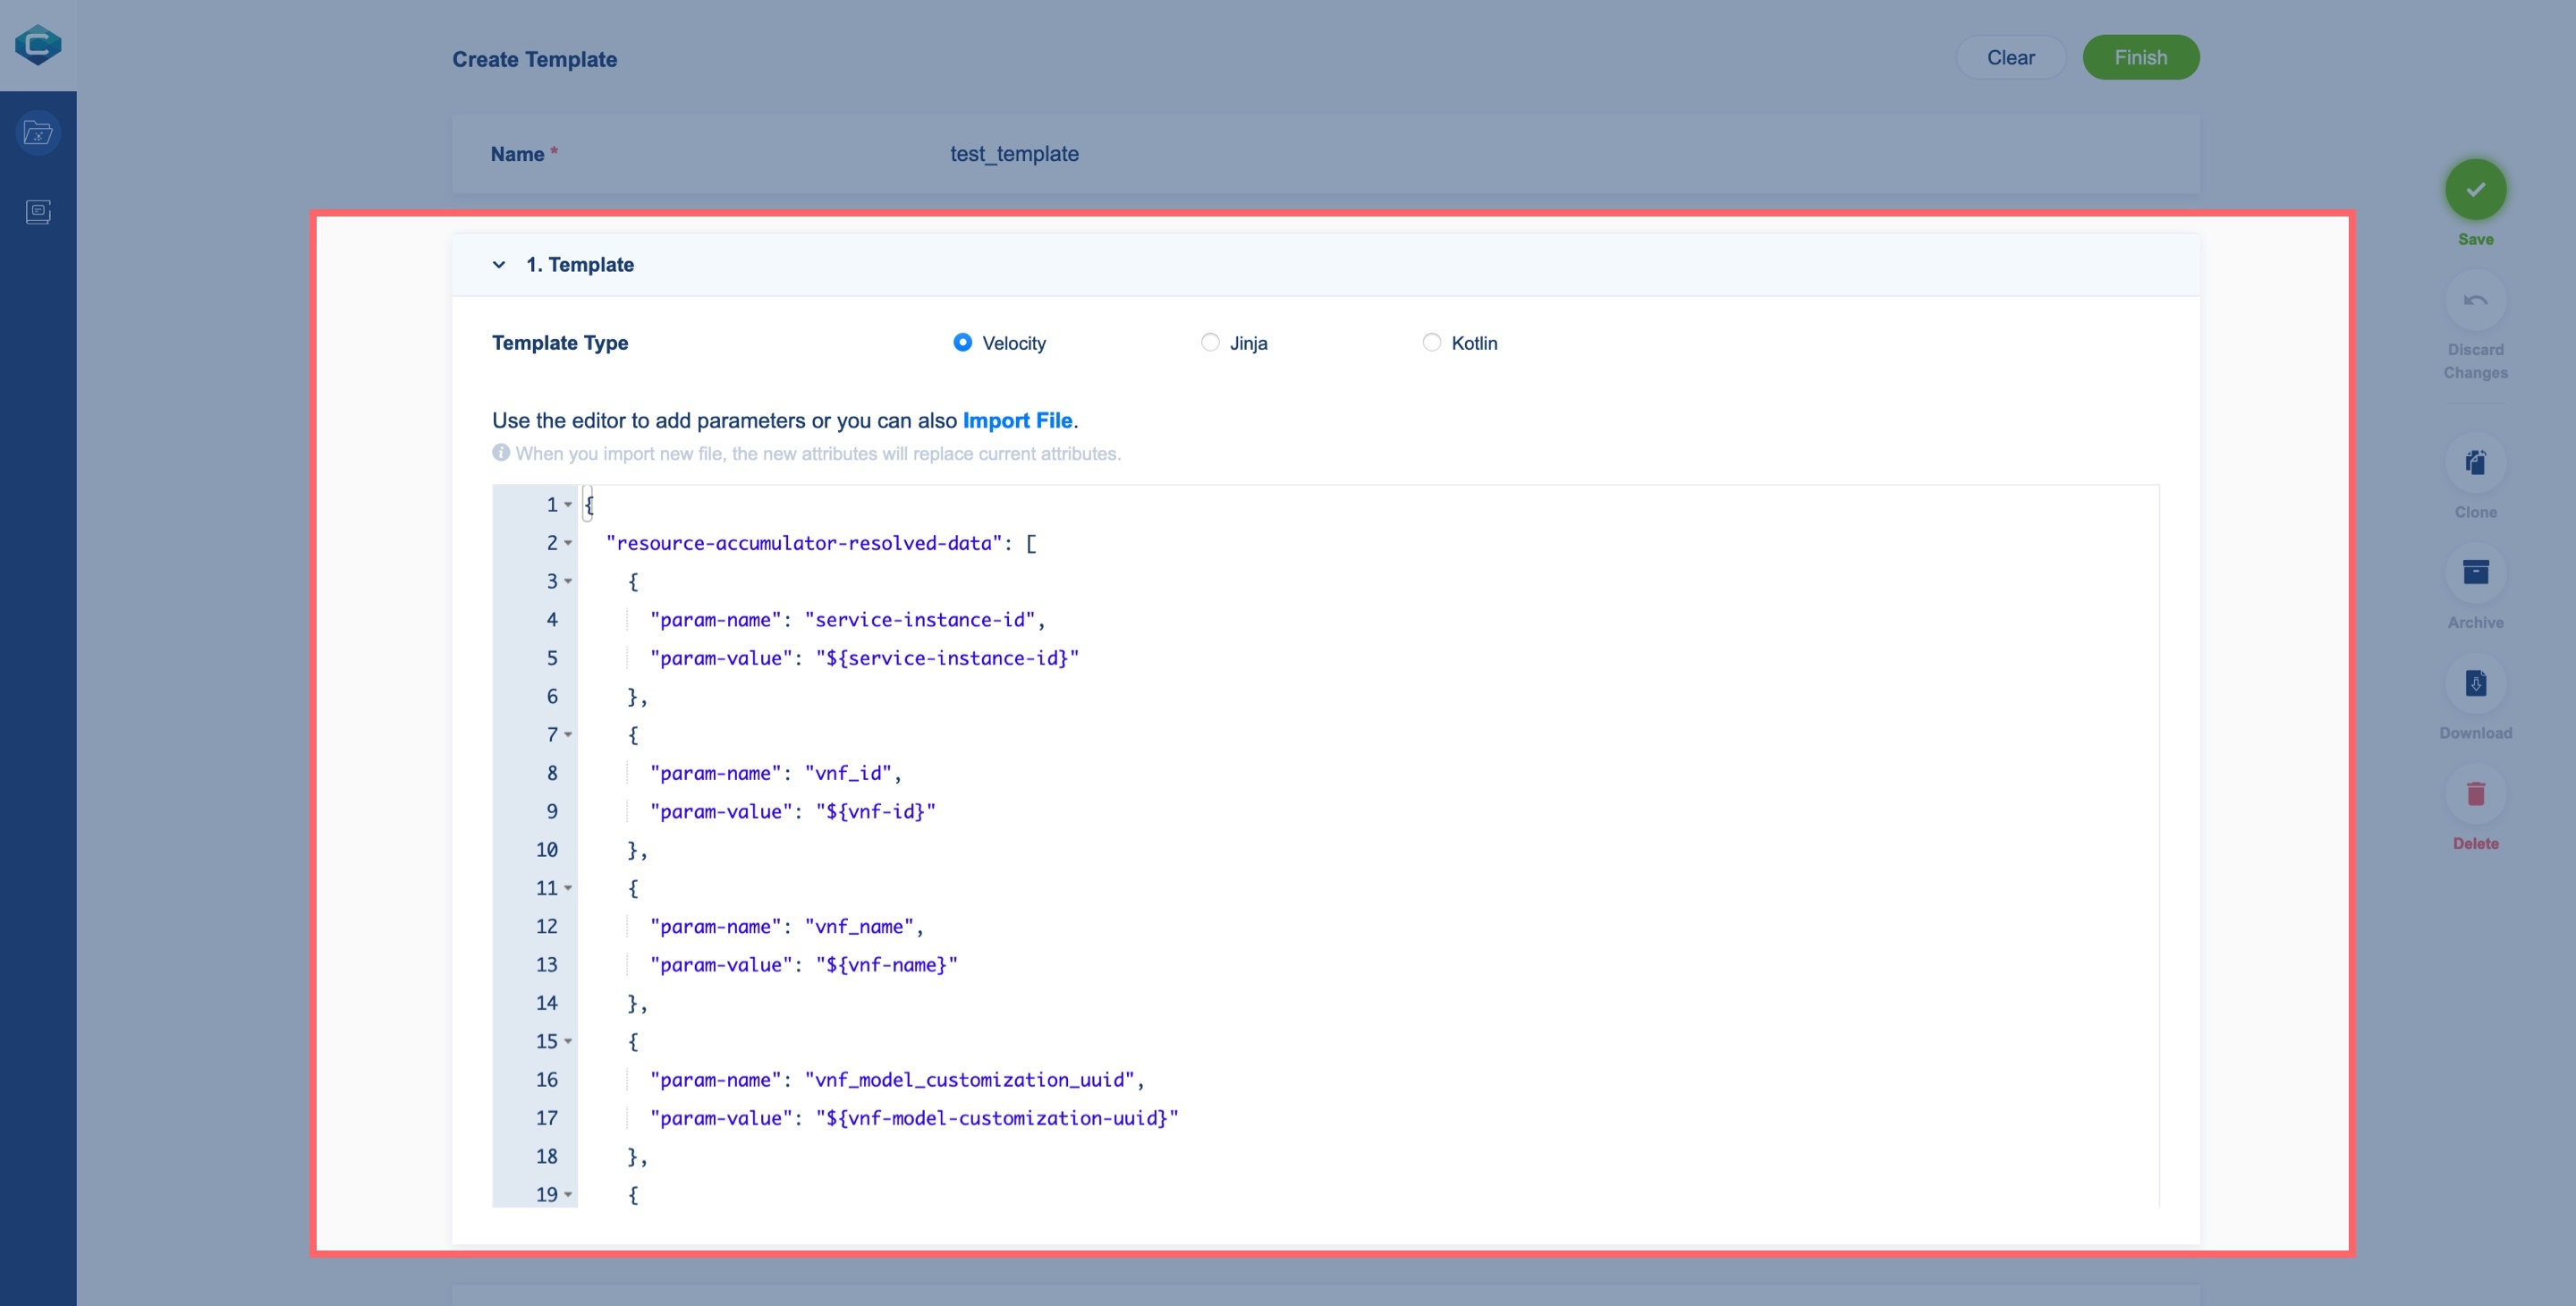
Import Template Attributes
After import attributes, you can add/edit/delete attributes in the code editor.
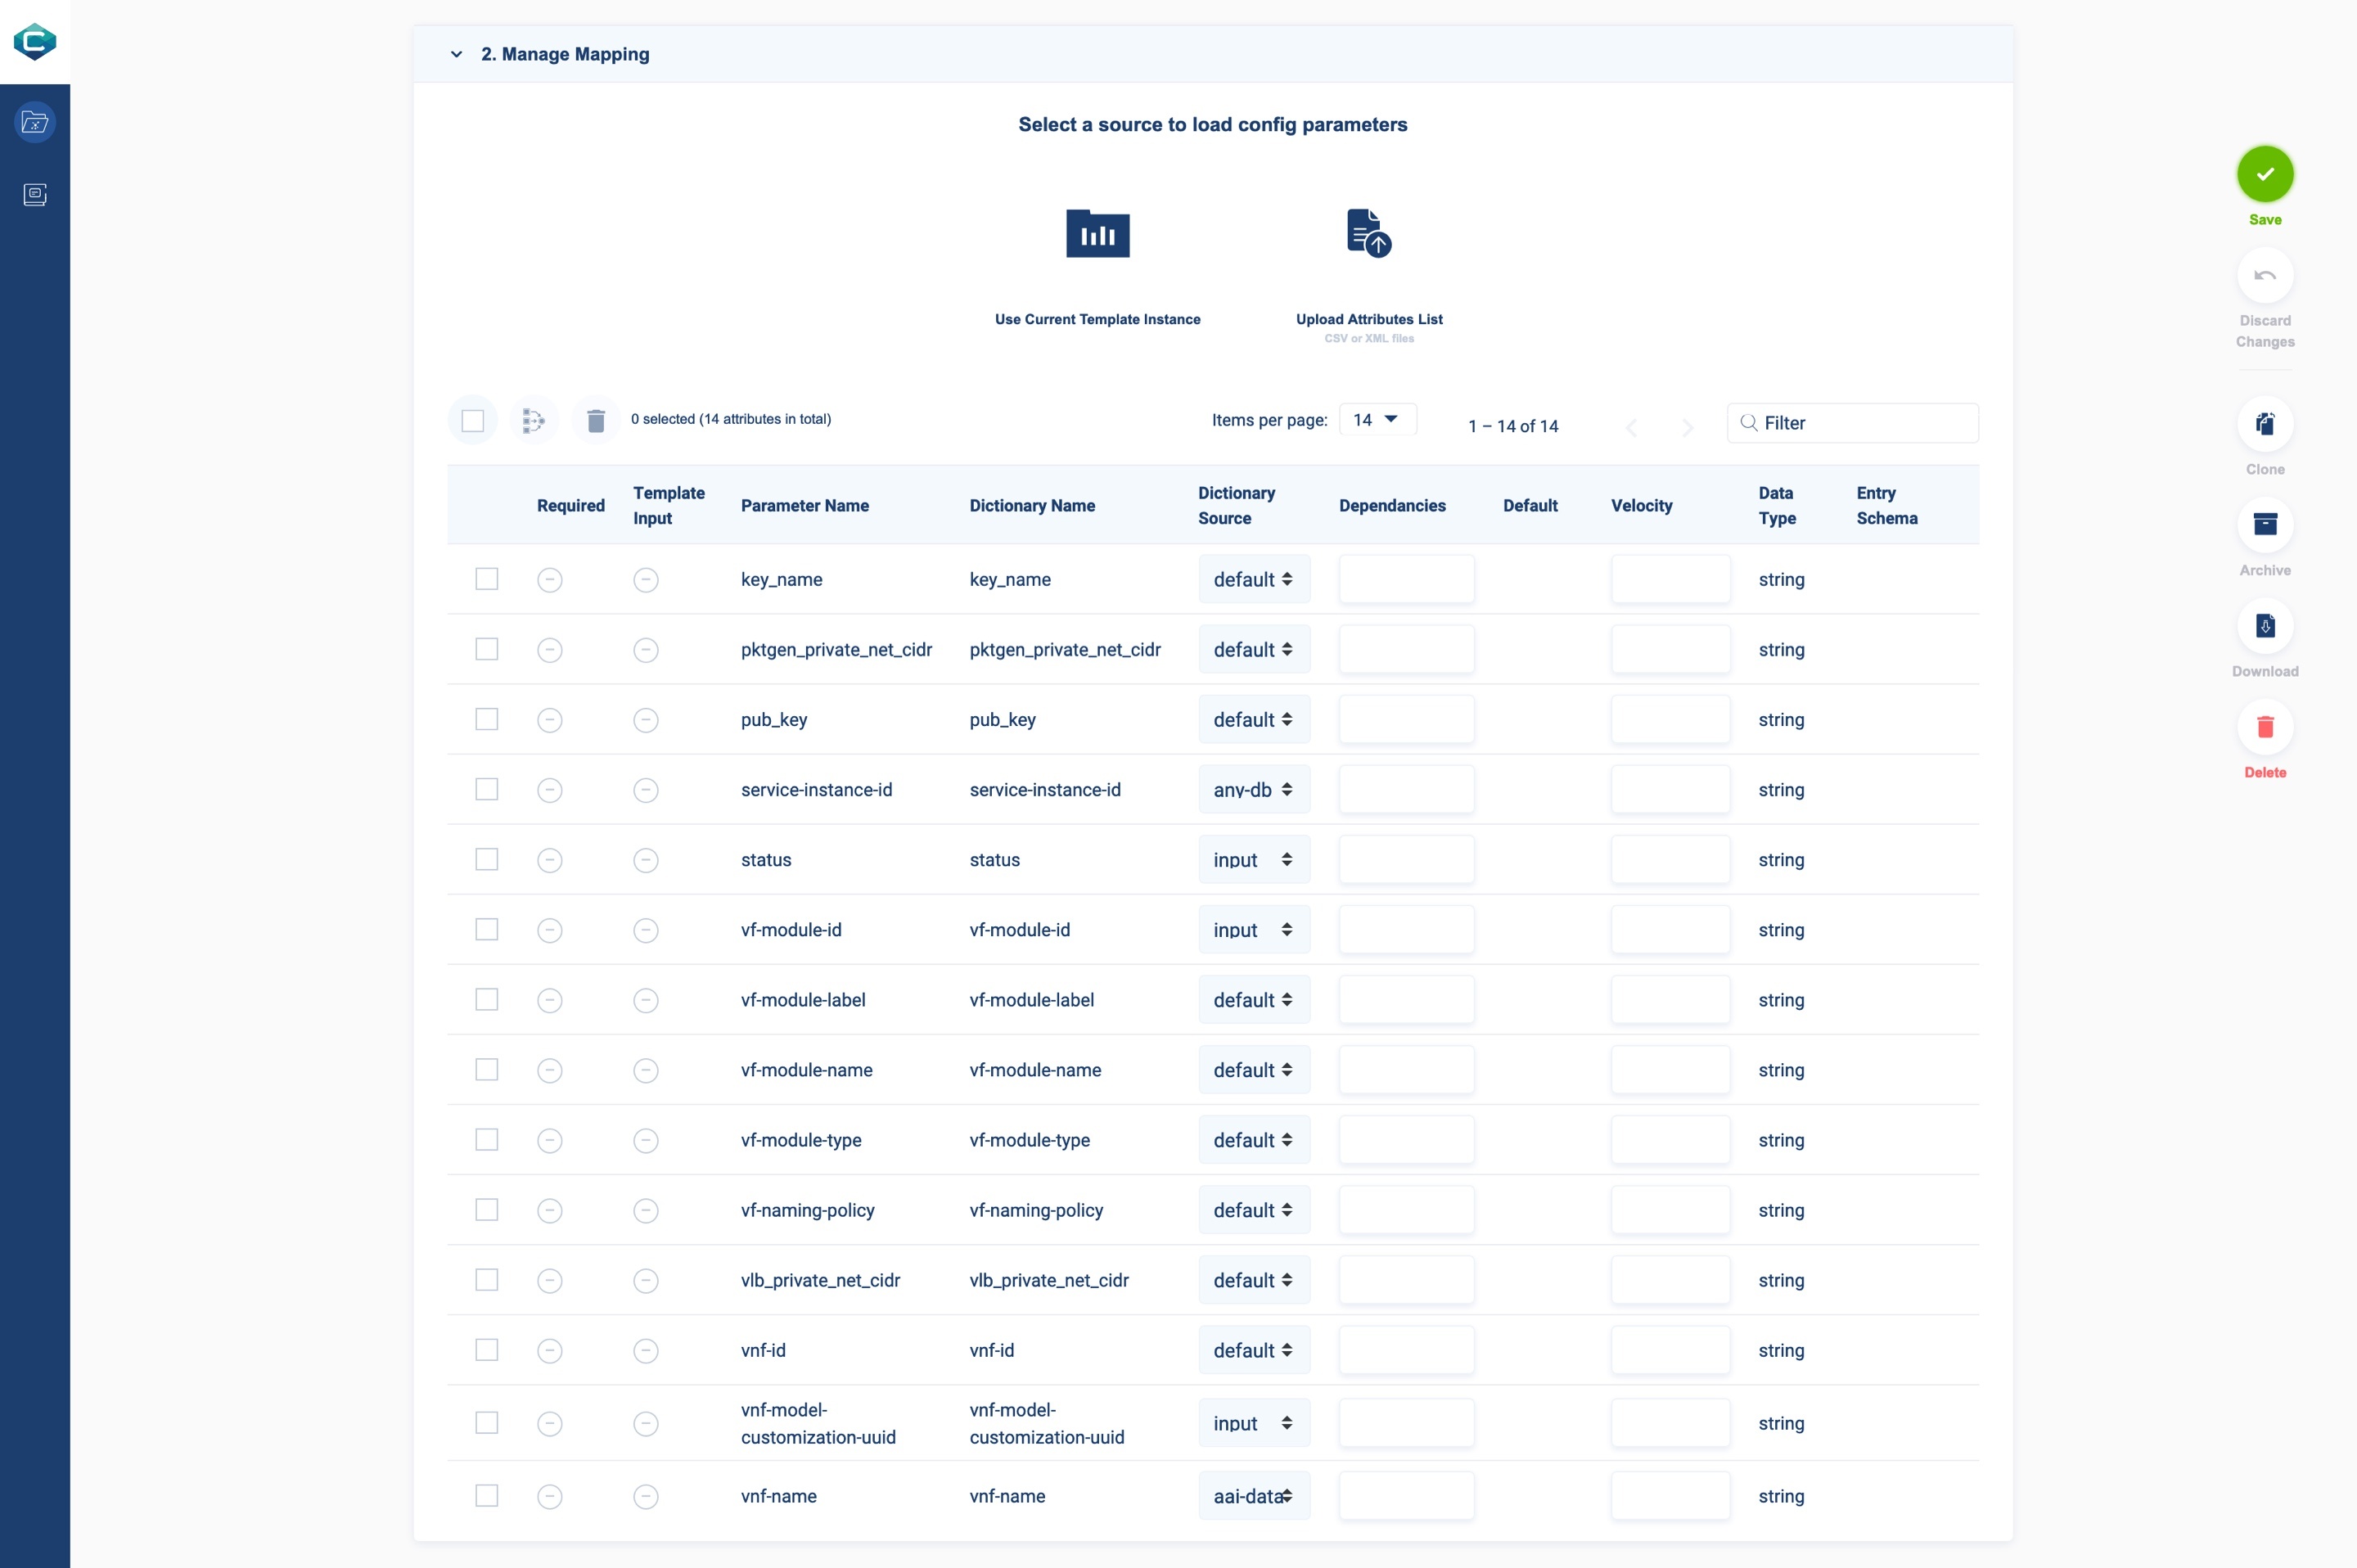
Manage Mapping Section
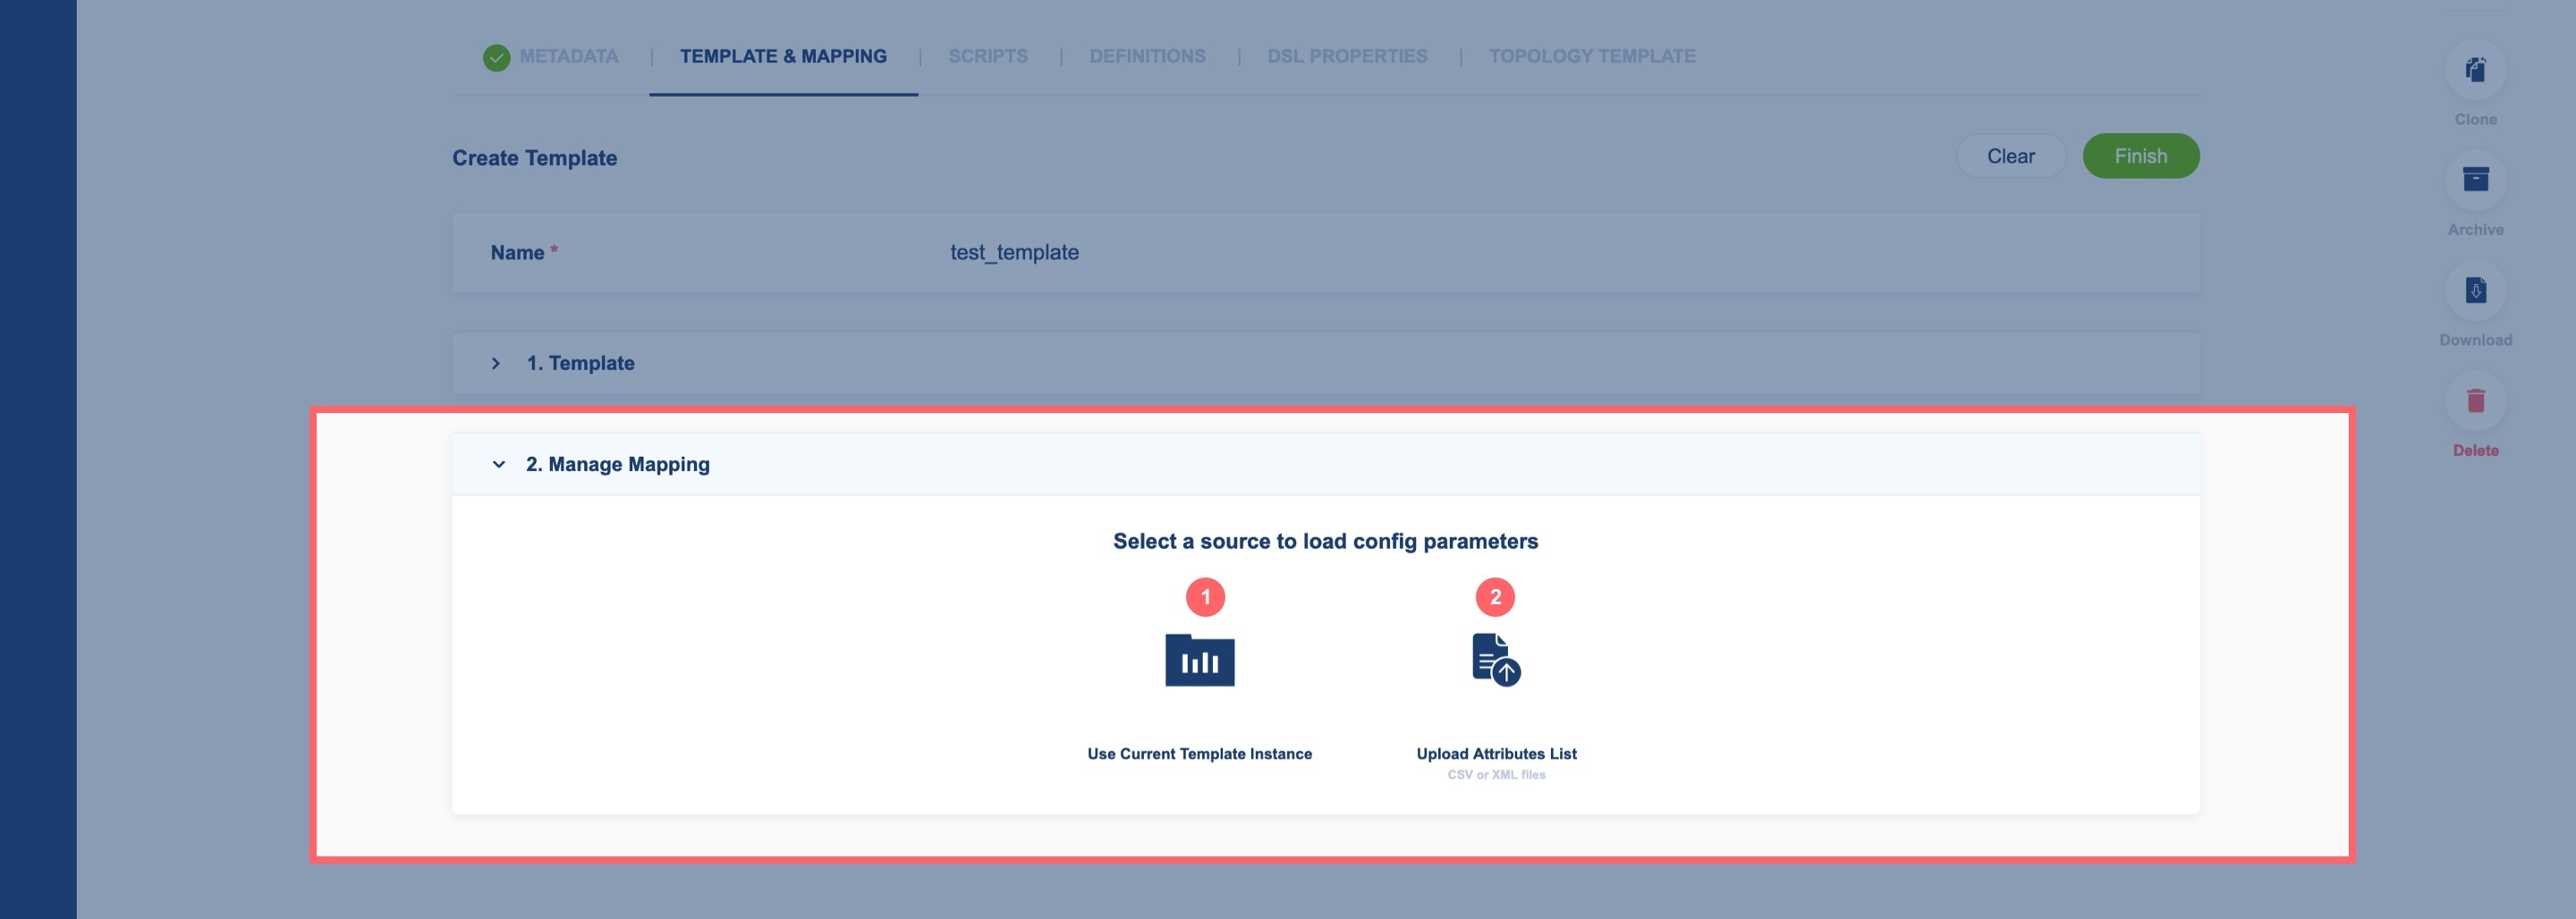
Use current Template Instance: You can use attributes from the Template section
Upload Attributes List: In case you don’t have existing attributes in Template section or have different attributes, you can upload the attributes list
Once you select the source of attributes, you get a confirmation of success fetching.

Then the Mapped Table appears to show the Resource Dictionary reference.
When you finish the creation process, you must click on the Finish button (1) to submit the template, or you can clear all data by click on the Clear button (2).

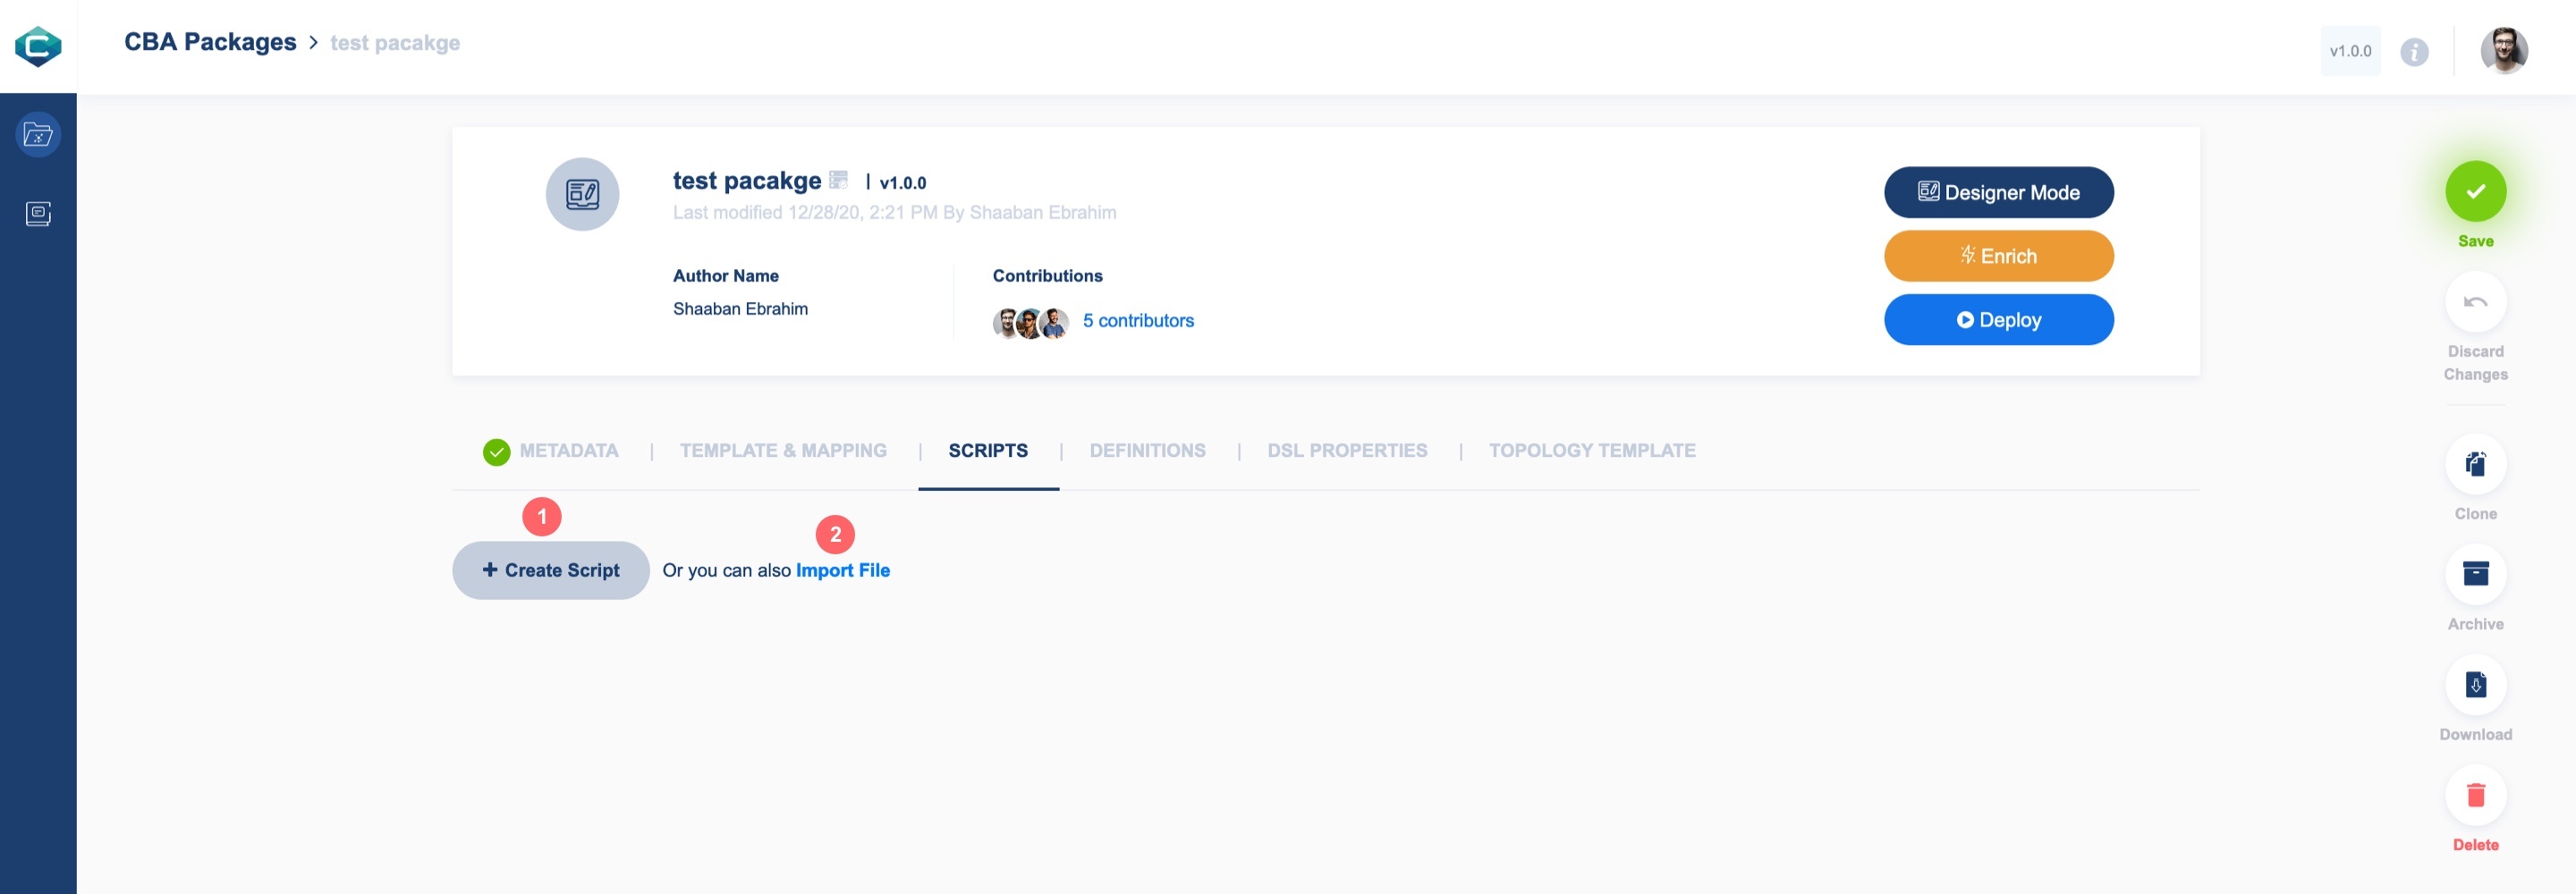
Scripts
Allowed file type: Kotlin(kt), Python(py), Jython, Ansible
To add script file/s, you have two options:
Create Script
Import File
Enter file URL: Script file can be stored in server and you can add this script file by copy and paste file URL in URL input then press ENTER key from the keyboard
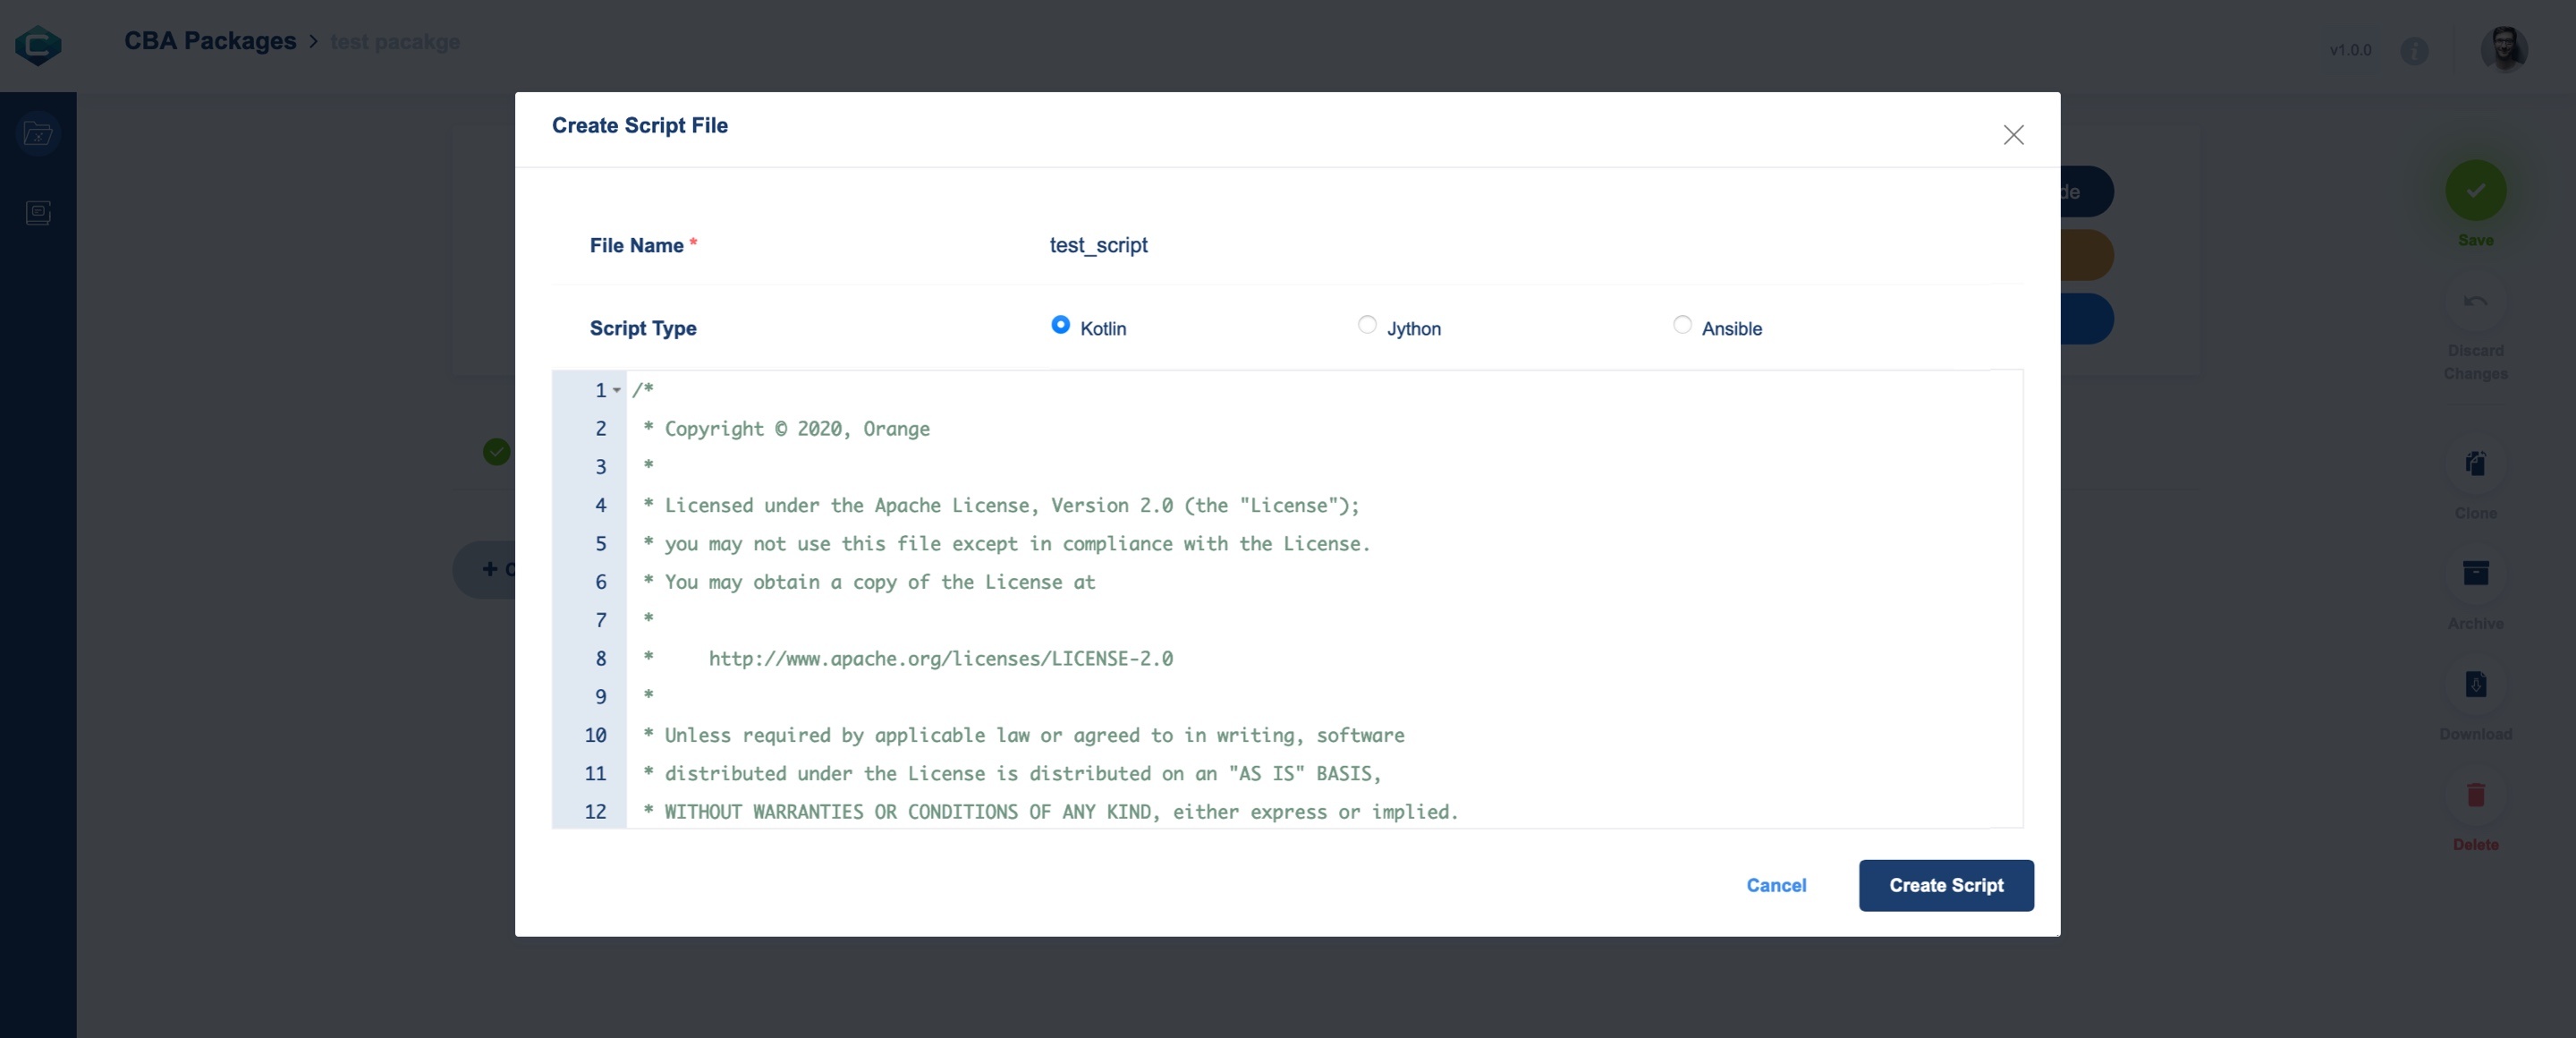
Create a Script File
File Name: Add the script file name
Script Type: Choose script type (Kotlin, Jython, Ansible)
Script Editor: Enter the script file content

After you type the script, click on the Create Script button to save it
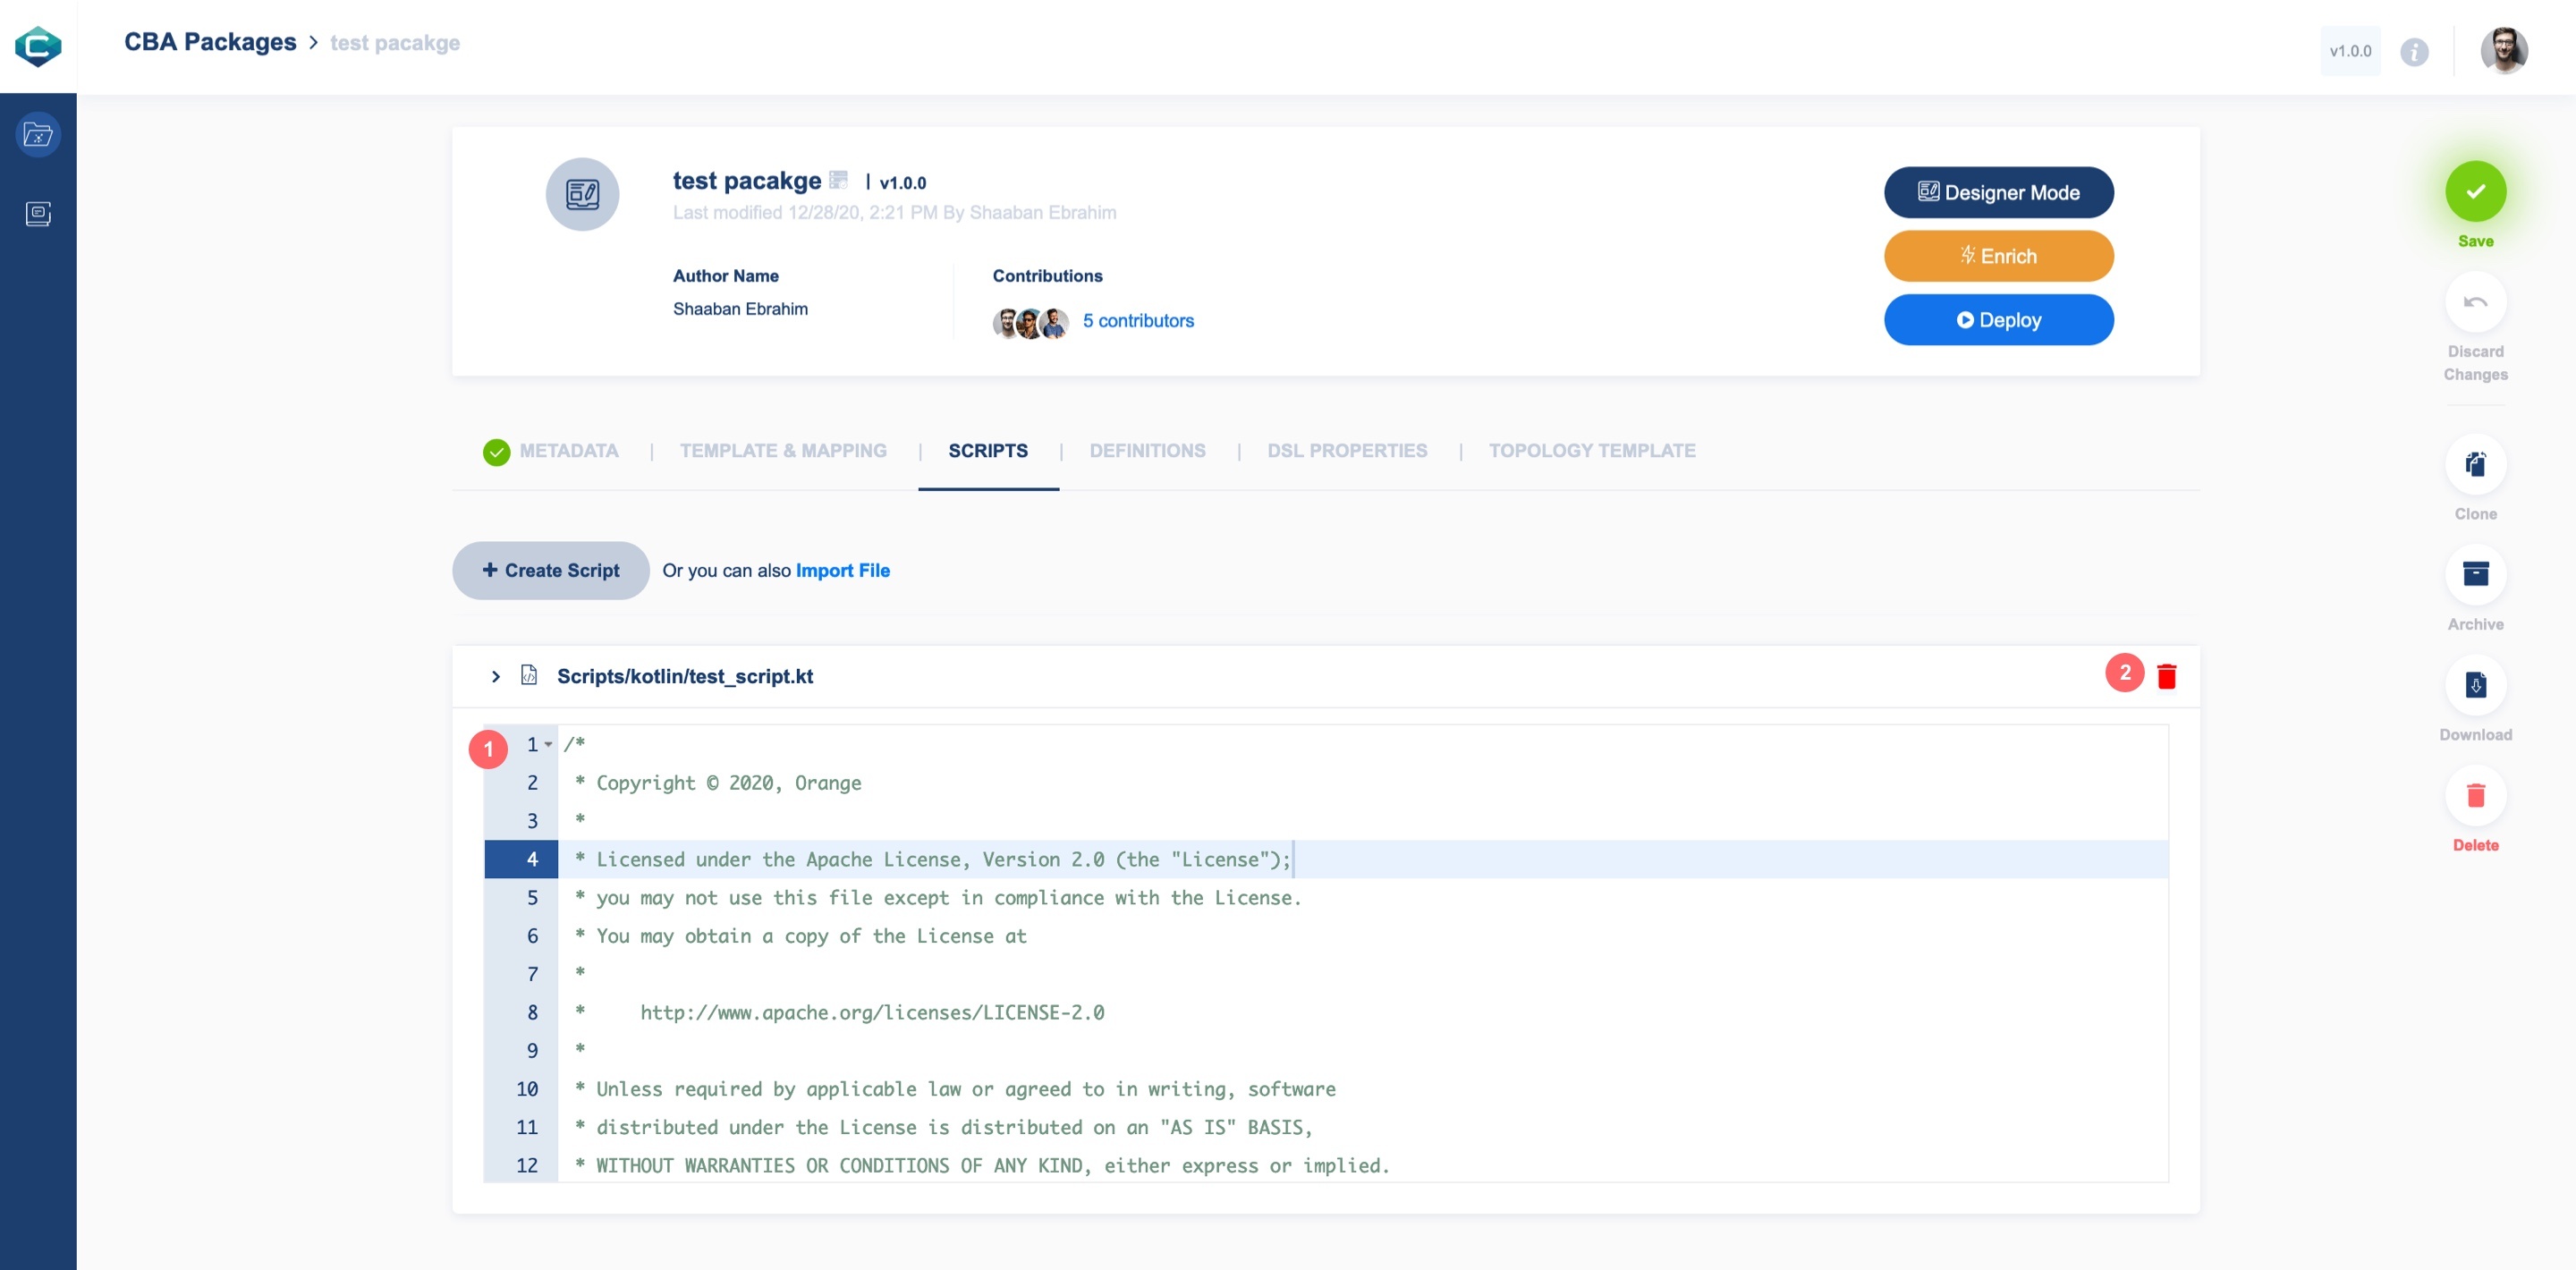
By adding script file/s, you can: 1. Edit file: You can edit each script file from the code editor 2. Delete file
Definitions
To define a data type that represents the schema of a specific type of data, you have to enrich the package to automatically generate all definition files:
Enrich Package: from the package details box, click on the Enrich button
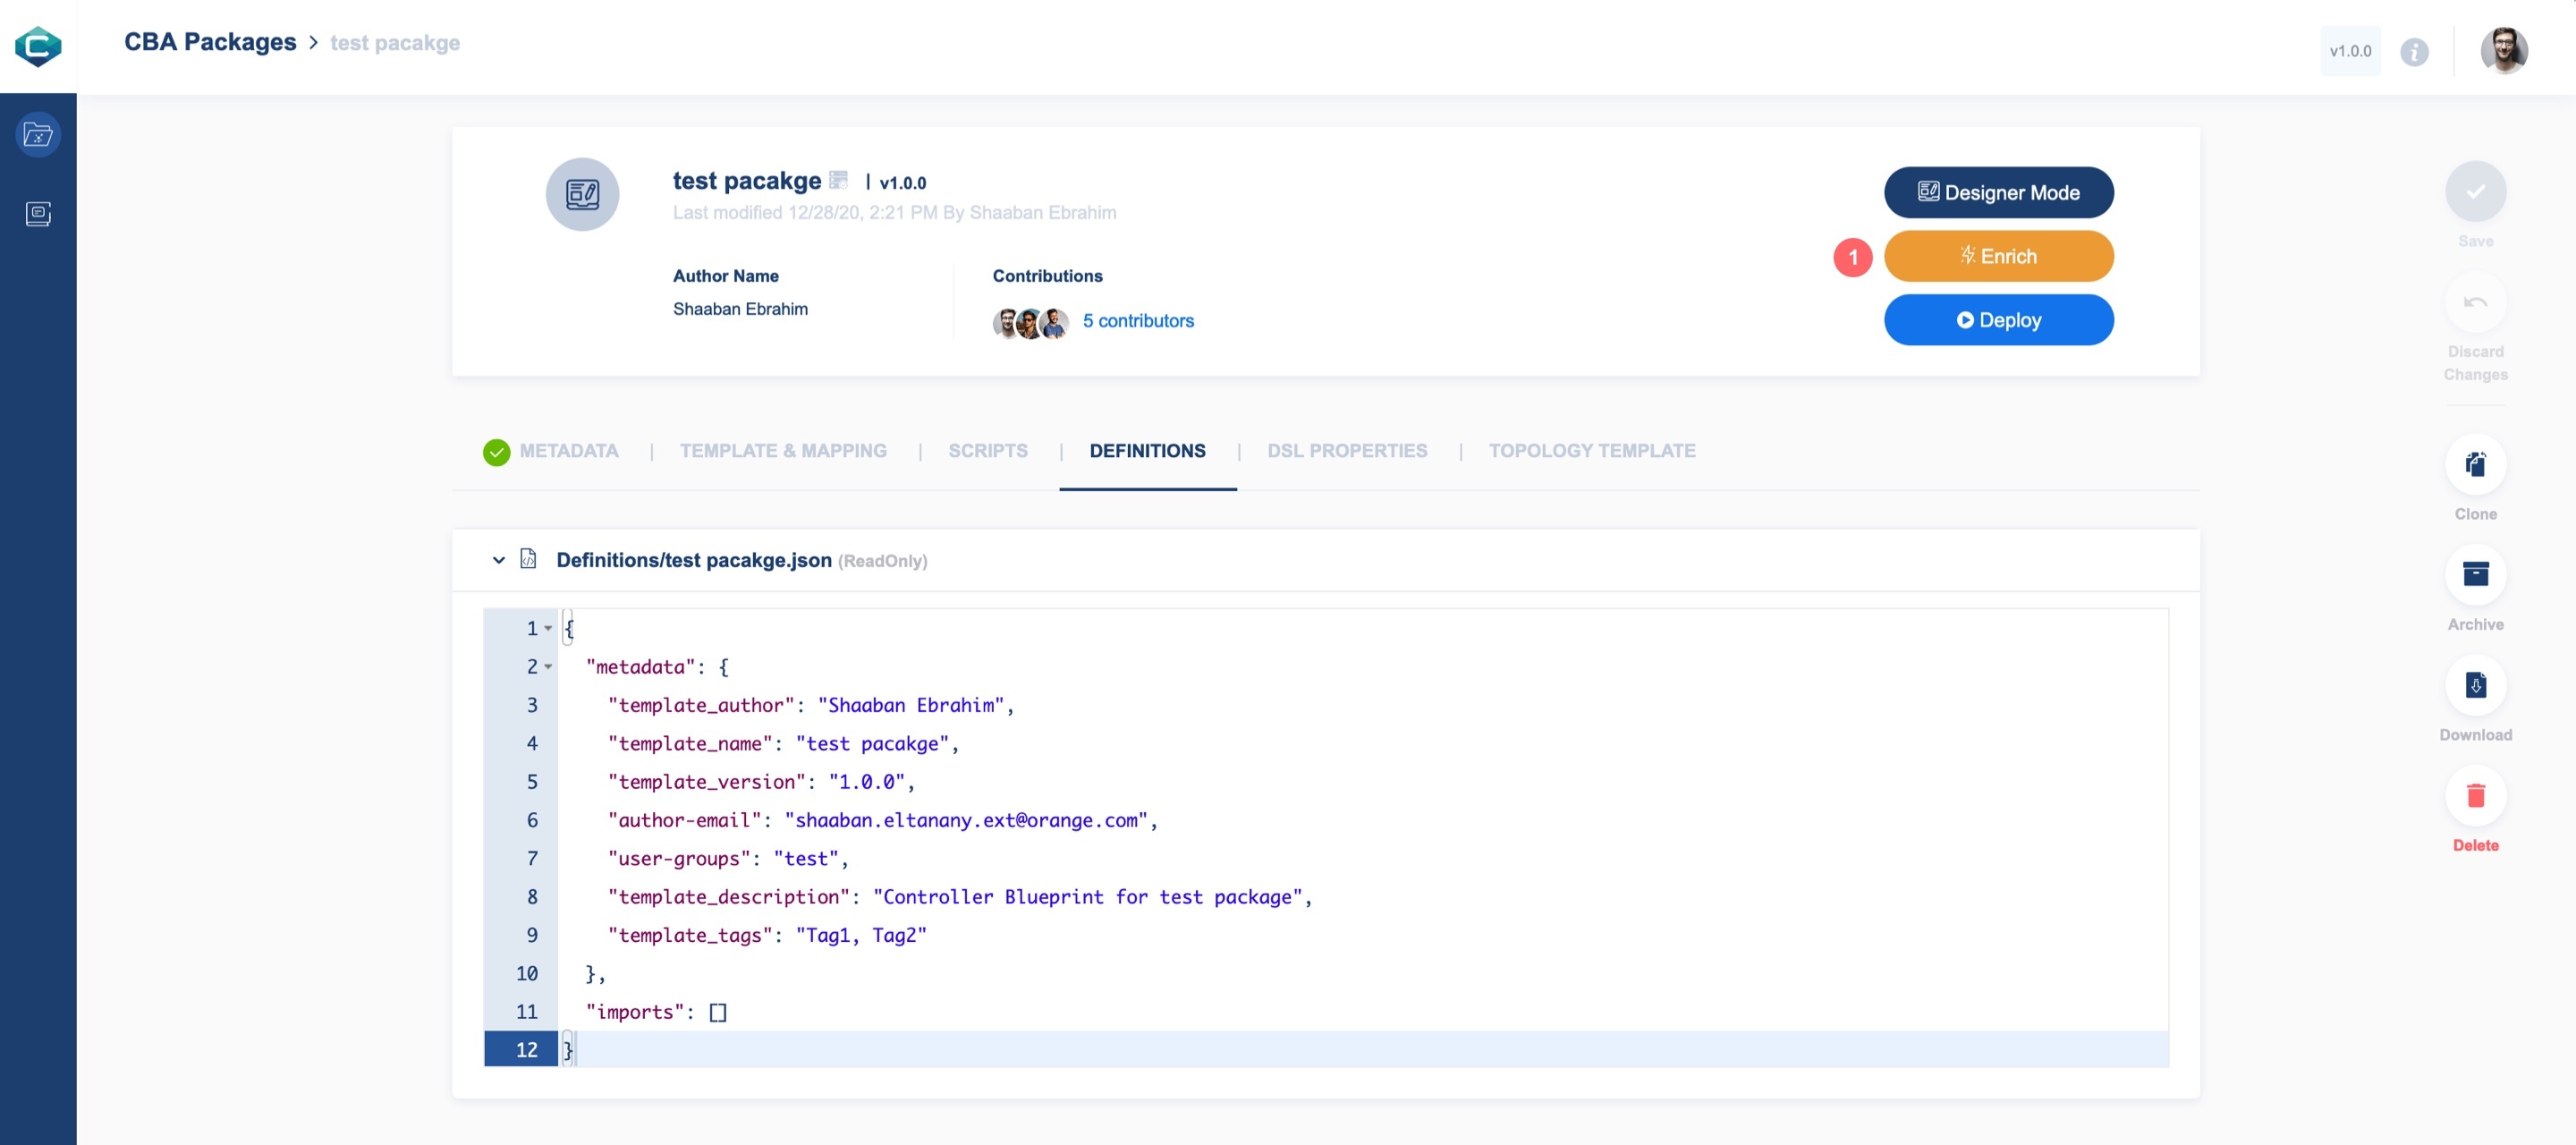
Once you successfully enrich the package, all definition files will be listed.
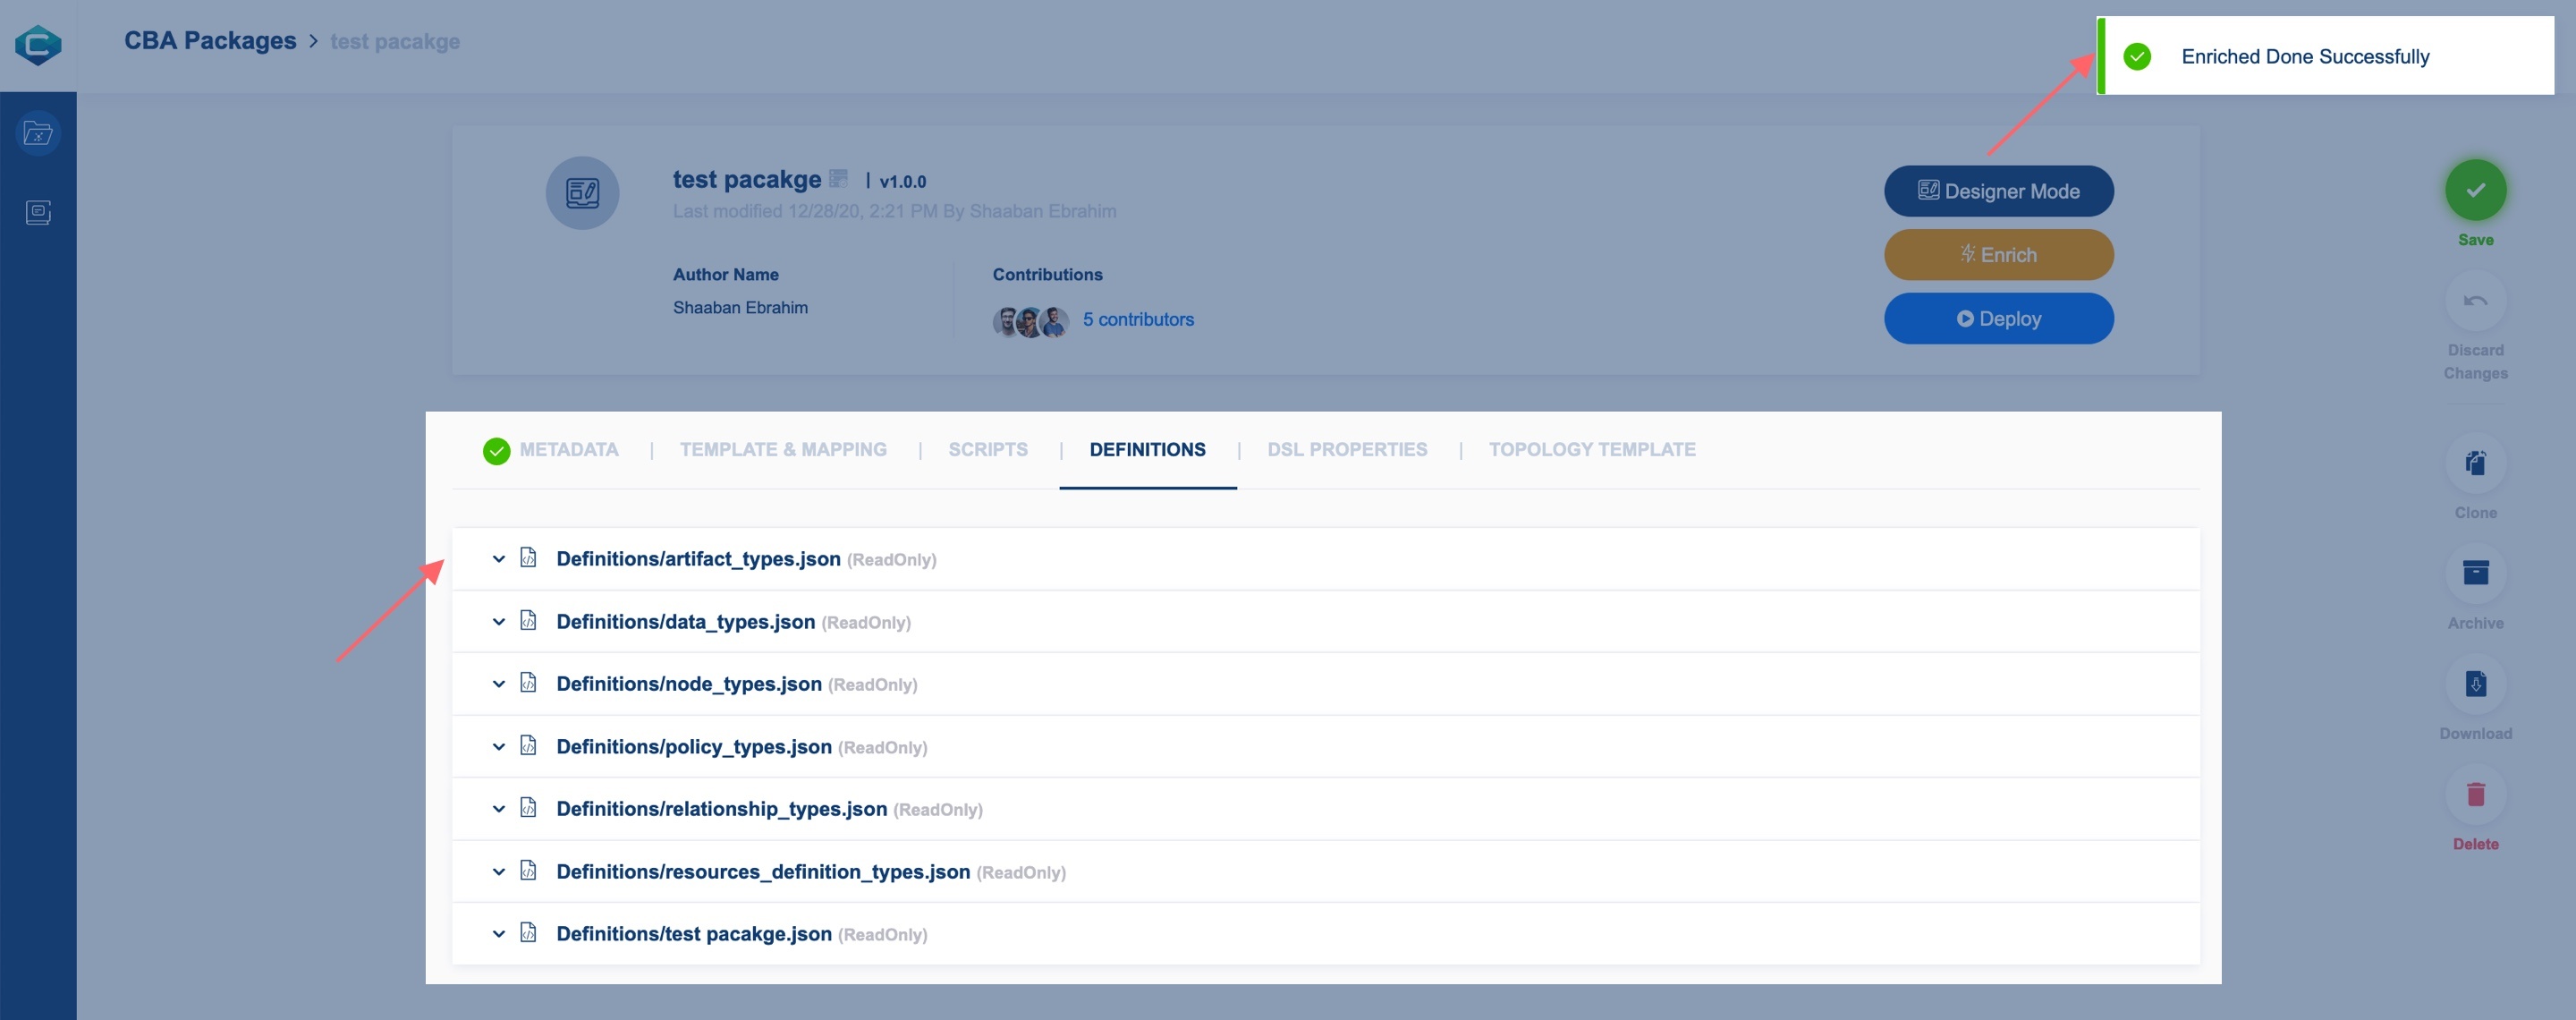
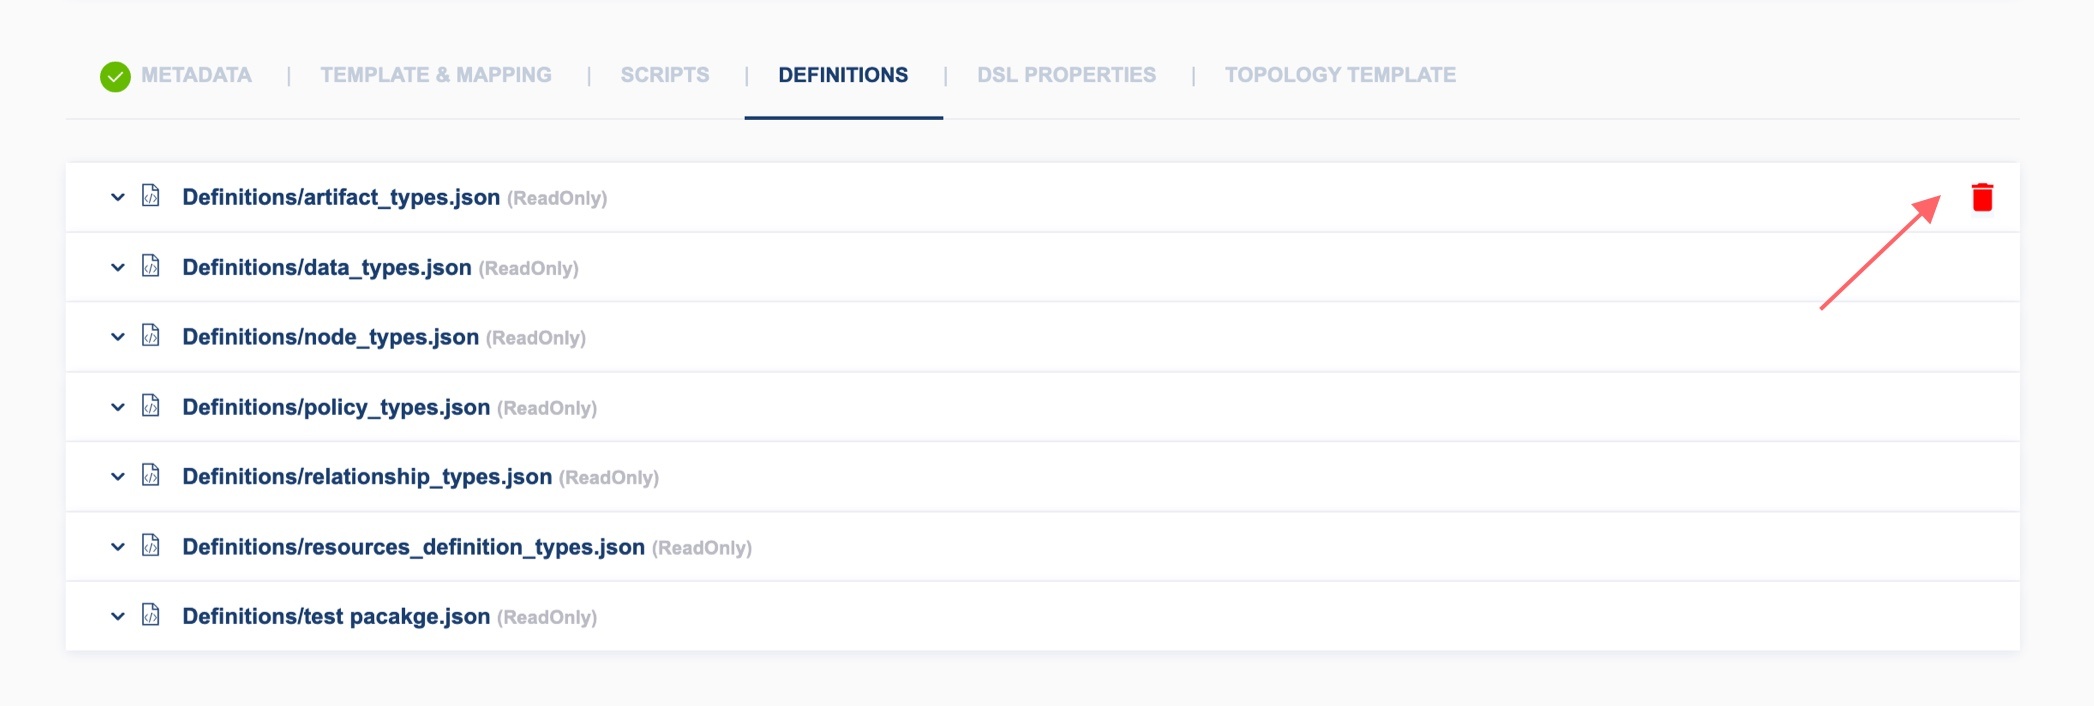
By definition file/s, you can Delete file
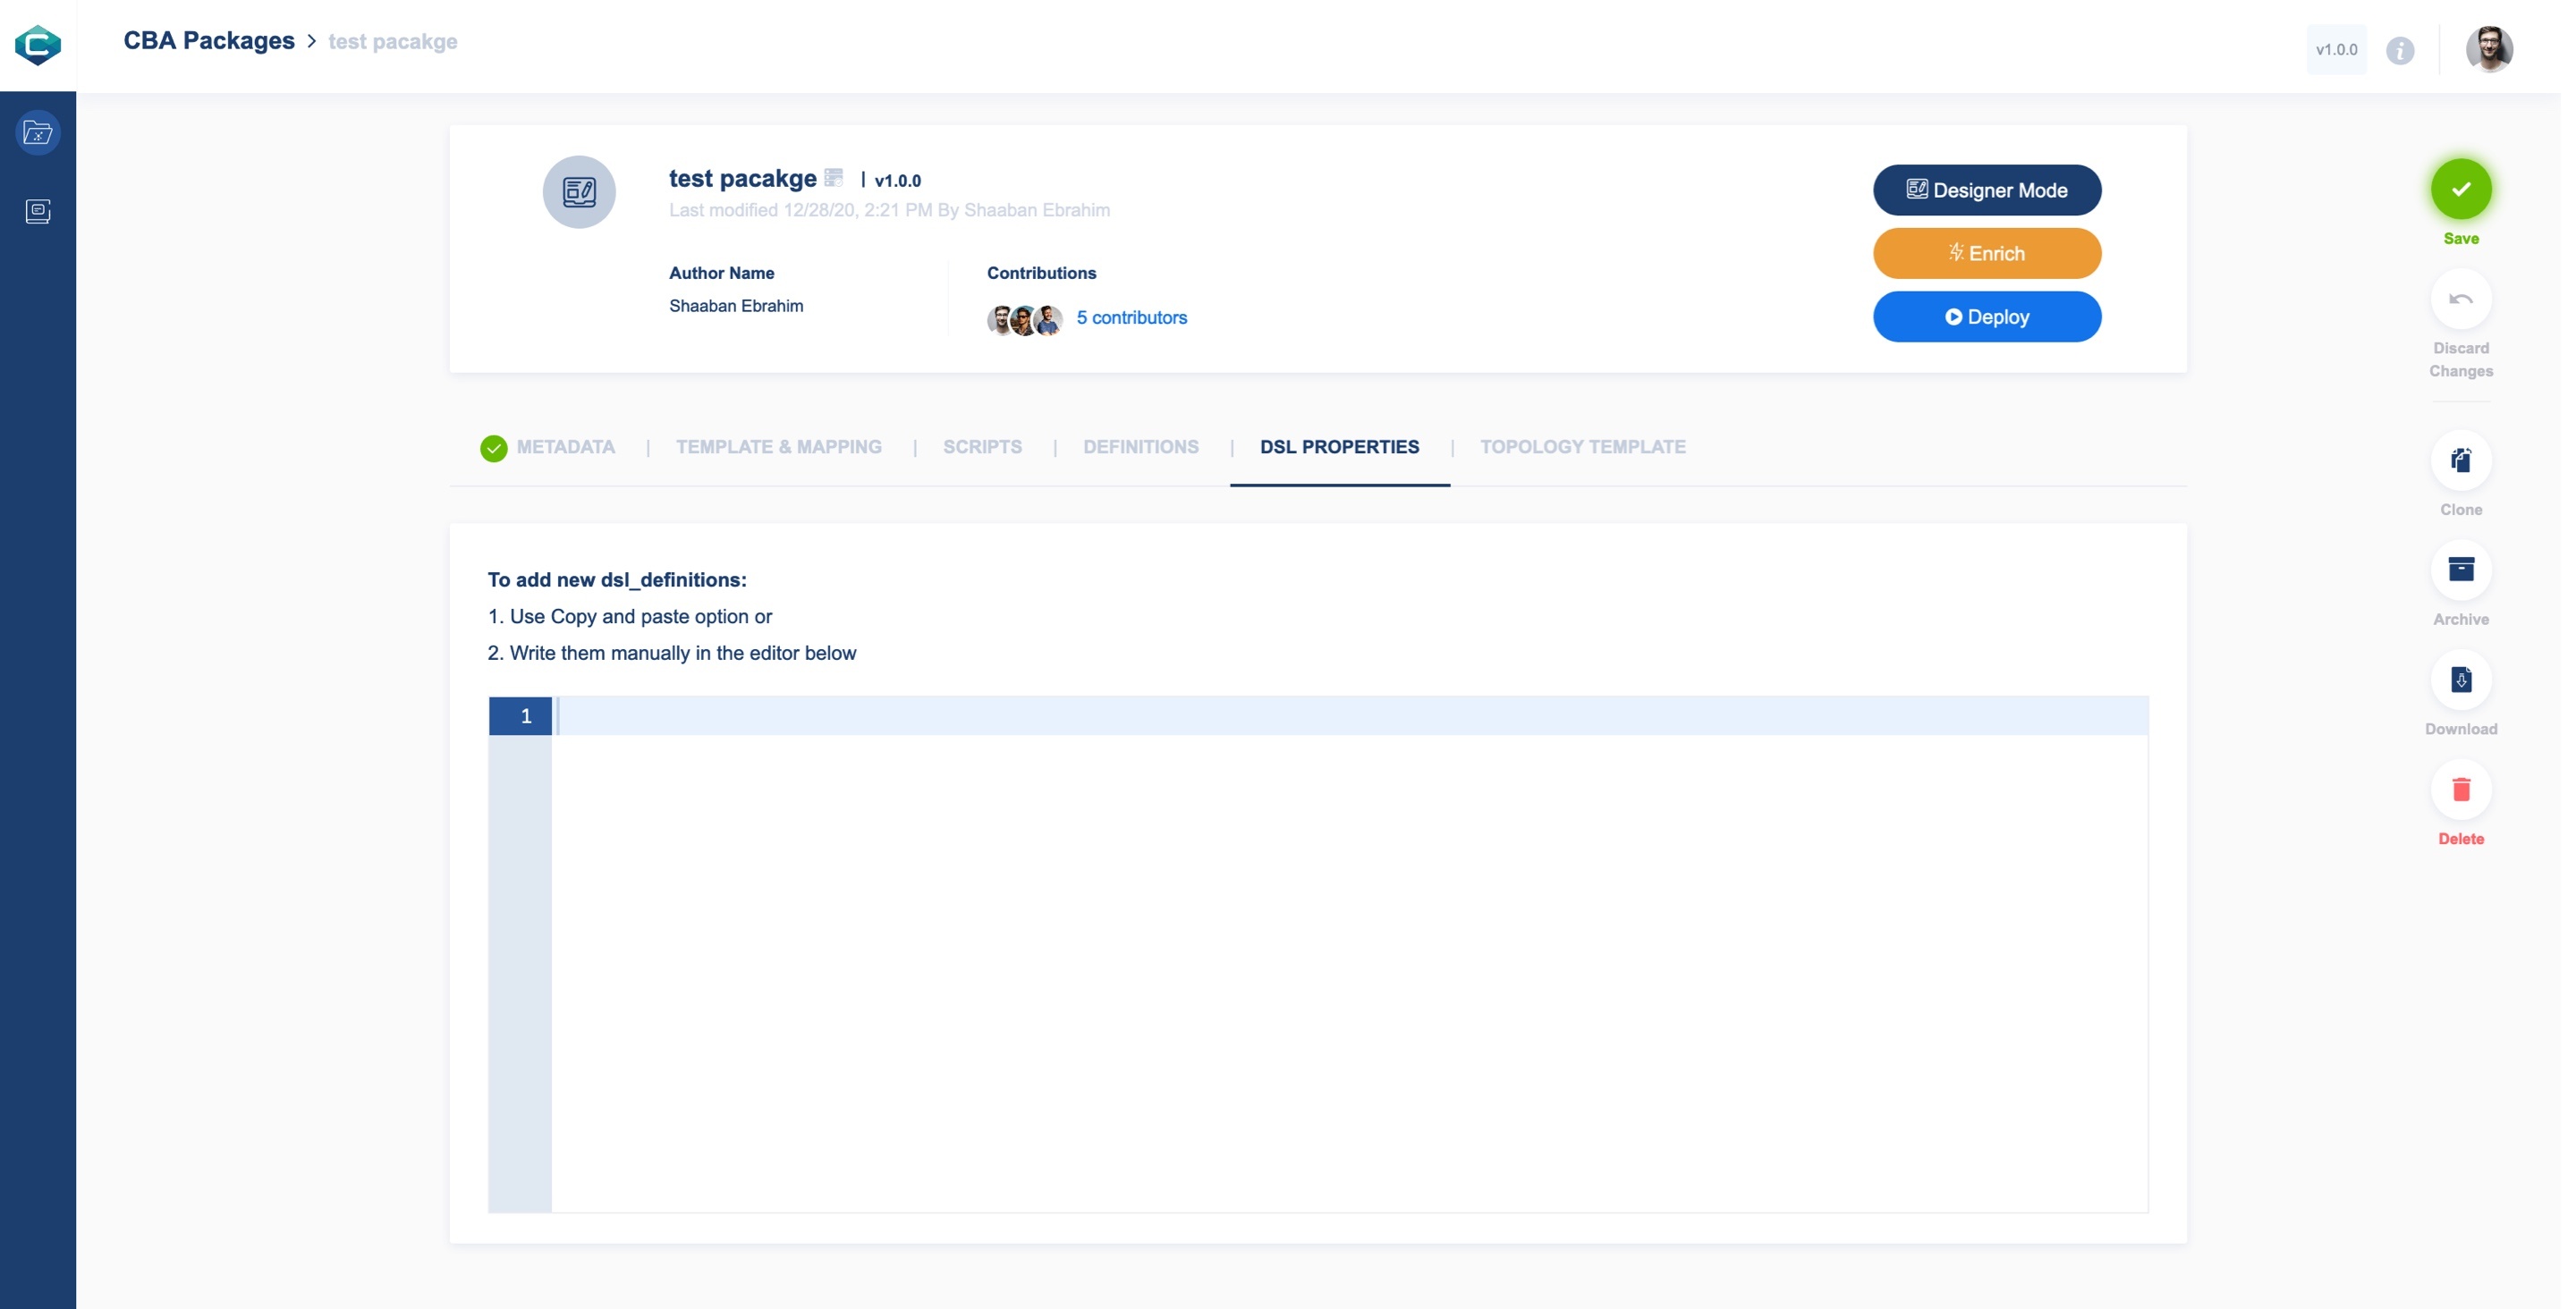
External System Authentication Properties
In order to populate the system information within the package, you have to provide dsl_definitions
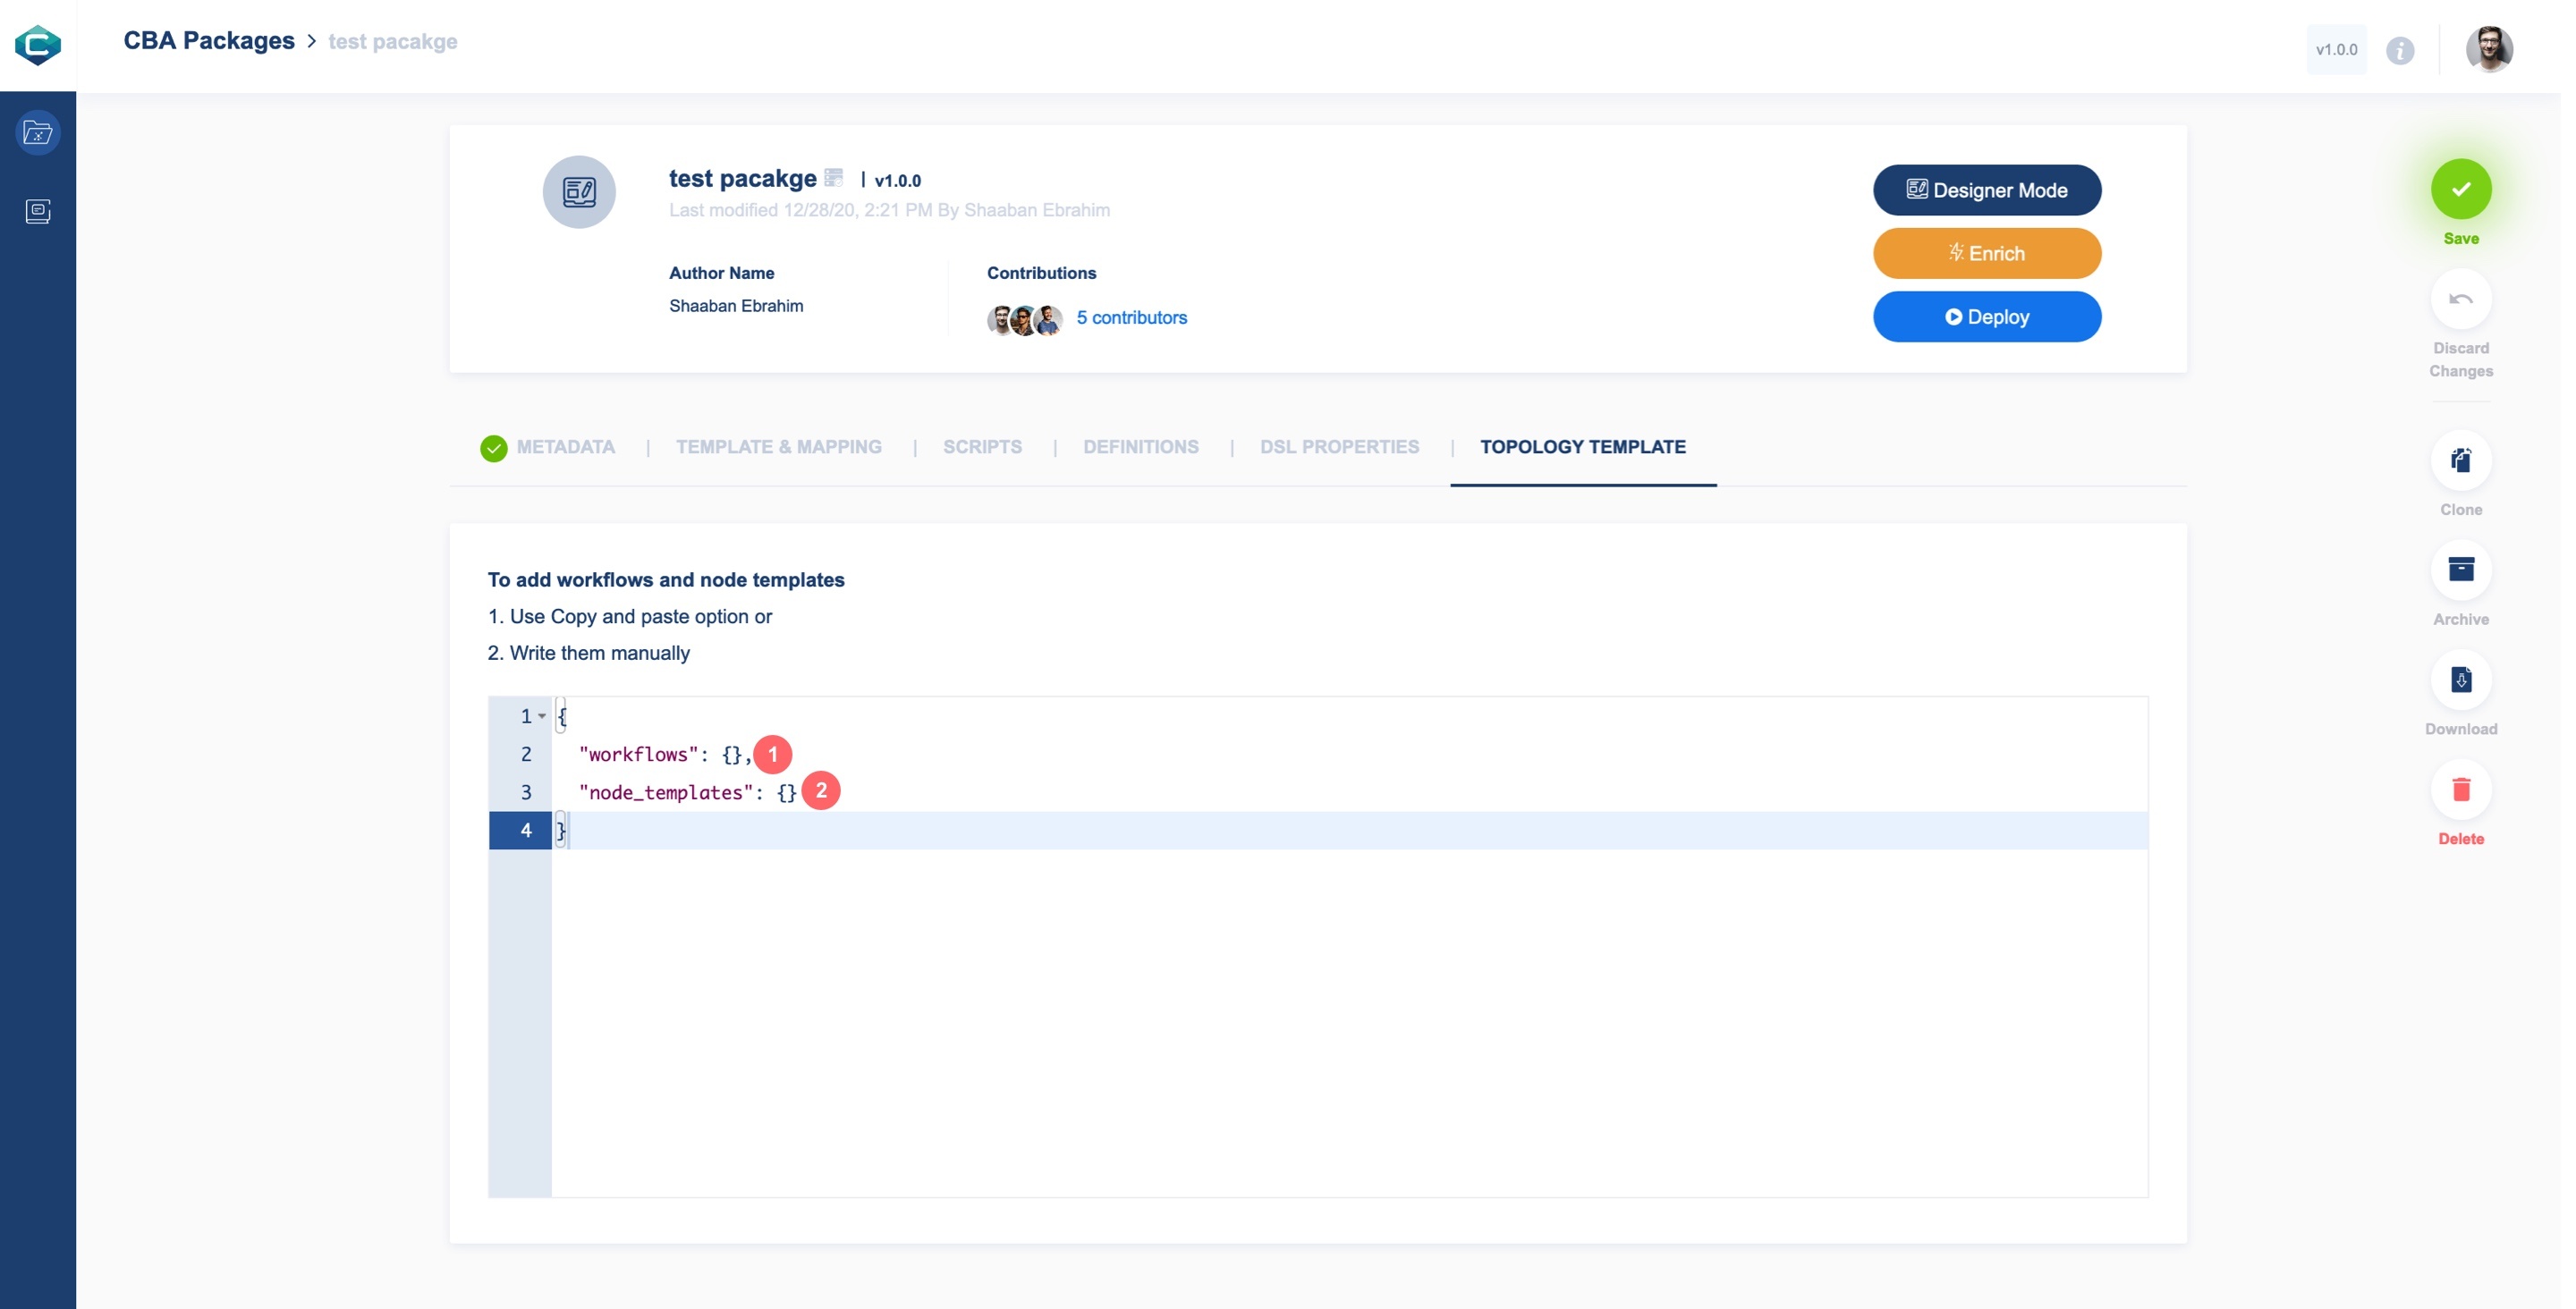
Topology Template
Here you can manually add your package:
Workflow that define an overall action to be taken on the service
Node/Component template that is used to represent a functionality along with its contracts, such as inputs, outputs, and attributes